
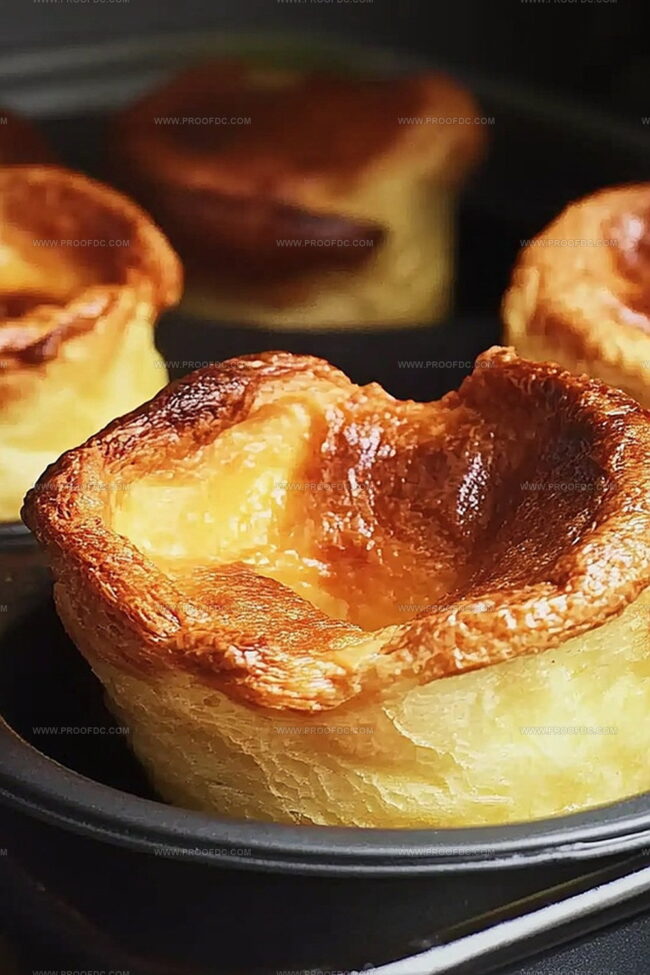
The Most Fluffy Yorkshire Pudding Recipe Ever Made
Crispy, golden Yorkshire pudding has been my weekend comfort since childhood memories first sparked my culinary passion.
Memories of grandma’s kitchen always remind me how simple ingredients can create magical moments.
Some dishes carry deep emotional connections beyond mere sustenance.
Perfectly puffy and light, this traditional British classic demands respect for technique and timing.
Precise oven temperature becomes your secret weapon when crafting these delectable companions to roasted meats.
Professional chefs and home cooks alike understand the delicate balance required for achieving those magnificent risen edges.
Mastering this recipe will transform your Sunday roast into an extraordinary dining experience you’ll proudly serve.
Why Yorkshire Pudding Recipe Feels Fancy But Easy
Ingredients For Yorkshire Pudding Recipe
Main Ingredients:
Flour Base:Liquid and Binding Ingredients:Fat and Cooking Components:Steps To Make Yorkshire Pudding Recipe Rise Well
Step 1: Whip Up The Batter
Create a silky-smooth mixture by combining flour and salt in a spacious bowl. Crack open eggs into the center, forming a little well. Slowly pour milk, whisking continuously until the batter transforms into a velvety, lump-free texture. Let the batter relax at room temperature for half an hour, allowing it to develop perfect rising potential.
Step 2: Fire Up The Oven
Crank your oven to a blazing 425F (220C). Grab a muffin tin or specialized Yorkshire pudding pan and slide it into the hot oven. Prepare your fat selection:Distribute a small splash of chosen fat into each cup. Return the pan to the oven, letting the fat heat until it’s shimmering and ready for action.
Step 3: Create Puffy Perfection
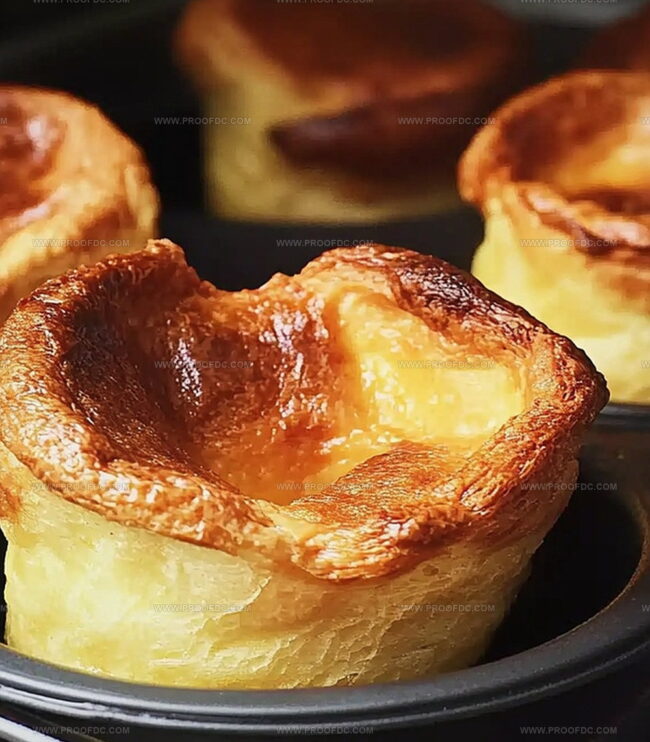
Carefully extract the scorching hot pan from the oven. Gently cascade the batter into each cup, filling them halfway. Slide the pan back into the oven and let magic happen. Bake for 20-25 minutes until the puddings rise majestically and turn a gorgeous golden brown. Keep that oven door sealed tight – no peeking allowed!
Step 4: Serve With Flair
Rush these cloudlike beauties straight from the oven to the table. They’re absolute champions when paired with a classic roast dinner and a generous waterfall of gravy. Enjoy immediately for maximum deliciousness!
Tips For Fluffy Yorkshire Pudding Recipe
How To Store And Reheat Yorkshire Pudding Recipe
What To Serve With Yorkshire Pudding Recipe
Different Takes On Yorkshire Pudding Recipe
Yorkshire Pudding Recipe FAQs
The key is high heat and fat. When the batter hits the sizzling hot oil in the preheated pan, it creates instant steam, causing the dramatic puffing and rise. The high oven temperature of 425F is crucial for achieving those beautiful, puffy edges.
Despite its name, Yorkshire pudding isn’t a sweet dessert. It’s a savory side dish made from a simple batter of eggs, flour, and milk. Traditionally served with roast beef, it’s more like a crispy, airy bread that soaks up delicious meat juices and gravy.
Resting the batter allows the flour to fully absorb the liquid and the gluten to relax. This results in a smoother, lighter texture and helps the puddings rise more evenly. A 30-minute rest at room temperature makes a significant difference in the final result.
While beef drippings provide the most traditional flavor, you can absolutely use vegetable oil. The most important factor is ensuring the oil is extremely hot before adding the batter, which helps create that signature crispy exterior and fluffy interior.
Print
Cheesecake Crescent Rolls Casserole Recipe
- Total Time: 1 hour 5 minutes
- Yield: 8 1x
Description
Crescent rolls cheesecake casserole delivers a perfect blend of sweet and creamy comfort. Classic ingredients merge into a delightful dessert that will make each bite a celebration of simple, irresistible flavors you won’t want to miss.
Ingredients
Main Ingredients:
- 2 cans (8 ounces each / 226 grams each) crescent roll dough
- 2 blocks (8 ounces each / 226 grams each) cream cheese, softened
- 1 cup (200 grams) granulated sugar
Flavor Enhancers:
- 1 teaspoon vanilla extract
- 1 teaspoon ground cinnamon
Finishing Ingredients:
- ¼ cup (50 grams) granulated sugar
- ¼ cup (60 grams / 4 tablespoons) unsalted butter, melted
Instructions
- Prepare the baking vessel by coating a 9×13-inch dish with butter or cooking spray, ensuring complete coverage to prevent sticking.
- Carefully unfurl the first crescent roll tube, gently pressing the dough into the bottom of the prepared dish. Meticulously seal any visible seams to create a uniform base layer.
- Combine cream cheese, sugar, and vanilla extract in a mixing bowl. Whip the ingredients using an electric mixer until the mixture transforms into a smooth, silky consistency.
- Delicately spread the cream cheese mixture across the initial dough layer, ensuring an even distribution that reaches all corners of the baking dish.
- Extract the second crescent roll tube and tenderly drape it over the cream cheese filling. Gently smooth out the surface, pinching together any visible seams to create a seamless top layer.
- Craft a sweet coating by blending granulated sugar and ground cinnamon in a separate small bowl.
- Lavishly brush melted butter across the entire top layer of crescent dough, creating a golden foundation for the upcoming cinnamon-sugar sprinkle.
- Liberally dust the cinnamon-sugar mixture over the buttered surface, allowing the ingredients to create a tantalizing, sweet crust.
- Position the dish in a preheated oven set to 350°F (175°C), allowing the casserole to bake for 30-35 minutes until the top achieves a rich golden-brown color and the edges become delightfully crisp.
- After removing from the oven, allow the casserole to rest and cool for 10-15 minutes, enabling the layers to set and flavors to meld.
- Slice into generous squares or rectangles, serving either warm or at room temperature. For an extra touch of decadence, consider drizzling with caramel or chocolate sauce.
Notes
- Softening cream cheese quickly by microwaving for 10-15 seconds ensures a smooth, lump-free filling without compromising texture.
- Use room temperature ingredients to create a more uniform and creamy cheesecake mixture that blends effortlessly.
- Seal crescent roll seams completely to prevent filling from leaking during baking, creating a more visually appealing and structurally sound dessert.
- Transform this dessert into a gluten-free version by substituting crescent roll dough with gluten-free puff pastry or a grain-free alternative like almond flour-based dough.
- Prep Time: 15 minutes
- Cook Time: 35 minutes
- Category: Desserts, Breakfast
- Method: Baking
- Cuisine: American
Nutrition
- Serving Size: 8
- Calories: 295
- Sugar: 22 g
- Sodium: 320 mg
- Fat: 18 g
- Saturated Fat: 11 g
- Unsaturated Fat: 5 g
- Trans Fat: 0 g
- Carbohydrates: 31 g
- Fiber: 0 g
- Protein: 4 g
- Cholesterol: 45 mg
Jenna Stewart
Head Chef & Recipe Innovator
Expertise
Farm-to-Table Cooking; Seasonal Menu Development; Visual Plating Techniques; Flavor Layering and Simple Prep Hacks.
Education
The Culinary Institute of America, Hyde Park, NY
Jenna Stewart is the inventive spirit behind many of our standout dishes at Pro of Delicious Creations. A proud graduate of The Culinary Institute of America, she built her skills mastering both classic recipes and fresh, modern twists.
Now, Jenna celebrates the beauty of seasonal, local ingredients, often sourced from her garden and nearby markets, to create recipes that are bursting with flavor yet easy to follow. When she’s not experimenting in the kitchen, Jenna loves exploring nature on hikes and discovering new treasures at local co-ops.