Description
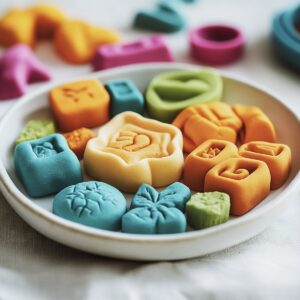
Homemade modeling clay delivers endless creative possibilities for crafting enthusiasts. Kids and adults can enjoy sculpting colorful designs with simple household ingredients and minimal preparation time.
Ingredients
Scale
- 1 ¼ cups (296 ml) water
- 2 cups (473 ml) baking soda
- 1 cup (236 ml) cornstarch
- Food coloring (optional)
- 1–2 drops essential oils (optional)
- Glitter or fine sand (optional)
Instructions
- Mixing Base: Combine baking soda and cornstarch in a medium saucepan, eliminating any potential lumps for a smooth foundation.
- Liquid Integration: Whisk water into the dry ingredients, creating a silky, homogeneous mixture without clumps or separation.
- Heating Process: Set saucepan over medium heat, continuously stirring to prevent scorching while the mixture gradually transforms into a dense, mashed potato-like consistency.
- Clay Formation: Remove pan from heat once the mixture achieves a thick, malleable texture that pulls away from pan edges.
- Cooling Stage: Transfer hot clay onto a clean surface, allowing initial steam to dissipate and temperature to reduce for safe handling.
- Kneading Technique: Work the clay with palms, stretching and manipulating to create a smooth, elastic texture free from cracks or uneven areas.
- Shaping Design: Use hands, rolling pins, or cookie cutters to mold clay into desired forms, carefully creating decorative elements or functional pieces.
- Preparation for Drying: Pierce small holes for ornaments or hanging pieces before the clay begins to set, ensuring clean, precise openings.
- Drying Method: Select between air-drying on a flat tray for 24-48 hours (rotating midway) or oven-baking at low temperature, monitoring closely to prevent burning.
- Finishing Touch: Allow clay creations to cool completely, ensuring structural integrity before handling or applying decorative elements like paint.
Notes
- Prevent Lumps: Sift dry ingredients thoroughly before mixing to eliminate cornstarch and baking soda clumps, ensuring a smooth clay texture.
- Control Heat Carefully: Maintain medium-low heat and stir constantly to prevent scorching, watching for the precise moment the mixture transforms from liquid to dough-like consistency.
- Manage Moisture Balance: Add water incrementally while stirring, creating a clay that’s neither too dry and crumbly nor too wet and sticky – aim for a play-dough like elasticity.
- Master Kneading Technique: Work the clay with firm, consistent hand movements, stretching and folding to develop a uniform, crack-free texture that holds shape perfectly.
- Prep Time: 5 minutes
- Cook Time: 5 minutes
- Category: None
- Method: Boiling
- Cuisine: American
Nutrition
- Serving Size: 9
- Calories: 25
- Sugar: 0 g
- Sodium: 0 mg
- Fat: 0 g
- Saturated Fat: 0 g
- Unsaturated Fat: 0 g
- Trans Fat: 0 g
- Carbohydrates: 6 g
- Fiber: 1 g
- Protein: 1 g
- Cholesterol: 0 mg