Craft Joy: Simple Homemade Modeling Clay Recipe for Kids
Clay crafting sparks creativity with this vibrant modeling clay recipe that brings imagination to life.
Artisan makers and young creators adore mixing simple ingredients for a colorful crafting experience.
Homemade clay offers endless possibilities for sculptural adventures.
Soft and pliable textures emerge from basic kitchen staples you already have on hand.
Children and adults alike can knead, shape, and design unique creations with this easy-to-make clay.
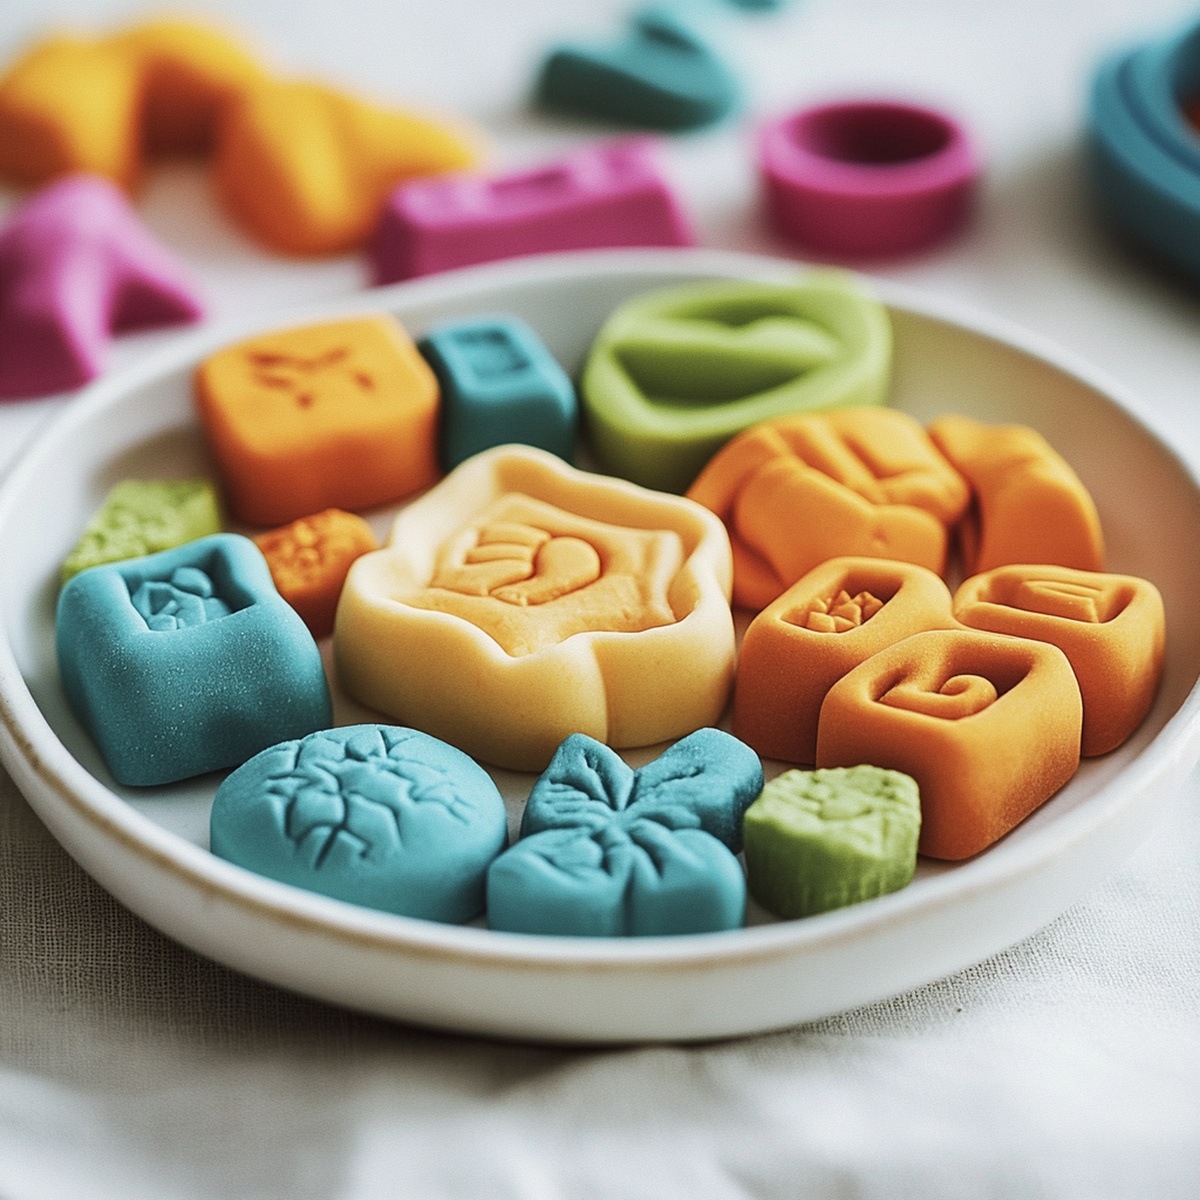
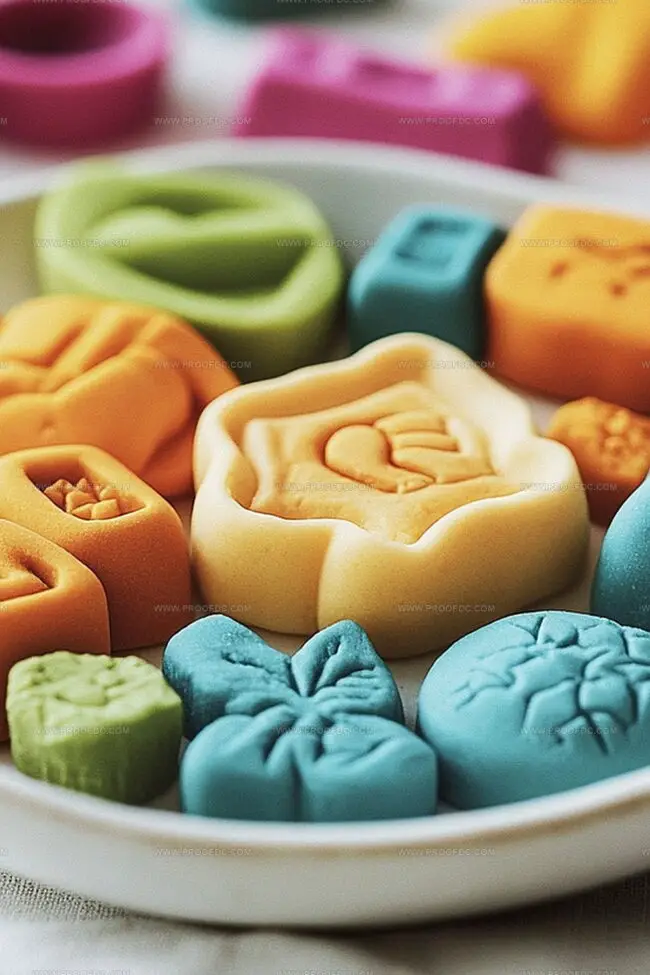
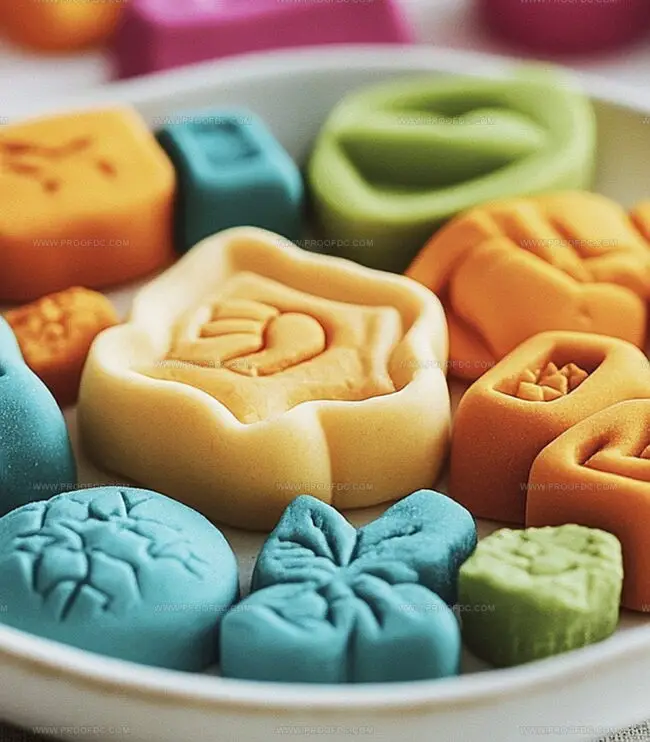
Color combinations range from pastel swirls to bold, bright hues that pop with personality.
Unleash your artistic spirit and transform ordinary moments into playful, sculpting memories.
Quick Recipe Overview
What Goes Into Homemade Modeling Clay
For Clay Base:For Mixing Tools:For Optional Drying Methods:Craft Tools For Homemade Modeling Clay
Steps To Mix Homemade Modeling Clay
Mix baking soda and cornstarch in a saucepan, creating a smooth foundation for your creative project. Gently pour water into the mixture, stirring until everything blends perfectly.
Place the saucepan on medium heat, stirring continuously. Watch as the mixture magically transforms into a soft, dough-like consistency similar to creamy mashed potatoes. Remove from heat once it reaches the right texture.
Transfer the warm mixture onto a flat surface. Allow it to cool down for a few minutes, then knead the dough until it becomes silky smooth and easy to work with.
Let your creativity flow! Roll out the clay, mold imaginative shapes, or use cookie cutters to craft unique designs. Remember to create a small hole if you’re planning to make ornaments or handprints.
Choose your drying method. For air drying, leave your creations on a tray for 1-2 days, flipping them midway. If you’re in a hurry, pop them in the oven at a low temperature, checking periodically to ensure they dry evenly without burning.
Helpful Tips For Homemade Modeling Clay
Ways To Use Homemade Modeling Clay With Kids
Keep Homemade Modeling Clay Soft And Safe
Print
Vibrant Modeling Clay Recipe
- Total Time: 10 minutes
- Yield: 9 1x
Description
Homemade modeling clay delivers endless creative possibilities for crafting enthusiasts. Kids and adults can enjoy sculpting colorful designs with simple household ingredients and minimal preparation time.
Ingredients
- 1 ¼ cups (296 ml) water
- 2 cups (473 ml) baking soda
- 1 cup (236 ml) cornstarch
- Food coloring (optional)
- 1–2 drops essential oils (optional)
- Glitter or fine sand (optional)
Instructions
- Mixing Base: Combine baking soda and cornstarch in a medium saucepan, eliminating any potential lumps for a smooth foundation.
- Liquid Integration: Whisk water into the dry ingredients, creating a silky, homogeneous mixture without clumps or separation.
- Heating Process: Set saucepan over medium heat, continuously stirring to prevent scorching while the mixture gradually transforms into a dense, mashed potato-like consistency.
- Clay Formation: Remove pan from heat once the mixture achieves a thick, malleable texture that pulls away from pan edges.
- Cooling Stage: Transfer hot clay onto a clean surface, allowing initial steam to dissipate and temperature to reduce for safe handling.
- Kneading Technique: Work the clay with palms, stretching and manipulating to create a smooth, elastic texture free from cracks or uneven areas.
- Shaping Design: Use hands, rolling pins, or cookie cutters to mold clay into desired forms, carefully creating decorative elements or functional pieces.
- Preparation for Drying: Pierce small holes for ornaments or hanging pieces before the clay begins to set, ensuring clean, precise openings.
- Drying Method: Select between air-drying on a flat tray for 24-48 hours (rotating midway) or oven-baking at low temperature, monitoring closely to prevent burning.
- Finishing Touch: Allow clay creations to cool completely, ensuring structural integrity before handling or applying decorative elements like paint.
Notes
- Prevent Lumps: Sift dry ingredients thoroughly before mixing to eliminate cornstarch and baking soda clumps, ensuring a smooth clay texture.
- Control Heat Carefully: Maintain medium-low heat and stir constantly to prevent scorching, watching for the precise moment the mixture transforms from liquid to dough-like consistency.
- Manage Moisture Balance: Add water incrementally while stirring, creating a clay that’s neither too dry and crumbly nor too wet and sticky – aim for a play-dough like elasticity.
- Master Kneading Technique: Work the clay with firm, consistent hand movements, stretching and folding to develop a uniform, crack-free texture that holds shape perfectly.
- Prep Time: 5 minutes
- Cook Time: 5 minutes
- Category: None
- Method: Boiling
- Cuisine: American
Nutrition
- Serving Size: 9
- Calories: 25
- Sugar: 0 g
- Sodium: 0 mg
- Fat: 0 g
- Saturated Fat: 0 g
- Unsaturated Fat: 0 g
- Trans Fat: 0 g
- Carbohydrates: 6 g
- Fiber: 1 g
- Protein: 1 g
- Cholesterol: 0 mg
Marcus Foley
Food Critic & Kitchen Coach
Expertise
Recipe Testing and Troubleshooting; Time-Saving Kitchen Hacks; Global Flavor Exploration; Engaging Food Writing and Honest Reviews.
Education
Institute of Culinary Education (ICE), New York, NY
Marcus Foley, based in Atlanta, GA, is a friendly food expert who makes cooking fun and simple.
With hands-on training from the Institute of Culinary Education and years of tasting everything from street food to fine dining, he shares easy kitchen hacks, global flavor ideas, and step-by-step recipes that turn kitchen mishaps into delicious surprises.