Divine Red Velvet Truffles Recipe: Sweet Bites of Joy!
Decadent chocolate enthusiasts crave these red velvet truffles that melt luxuriously on your tongue.
Rich cocoa powder blends seamlessly with cream cheese to create an irresistible treat.
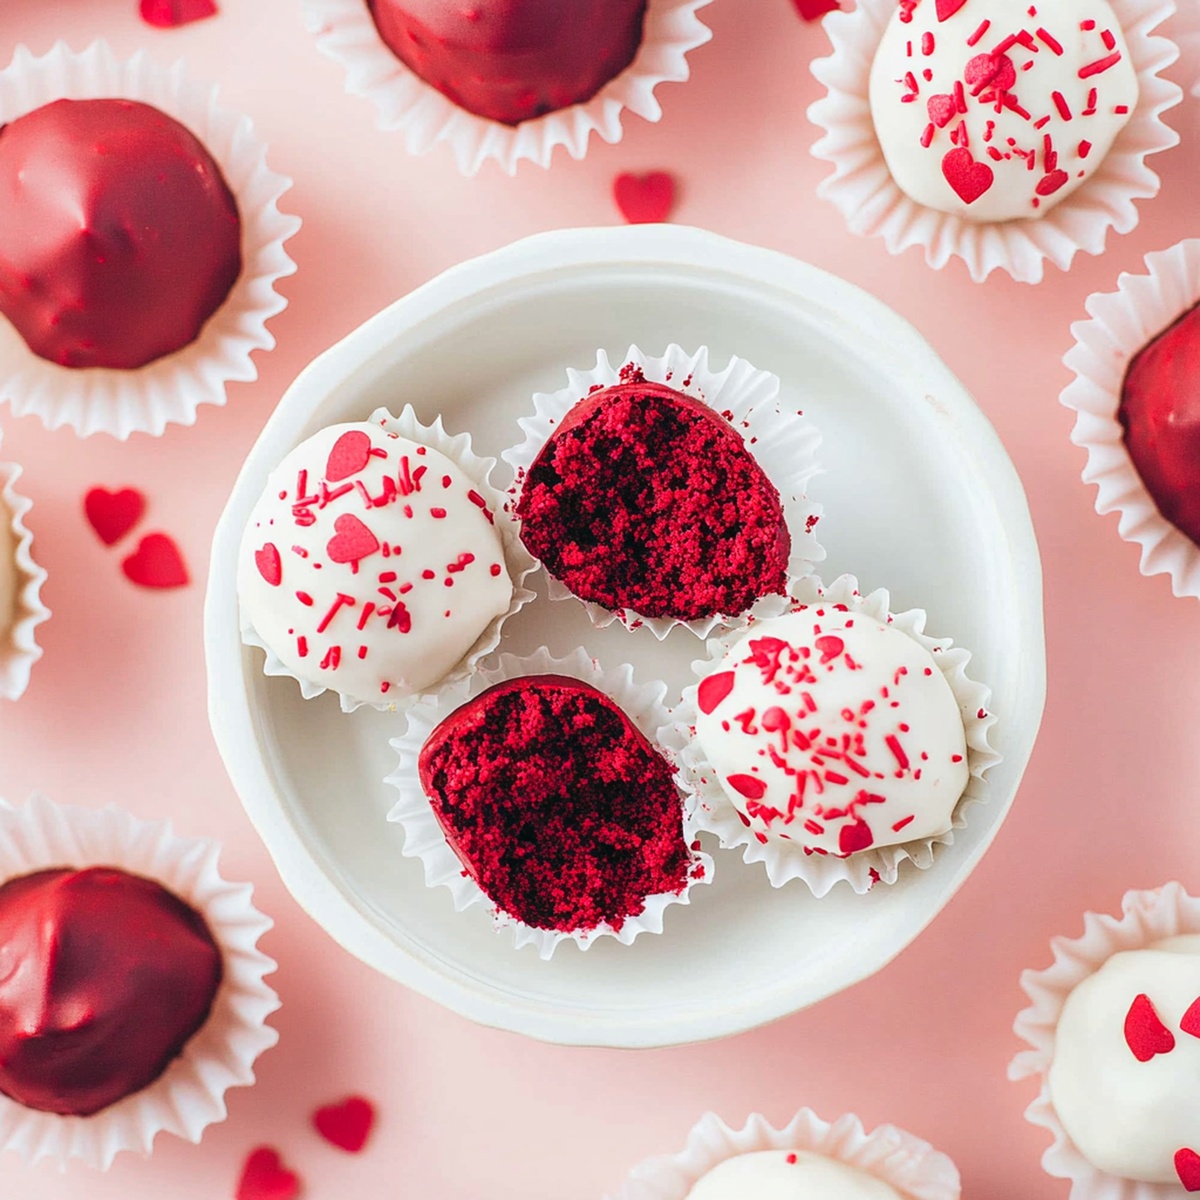
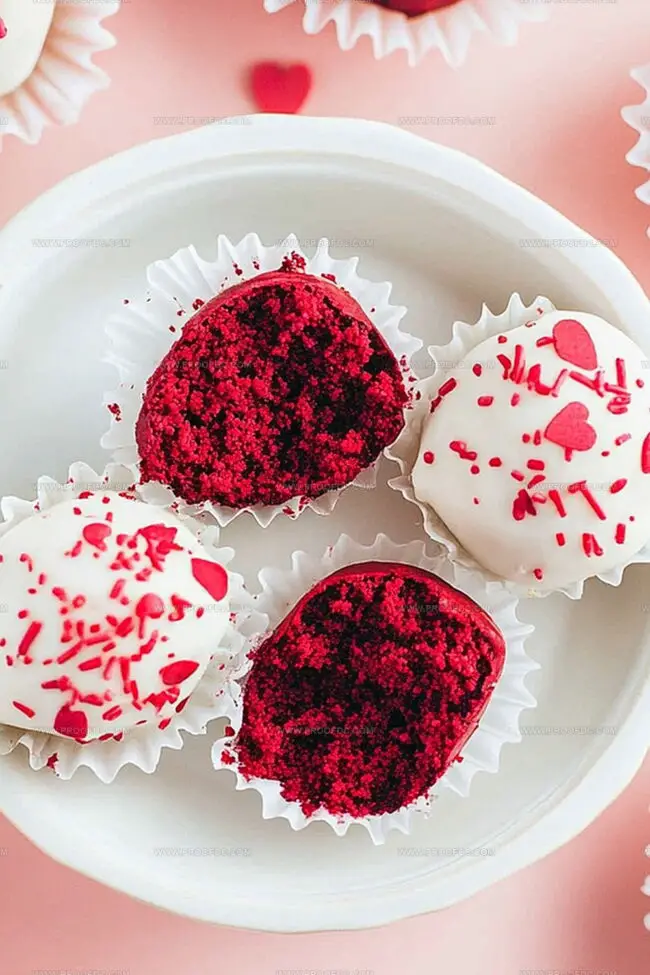
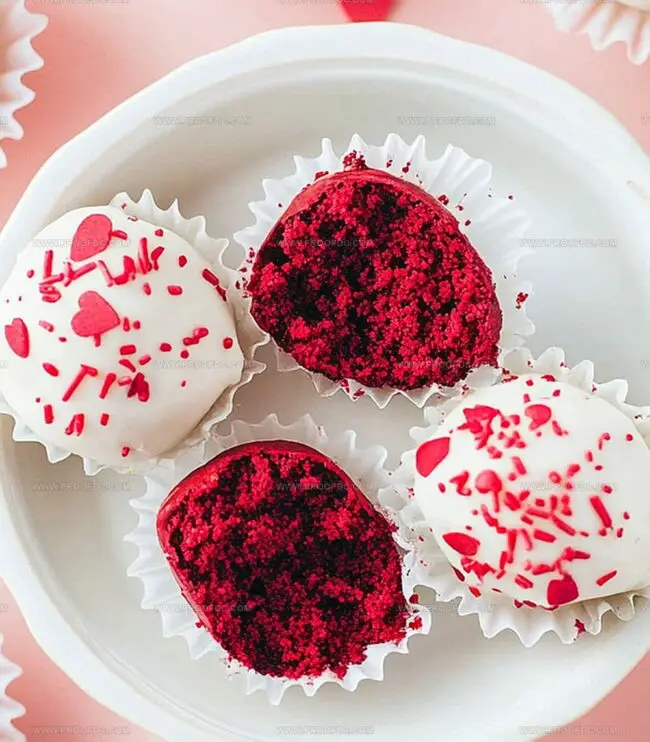
The deep crimson color hints at the delightful flavor waiting to be savored.
Each bite delivers a smooth, velvety texture that dances between sweet and tangy.
Creamy and indulgent, these truffles are perfect for special celebrations or quiet moments of pure bliss.
Minimal ingredients and simple steps make this dessert accessible to bakers of all skill levels.
You’ll become the star of any gathering with these elegant, bite-sized delights that promise pure chocolate ecstasy.
Quick Recipe Overview
All Ingredients For Red Velvet Truffles
For Cake Base:For Creamy Filling:For Coating and Decoration:Gear For Red Velvet Truffles
Steps To Make Red Velvet Truffles
Grab your cake mix and transform it into a stunning red velvet masterpiece. Pour the batter into a greased pan and bake until perfectly cooked. Let the cake cool completely, giving you time to dream about the delicious truffles ahead.
Blend cream cheese with sweet powdered sugar and a splash of vanilla. Whisk until the mixture looks smooth and feels like pure happiness. This is where the magic begins.
Crumble the cooled cake into tiny pieces. Mix the cream cheese blend into the crumbs, using your hands to create a delightful dough. Roll the mixture into small, perfect spheres. Pop them in the freezer to set and become firm.
Gently melt chocolate in short bursts, stirring until silky smooth. Add a touch of coconut oil to make the coating extra glossy and fluid.
Dip each truffle into the warm chocolate, letting excess drip away. Sprinkle with festive red crumbs or colorful sprinkles. Place on a tray to set.
Refrigerate the truffles until the chocolate hardens. Store in a sealed container and enjoy within five days – if they last that long!
Helpful Hints For Red Velvet Truffles
How To Serve Red Velvet Truffles
How To Store Red Velvet Truffles
Print
Velvety Red Velvet Truffles Recipe
- Total Time: 1 hour
- Yield: 25 1x
Description
Indulgent red velvet truffles bring luxurious chocolate and cream cheese flavors to dessert lovers. Rich cocoa-infused treats finish with smooth chocolate coating and delightful crumbled cake texture you cannot resist.
Ingredients
- 1 box red velvet cake mix
- 4 oz (113 g) cream cheese, softened
- ½ cup (30 g) powdered sugar
- ½ tsp vanilla extract
- Eggs (as specified on box)
- Oil (as specified on box)
- Water (as specified on box)
- 12 oz (340 g) white chocolate or semi-sweet chocolate, melted
- 1 tsp coconut oil or vegetable oil (optional, for smoother coating)
- Red velvet cake crumbs
- Drizzle of melted white or dark chocolate
- Sprinkles
Instructions
- Cake Preparation: Preheat oven to specified temperature and meticulously grease pan with parchment paper, following package instructions for red velvet cake baking.
- Cake Crumbling: Allow cake to cool completely, then transform into fine, uniform crumbs within a spacious mixing bowl, ensuring consistent texture.
- Cream Cheese Fusion: Whip cream cheese mixture to silky perfection, thoroughly blending powdered sugar and vanilla extract until smooth and homogeneous.
- Mixture Integration: Delicately fold cream cheese mixture into cake crumbs, creating a cohesive, moldable consistency using hands or a spoon.
- Truffle Forming: Shape uniform balls from the cake mixture, maintaining consistent size and symmetry with gentle rolling technique.
- Chilling Process: Arrange formed truffles on parchment-lined tray and freeze briefly to enhance structural integrity and handling ease.
- Chocolate Coating: Melt chocolate in controlled intervals, stirring intermittently to prevent scorching and achieve glossy, smooth finish.
- Dipping and Decorating: Submerge chilled truffles in melted chocolate using fork, ensuring complete coverage, and immediately garnish with red velvet crumbs or sprinkles.
- Final Setting: Refrigerate decorated truffles until chocolate coating solidifies completely, then transfer to airtight container for storage.
Notes
- Cake Texture Matters: Ensure the red velvet cake is moist but not overly wet to prevent truffles from becoming too soft or crumbly.
- Chill for Perfection: Freezing the cake balls before dipping helps maintain their shape and makes chocolate coating easier and cleaner.
- Smooth Coating Technique: Use a fork when dipping truffles to allow excess chocolate to drip off, creating a thin, even chocolate shell.
- Temperature Control: Let truffles sit at room temperature for 5-10 minutes before serving to soften slightly and enhance flavor and texture.
- Prep Time: 30 minutes
- Cook Time: 30 minutes
- Category: Desserts, Snacks
- Method: Baking
- Cuisine: American
Nutrition
- Serving Size: 25
- Calories: 150
- Sugar: 12 g
- Sodium: 100 mg
- Fat: 8 g
- Saturated Fat: 4 g
- Unsaturated Fat: 3 g
- Trans Fat: 0 g
- Carbohydrates: 18 g
- Fiber: 0 g
- Protein: 2 g
- Cholesterol: 10 mg
Marcus Foley
Food Critic & Kitchen Coach
Expertise
Recipe Testing and Troubleshooting; Time-Saving Kitchen Hacks; Global Flavor Exploration; Engaging Food Writing and Honest Reviews.
Education
Institute of Culinary Education (ICE), New York, NY
Marcus Foley, based in Atlanta, GA, is a friendly food expert who makes cooking fun and simple.
With hands-on training from the Institute of Culinary Education and years of tasting everything from street food to fine dining, he shares easy kitchen hacks, global flavor ideas, and step-by-step recipes that turn kitchen mishaps into delicious surprises.