
The Best Thumbprint Cookies with Icing Recipe for Sweet Moments
These buttery thumbprint cookies with vibrant icing create sweet moments of pure joy.
Baking a treat that brings instant smiles to everyone around you.
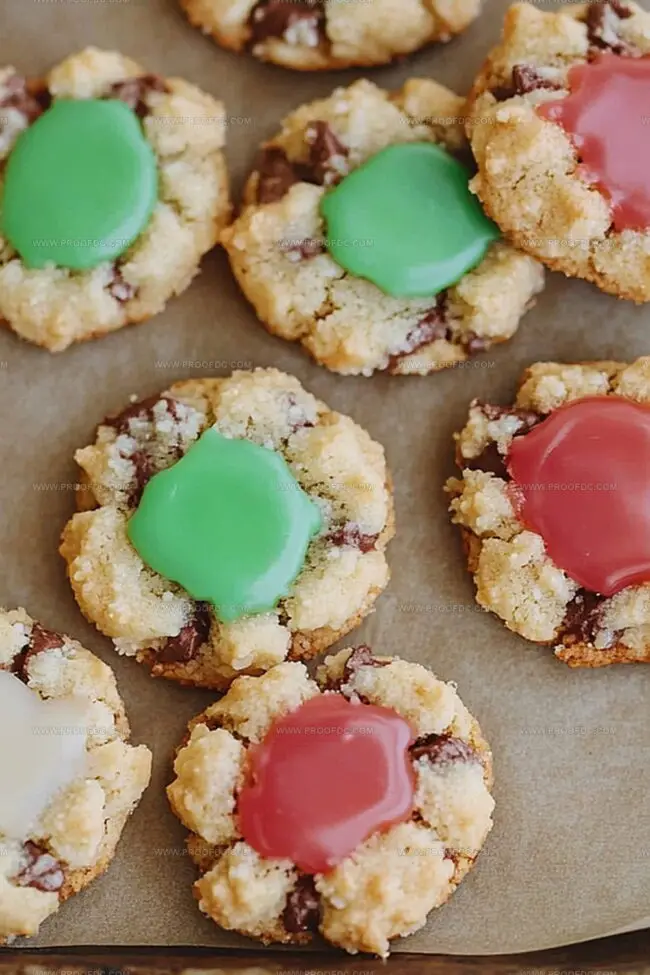
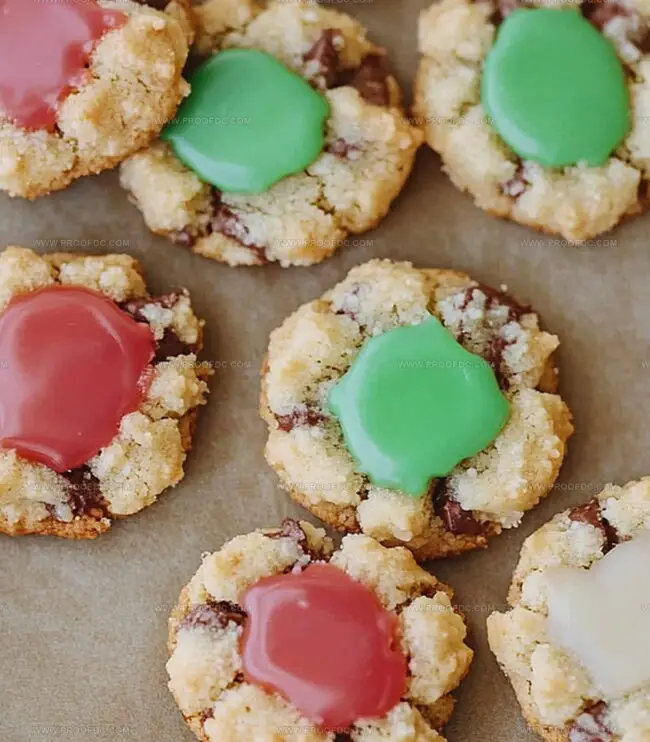
Soft, crumbly shortbread forms the perfect base for colorful dollops of sugary glaze.
Each cookie looks like a miniature work of art, with delicate indentations filled with glossy icing.
The recipe combines simple ingredients into something magical that sparks childhood memories.
Crisp edges and tender centers make these little delights irresistible to both kids and adults.
You’ll want to clear your afternoon and gather your mixing bowls for this delightful baking adventure.
Why Thumbprint Cookies With Icing Are So Pretty And Sweet
Ingredients Needed For Thumbprint Cookies With Icing
Dry Ingredients:Wet Ingredients:Filling and Topping:How To Make Thumbprint Cookies With Icing At Home
Step 1: Whip Up The Cookie Base
Grab a large mixing bowl and blend together:Mix until the ingredients form a smooth, creamy dough that holds together perfectly.
Step 2: Shape Sweet Little Balls
Roll the dough into small, uniform spheres about the size of a walnut. Place each ball gently onto the prepared baking sheets, leaving a bit of space between them.
Step 3: Create Magical Thumbprints
Use your thumb or the back of a small spoon to create a gentle indentation in the center of each cookie. Press carefully to avoid cracking the delicate dough.
Step 4: Bake To Golden Perfection
Slide the baking sheets into the preheated oven. Bake until the edges turn a delicate golden brown, typically around 12-15 minutes. The cookies should look slightly firm but not dark.
Step 5: Craft Colorful Icing
While cookies cool, prepare a vibrant icing by whisking:Stir until the mixture reaches a smooth, spreadable consistency.
Step 6: Decorate With Delightful Icing
Once cookies have completely cooled, carefully fill each thumbprint with the prepared icing. Use a small spoon or piping bag for precise application.
Step 7: Let Icing Set
Allow the iced cookies to rest at room temperature until the icing hardens and becomes glossy. This typically takes about 30 minutes to an hour.
Enjoy your beautiful, homemade thumbprint cookies!
Pro Tips For Thumbprint Cookies With Icing
Store And Reheat Thumbprint Cookies With Icing With Ease
What Tastes Great With Thumbprint Cookies With Icing
Variations On Thumbprint Cookies With Icing
Thumbprint Cookies With Icing FAQs
Thumbprint cookies are beloved for their cute indentation filled with colorful icing, creating a perfect bite-sized treat that combines buttery cookie with sweet filling.
Absolutely! While this recipe uses icing, traditional thumbprint cookies often feature raspberry, strawberry, or apricot jam in the center, giving you lots of delicious options to customize your cookies.
Not at all! These cookies are surprisingly simple to prepare, even for beginner bakers. The key is gently pressing your thumb (or the back of a small spoon) into the cookie dough to create the signature indent before baking.
Chilling helps prevent the cookies from spreading too much during baking, ensuring they maintain their classic round shape and cute thumbprint center. It also enhances the butter’s flavor and creates a more tender cookie texture.
Print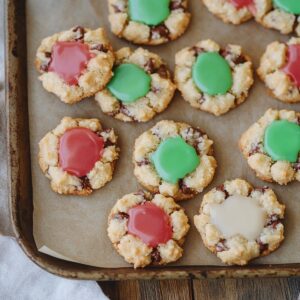
Thumbprint Cookies With Icing Recipe
- Total Time: 32 minutes
- Yield: 24 1x
Description
Delightful thumbprint cookies embrace sweet simplicity with a buttery base and colorful icing drizzle. Homemade comfort meets elegant charm, inviting you to savor each delicate, perfectly crafted bite of pure baking joy.
Ingredients
Main Ingredients:
- 2 cups (250 g) all-purpose flour
- 1 cup (225 g) unsalted butter, softened
- ⅔ cup (135 g) granulated sugar
Sweet Enhancers:
- 1 large egg yolk
- 1 teaspoon vanilla extract
- ¼ teaspoon salt
Icing Components:
- 1 cup (120 g) powdered sugar
- 2 tablespoons milk or cream
- ½ teaspoon vanilla or almond extract
- Food coloring (optional)
Instructions
- Arrange the oven rack in the center position and warm to 350F (175C), ensuring an even heat distribution. Prepare baking sheets by layering parchment paper for optimal cookie release.
- Cream together butter and sugar until the mixture becomes light, fluffy, and pale, creating a smooth foundation for the cookie dough.
- Incorporate vanilla extract and egg yolk into the butter mixture, blending thoroughly to achieve a uniform consistency.
- Gradually fold in flour and salt, mixing until a cohesive dough forms without overmixing, which could result in tough cookies.
- Roll the dough into small, uniform spheres, each approximately the size of a walnut, ensuring consistent baking.
- Gently press your thumb or the back of a small spoon into the center of each dough ball, creating a well for the jam filling.
- Place the indented cookies onto prepared baking sheets, spacing them slightly apart to allow for minimal spreading during baking.
- Carefully spoon a small amount of jam into each thumbprint depression, selecting your preferred flavor for a personalized touch.
- Slide the baking sheets into the preheated oven and bake for 12-15 minutes, or until the cookie edges turn a delicate golden brown.
- Remove cookies from the oven and allow them to cool completely on the baking sheets, providing stability for the delicate structure.
- Prepare the icing by whisking powdered sugar with milk or cream until smooth and drizzling consistency is achieved.
- Once cookies have cooled, elegantly drizzle or pipe the icing over the jam-filled centers, creating an artistic finishing touch.
- Let the icing set fully before storing the cookies in an airtight container, preserving their delightful texture and appearance.
Notes
- Chill the cookie dough for 30 minutes before shaping to prevent spreading and maintain a perfect round shape during baking.
- Use a small spoon or the back of a measuring spoon to create uniform thumb indentations, ensuring even jam or icing placement.
- Experiment with different jam flavors like raspberry, apricot, or strawberry to add variety and personalize these classic cookies.
- Allow cookies to cool completely before adding icing to prevent melting and ensure a clean, professional-looking decoration.
- Prep Time: 20 minutes
- Cook Time: 12 minutes
- Category: Desserts, Snacks
- Method: Baking
- Cuisine: American
Nutrition
- Serving Size: 24
- Calories: 133
- Sugar: 6 g
- Sodium: 35 mg
- Fat: 7 g
- Saturated Fat: 4 g
- Unsaturated Fat: 3 g
- Trans Fat: 0 g
- Carbohydrates: 17 g
- Fiber: 0 g
- Protein: 2 g
- Cholesterol: 20 mg
Jenna Stewart
Head Chef & Recipe Innovator
Expertise
Farm-to-Table Cooking; Seasonal Menu Development; Visual Plating Techniques; Flavor Layering and Simple Prep Hacks.
Education
The Culinary Institute of America, Hyde Park, NY
Jenna Stewart is the inventive spirit behind many of our standout dishes at Pro of Delicious Creations. A proud graduate of The Culinary Institute of America, she built her skills mastering both classic recipes and fresh, modern twists.
Now, Jenna celebrates the beauty of seasonal, local ingredients, often sourced from her garden and nearby markets, to create recipes that are bursting with flavor yet easy to follow. When she’s not experimenting in the kitchen, Jenna loves exploring nature on hikes and discovering new treasures at local co-ops.