The Cutest Gnome Cookies Recipe: Bake Adorable Magic Today!
Meet the whimsical gnome cookies that’ll bring a sprinkle of magic to your baking adventure.
These adorable little treats capture imagination with their playful charm and sweet details.
Crafted with simple ingredients, they promise smiles and delight for anyone who glimpses their charming faces.
Tiny bearded friends peeking from your dessert plate, ready to spark joy and conversation.
Each cookie becomes a miniature work of art, blending creativity with delicious flavor.
Colorful decorations transform ordinary sugar cookies into enchanting woodland characters that dance with personality.
You’ll want to gather friends and turn this baking session into a memorable crafting experience.
Jump into this delightful recipe and let your inner cookie artist shine!
What’s So Cute About The Cutest Gnome Cookies
What You’ll Use For The Cutest Gnome Cookies
Cookie Base:Flour Mixture:Decoration Ingredients:How To Make The Cutest Gnome Cookies

Step 1: Whip Up Magical Dough
In a spacious mixing bowl, blend softened butter and sugar until they become light and airy. Gently incorporate:In a separate bowl, combine:Gradually merge wet and dry ingredients until a smooth dough forms. Separate the dough into two portions, wrap in plastic, and chill in the refrigerator for a full hour.
Step 2: Warm Up the Oven
Fire up your oven to 350°F (175°C). Prepare baking sheets by lining them with parchment paper.
Step 3: Shape Whimsical Gnome Friends
Dust your work surface with flour and roll out the chilled dough to a quarter-inch thickness. Create magical shapes:Carefully assemble your gnome characters by attaching triangular hats to circular bases. Gently pinch the hat tops to give them a playful, curved appearance.
Step 4: Bake to Golden Perfection
Arrange the shaped cookies on prepared baking sheets, leaving space between each gnome. Slide into the preheated oven and bake for 10-12 minutes until edges turn a delicate golden brown. Allow cookies to rest on baking sheets for 5 minutes, then transfer to a cooling rack.
Step 5: Dress Up Your Gnome Cookies
Bring your gnome friends to life with decorative touches:Step 6: Celebrate Your Creations
Wait patiently for the icing to set completely. These charming gnome cookies are ready to delight friends, family, or become the star of your dessert display. Gift them in cute packaging or showcase them as an eye-catching treat!
Tips For Decorating The Cutest Gnome Cookies
How To Store And Keep The Cutest Gnome Cookies Fresh
What Pairs With The Cutest Gnome Cookies
Change Things Up In The Cutest Gnome Cookies
FAQs About The Cutest Gnome Cookies
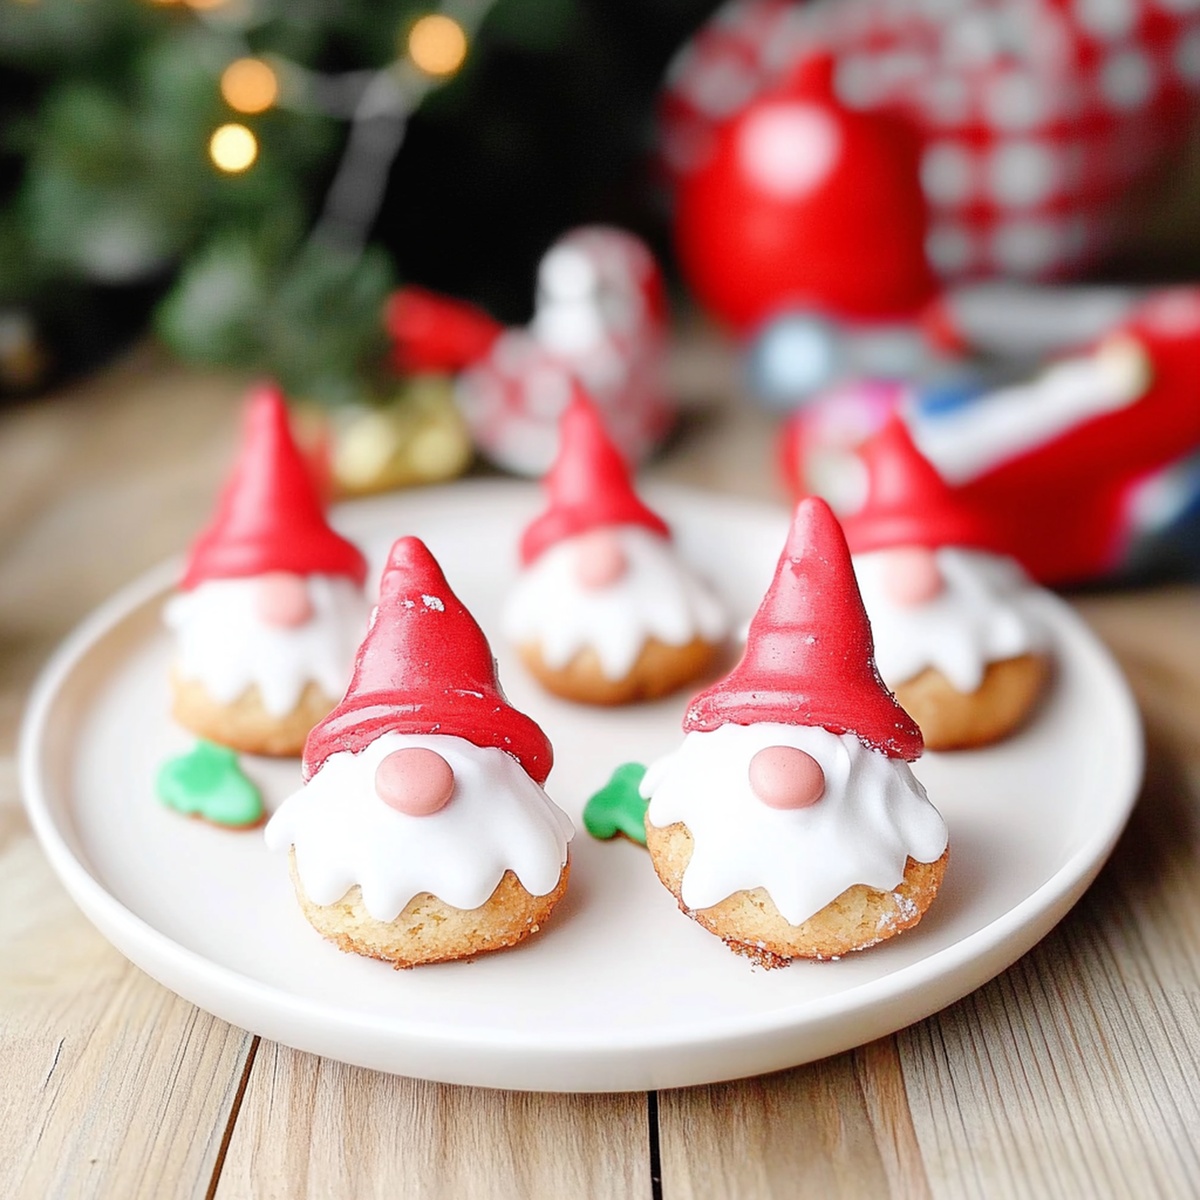
These adorable cookies feature a creative triangle hat design and whimsical decorations that transform simple sugar cookies into charming little gnome characters with cute beards and festive red hats.
Not at all! This recipe is beginner-friendly. With basic cookie-making techniques and some simple decorating skills, anyone can create these delightful gnome-shaped treats.
Absolutely! The cookie dough can be prepared in advance and refrigerated for up to 2 days before baking. This makes the recipe perfect for planning ahead and reducing day-of preparation stress.
Let kids get creative by adding different colored icing, using sprinkles for texture, or experimenting with various candy pieces for noses and facial features. It’s a great activity to enjoy together and spark imagination.
Print
The Cutest Gnome Cookies Recipe
- Total Time: 2 hours
- Yield: 24 1x
Description
Whimsical gnome cookies bring playful charm to dessert tables with adorable character details. Small sweet treats capture woodland magic, inviting friends and families to enjoy delightful homemade baking moments.
Ingredients
Main Ingredients:
- 1 cup (230 g) unsalted butter, softened
- 2 ½ cups (315 g) all-purpose flour
- ¾ cup (150 g) granulated sugar
- 1 large egg
Flavoring and Leavening Ingredients:
- 1 teaspoon vanilla extract
- ½ teaspoon baking powder
- ¼ teaspoon salt
Decoration Ingredients:
- Royal icing (store-bought or homemade, divided into red, white, and black)
- Mini marshmallows (optional, for hat details)
- Candy or chocolate chips (for noses)
Instructions
- Craft a silky, pliable cookie dough by thoroughly blending butter and sugar until they transform into a light, airy mixture. Incorporate egg and vanilla extract, ensuring complete integration.
- Whisk flour, baking powder, and salt in a separate vessel. Gradually fold dry ingredients into the creamy base, gently mixing until a cohesive dough emerges.
- Partition the dough into two equal segments, encase each portion in plastic wrap, and refrigerate for a minimum of 60 minutes to enhance flavor development and texture.
- Warm the oven to 350F (175C). Prepare baking sheets with parchment paper, creating a non-stick surface for your gnome-inspired treats.
- Retrieve chilled dough and roll onto a flour-dusted workspace, achieving a uniform 1/4 inch thickness. Carefully cut triangular shapes for whimsical gnome hats and circular forms for faces and beards.
- Meticulously assemble cookie components, positioning triangular hats atop round bases. Gently pinch hat tips to create a playful, slightly curved silhouette.
- Arrange shaped cookies on prepared sheets, maintaining approximately one inch of separation. Bake for 10-12 minutes until edges acquire a delicate golden hue.
- Allow cookies to rest on baking sheets for five minutes, then transfer to a wire rack for complete cooling.
- Embellish gnome cookies with vibrant red royal icing on hats. Optional: attach miniature marshmallows for a plush trim.
- Craft textured beards using white royal icing, employing a zigzag technique for dimensional interest. Position candy or chocolate chips as charming noses.
- Add optional facial details using black royal icing for expressive eyes.
- Permit decorative elements to set thoroughly before serving or packaging these delightful, character-filled cookies.
Notes
- Chill the dough thoroughly to prevent spreading and maintain the adorable gnome shape during baking.
- Use cold butter straight from the refrigerator for a more stable cookie structure that holds intricate details.
- Opt for gel food coloring when decorating to achieve vibrant colors without altering the royal icing’s consistency.
- Dust your work surface lightly with powdered sugar instead of flour to prevent the dough from becoming tough and dry.
- Customize the gnome faces by experimenting with different candy decorations like mini M&Ms or sprinkles for unique personality.
- Store decorated cookies in a single layer between parchment paper to preserve their delicate design and prevent smudging.
- Make gluten-free versions by substituting all-purpose flour with a 1:1 gluten-free baking blend for equally adorable results.
- Pipe royal icing details when cookies are completely cool to ensure crisp, clean decorative lines.
- Prep Time: 30 minutes
- Cook Time: 30 minutes
- Category: Desserts, Snacks
- Method: Baking
- Cuisine: American
Nutrition
- Serving Size: 24
- Calories: 150
- Sugar: 7 g
- Sodium: 50 mg
- Fat: 8 g
- Saturated Fat: 5 g
- Unsaturated Fat: 3 g
- Trans Fat: 0 g
- Carbohydrates: 19 g
- Fiber: 0.5 g
- Protein: 1.5 g
- Cholesterol: 30 mg
Jenna Stewart
Head Chef & Recipe Innovator
Expertise
Farm-to-Table Cooking; Seasonal Menu Development; Visual Plating Techniques; Flavor Layering and Simple Prep Hacks.
Education
The Culinary Institute of America, Hyde Park, NY
Jenna Stewart is the inventive spirit behind many of our standout dishes at Pro of Delicious Creations. A proud graduate of The Culinary Institute of America, she built her skills mastering both classic recipes and fresh, modern twists.
Now, Jenna celebrates the beauty of seasonal, local ingredients, often sourced from her garden and nearby markets, to create recipes that are bursting with flavor yet easy to follow. When she’s not experimenting in the kitchen, Jenna loves exploring nature on hikes and discovering new treasures at local co-ops.