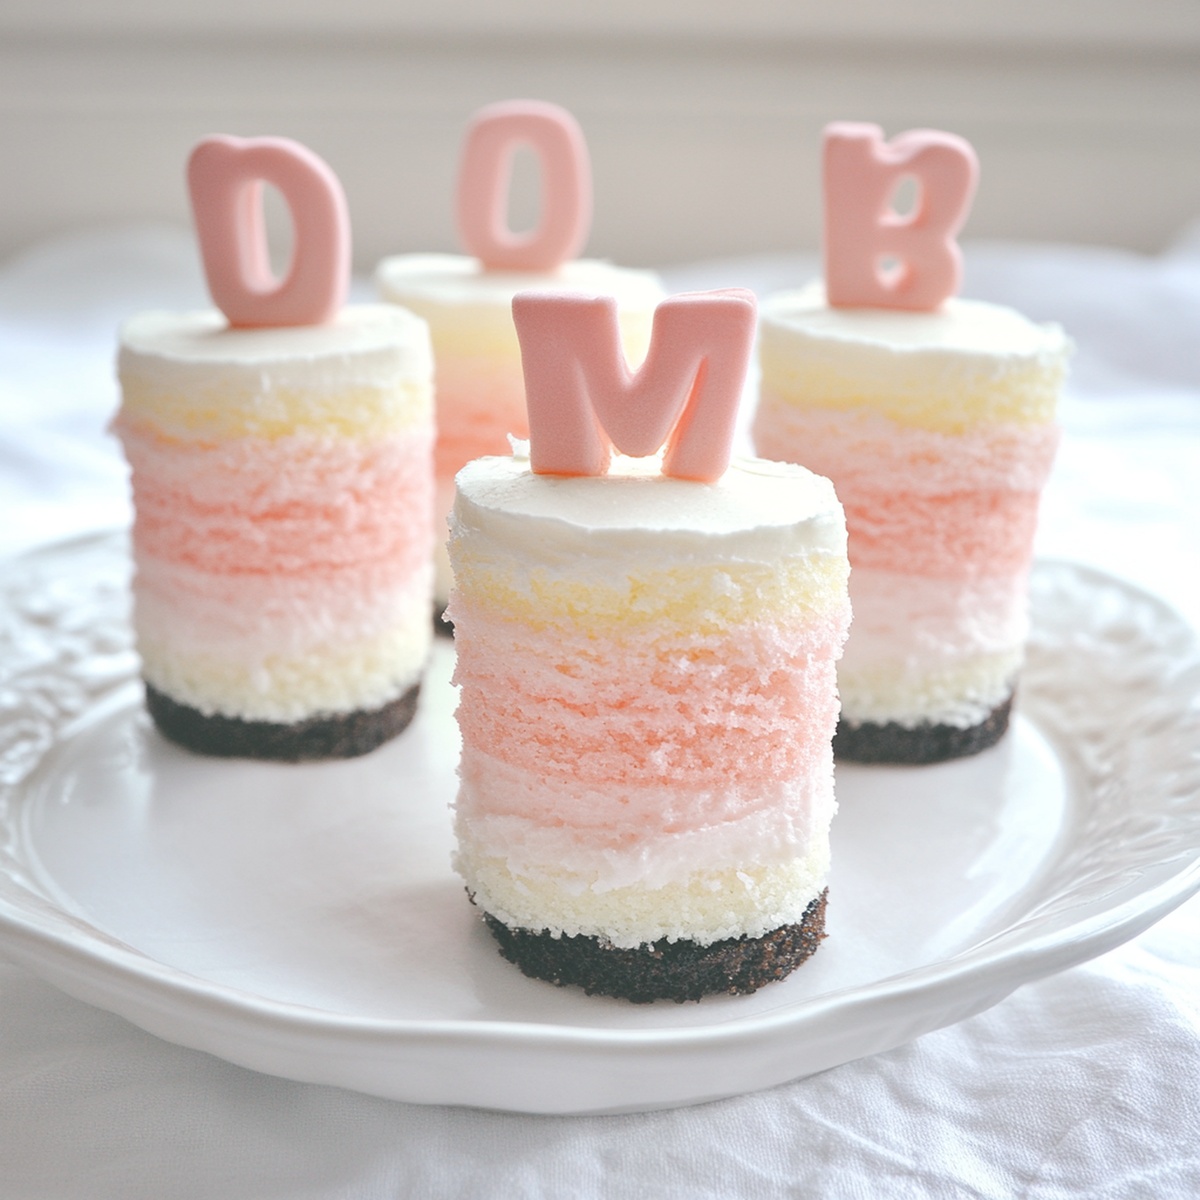
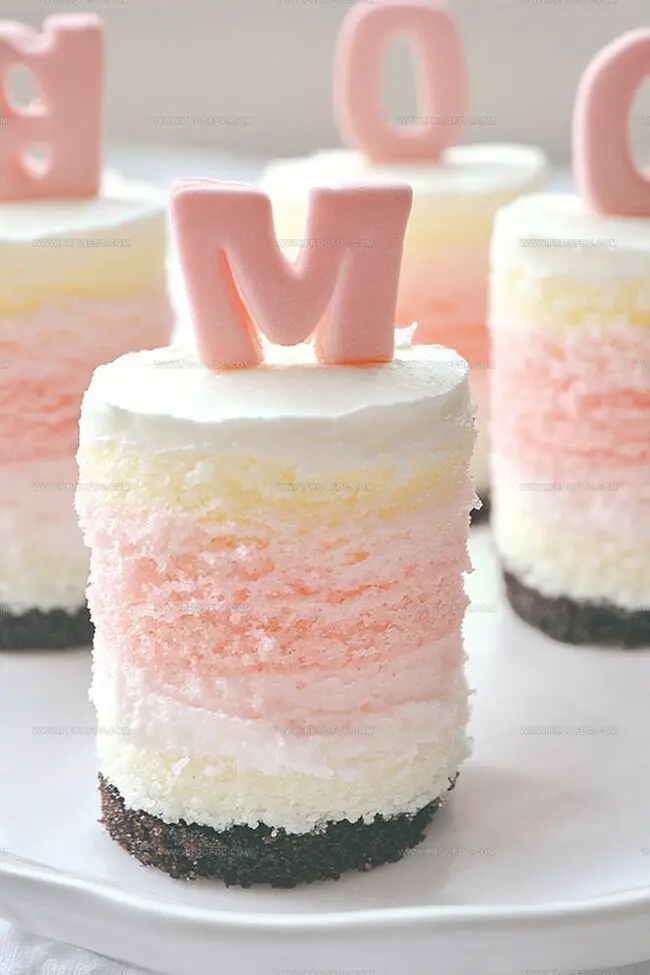
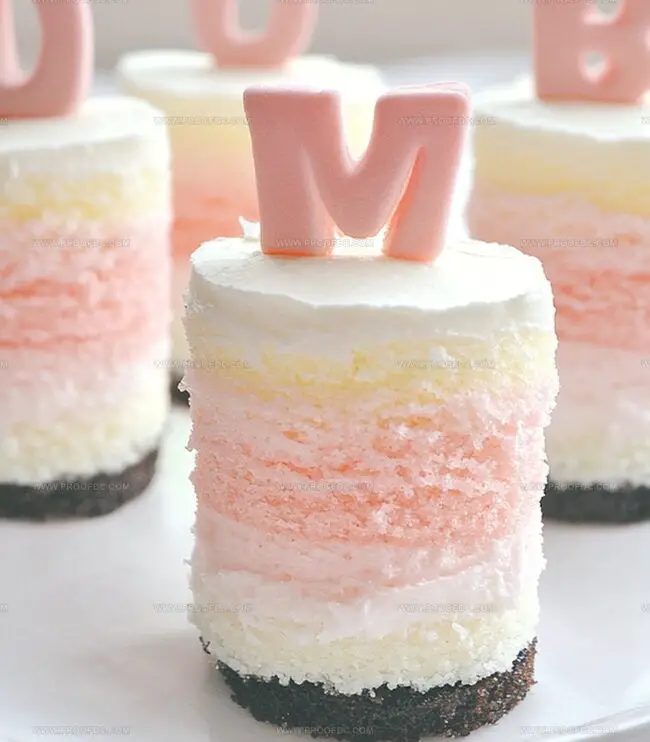
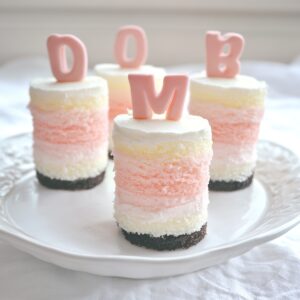
These delicate mini ombre cakes dance with layers of soft, gradient-hued beauty that captivate every dessert enthusiast.
Color gradients have taken baking by delightful storm, creating stunning mini ombre cakes that mesmerize with their elegant design.
Soft pastel hues blend seamlessly from light to deep, transforming a simple cake into an artistic masterpiece.
Bakers adore these petite treats for their visual charm and delectable taste.
Each miniature cake tells a sweet story of precision and creativity.
The gentle color transition reflects pure culinary craftsmanship that will surely impress anyone who takes a bite.
Serve these charming mini cakes and watch as your guests marvel at your baking magic.
Quick Recipe Overview
Prep Time: 15 minutes
Cook Time: 45 minutes
Total Time: 1 hour
Calories: 400 kcal
Servings: 13
Things Inside Mini Ombre Cakes
For Cake Base:
All-Purpose Flour: Provides sturdy structure for delicate layers.
Sugar: Sweetens and helps create tender cake texture.
Eggs: Binds ingredients and adds richness to the batter.
Vegetable Oil: Ensures moist and soft cake crumb.
Milk: Enhances cake’s smoothness and helps blend ingredients.
For Color Enhancement:
Red Gel Food Coloring: Creates beautiful ombre gradient effect with intense, vibrant color.
Pink Gel Food Coloring: Offers softer, delicate shade transitions between cake layers.
For Preparation Support:
Parchment Paper: Prevents cake from sticking and ensures easy removal.
Cooking Spray: Provides non-stick surface for smooth cake release.
Kitchen Tools For Mini Ombre Cakes
Large mixing bowls: Three separate bowls for dividing cake batter into different color intensities.
Electric mixer or whisk: Essential for blending cake batter smoothly and evenly.
Gel food coloring: Red or pink colors to create ombre gradient effect.
9-inch round cake pans: Three pans needed for layering different shade cakes.
Parchment paper or cooking spray: Helps prevent cake from sticking and ensures easy removal.
Spatula: Useful for mixing and spreading food coloring evenly through batter.
Measuring cups: For accurately following cake mix package instructions.
Simple Instructions For Mini Ombre Cakes
Craft Your Color Palette Grab three mixing bowls and prepare to paint your cake with delightful shades. Using gel food coloring, transform plain batter into a gradient of blush tones ranging from soft pink to deep rose.
Layer with Love Pour each uniquely colored batter into greased cake pans, arranging from lightest to darkest. Ensure smooth, even surfaces by gently tapping pans on the counter to release any air bubbles.
Bake to Perfection Slide pans into a preheated oven set at 350F. Watch as your cakes rise and develop beautiful, uniform colors. Bake until a toothpick inserted comes out clean, typically around 25-30 minutes.
Cool and Stack Allow cakes to cool completely on wire racks. Carefully remove from pans and begin stacking from darkest at the bottom to lightest on top, creating a stunning ombre effect that will wow your guests.
Frost with Finesse Apply a light, smooth layer of frosting between each cake layer and around the exterior. Use a spatula to create a seamless transition, highlighting the beautiful color gradient from bottom to top.
Tips And Variations For Mini Ombre Cakes
Color Blending Pro Tip: Start with a tiny drop of food coloring and gradually increase to achieve perfect ombre shades without oversaturating the batter.
Make-Ahead Magic: Prepare cake layers in advance and store wrapped tightly in plastic film at room temperature for up to 2 days before assembling.
Gluten-Free Swap: Replace standard cake mix with a gluten-free cake mix, ensuring those with wheat sensitivities can enjoy this beautiful dessert.
Dairy-Free Adaptation: Use dairy-free margarine or vegetable oil when greasing pans and select a vegan-friendly cake mix to accommodate lactose-intolerant guests.
Decoration Genius: Enhance visual appeal by adding white buttercream between layers and coating the exterior with a light dusting of matching colored sprinkles for extra charm.
Serving Mini Ombre Cakes Right
Color Harmony Plating: Stack cake layers from lightest to darkest pink shade on elegant white dessert plates for a stunning visual presentation.
Party Perfect Display: Arrange mini ombre cakes on a tiered cake stand with fresh rose petals scattered around for a romantic and festive look.
Garnish Glamour: Top each mini cake with a delicate edible flower, whipped cream swirl, or sprinkle of pink sugar crystals to enhance the ombre gradient effect.
Sweet Companion Pairing: Serve alongside champagne, strawberry prosecco, or rose-flavored tea to complement the soft pink color palette and delicate cake texture.
Storage Help For Mini Ombre Cakes
Smart Color Layering: Stack cake layers from lightest to darkest shade, creating a gorgeous gradient effect that looks professionally designed.
Refrigeration Magic: Store completed mini ombre cakes in an airtight container for up to 4 days, keeping them fresh and maintaining their vibrant color integrity.
Freezing Technique: Wrap individual cake layers in plastic wrap and freeze for 2-3 weeks before assembling, which helps prevent crumbling and makes decorating easier.
Make-Ahead Strategy: Prepare cake batter and color gradients one day ahead, storing colored batters in sealed containers in the refrigerator to save time during actual baking process.
Delightful mini ombre cakes emerge as a visual feast with gradient layers of pastel hues. French pastry techniques combine elegantly to create miniature desserts that charm guests with their sophisticated presentation and delicate flavors.
Ingredients
Scale
1 box white or vanilla cake mix
3 eggs
⅓ cup (80 milliliters) vegetable oil
1 cup (240 milliliters) water
1 pinch salt
1 red or pink gel food coloring
1 cup (2 sticks / 226 grams) unsalted butter, softened
4 cups (480 grams) powdered sugar
24 tablespoons (360 milliliters) heavy cream or milk
1 teaspoon vanilla extract
Instructions
Preparation: Meticulously prepare three 9-inch round cake pans by greasing and flouring to guarantee seamless cake release.
Batter Creation: Prepare cake mix according to package instructions, ensuring a silky, homogeneous mixture without lumps.
Color Transformation: Divide batter into three equal portions, then apply gel food coloring—ranging from soft blush to rich crimson—carefully blending to achieve saturated, uniform shades without disrupting batter structure.
Pan Filling: Distribute colored batters into prepared pans, using a spatula to level surfaces and eliminate potential air bubbles.
Baking Process: Position pans in a preheated oven, rotating midway through cooking to ensure consistent heat distribution and golden-brown edges. Bake for 25-30 minutes, checking for a springy texture that indicates perfect doneness.
Cooling Phase: Transfer baked layers to wire cooling racks, allowing complete temperature reduction before proceeding with cake assembly or decoration.
Notes
Precise Color Layering: Use gel food coloring for vibrant, saturated colors without altering batter consistency; add color gradually to achieve perfect ombre gradient.
Measurement Mastery: Always use a kitchen scale to ensure equal batter distribution across layers, guaranteeing uniform cake height and professional appearance.
Gentle Mixing Technique: Fold color into batter using silicone spatula with minimal strokes to prevent deflating air bubbles and maintain cake’s light, airy texture.
Cooling Crucial: Allow cakes to cool completely on wire racks before assembling to prevent structural collapse and ensure clean, crisp layer definition.
Recipe Testing and Troubleshooting; Time-Saving Kitchen Hacks; Global Flavor Exploration; Engaging Food Writing and Honest Reviews.
Education
Institute of Culinary Education (ICE), New York, NY
Program: Diploma in Culinary Arts
Focus: Hands-on training in foundational techniques, flavor development, recipe creation, and kitchen efficiency, with an emphasis on real-world application and storytelling through food.
Marcus Foley, based in Atlanta, GA, is a friendly food expert who makes cooking fun and simple.
With hands-on training from the Institute of Culinary Education and years of tasting everything from street food to fine dining, he shares easy kitchen hacks, global flavor ideas, and step-by-step recipes that turn kitchen mishaps into delicious surprises.
Marcus Foley
Food Critic & Kitchen Coach
Expertise
Recipe Testing and Troubleshooting; Time-Saving Kitchen Hacks; Global Flavor Exploration; Engaging Food Writing and Honest Reviews.
Education
Institute of Culinary Education (ICE), New York, NY
Marcus Foley, based in Atlanta, GA, is a friendly food expert who makes cooking fun and simple.
With hands-on training from the Institute of Culinary Education and years of tasting everything from street food to fine dining, he shares easy kitchen hacks, global flavor ideas, and step-by-step recipes that turn kitchen mishaps into delicious surprises.