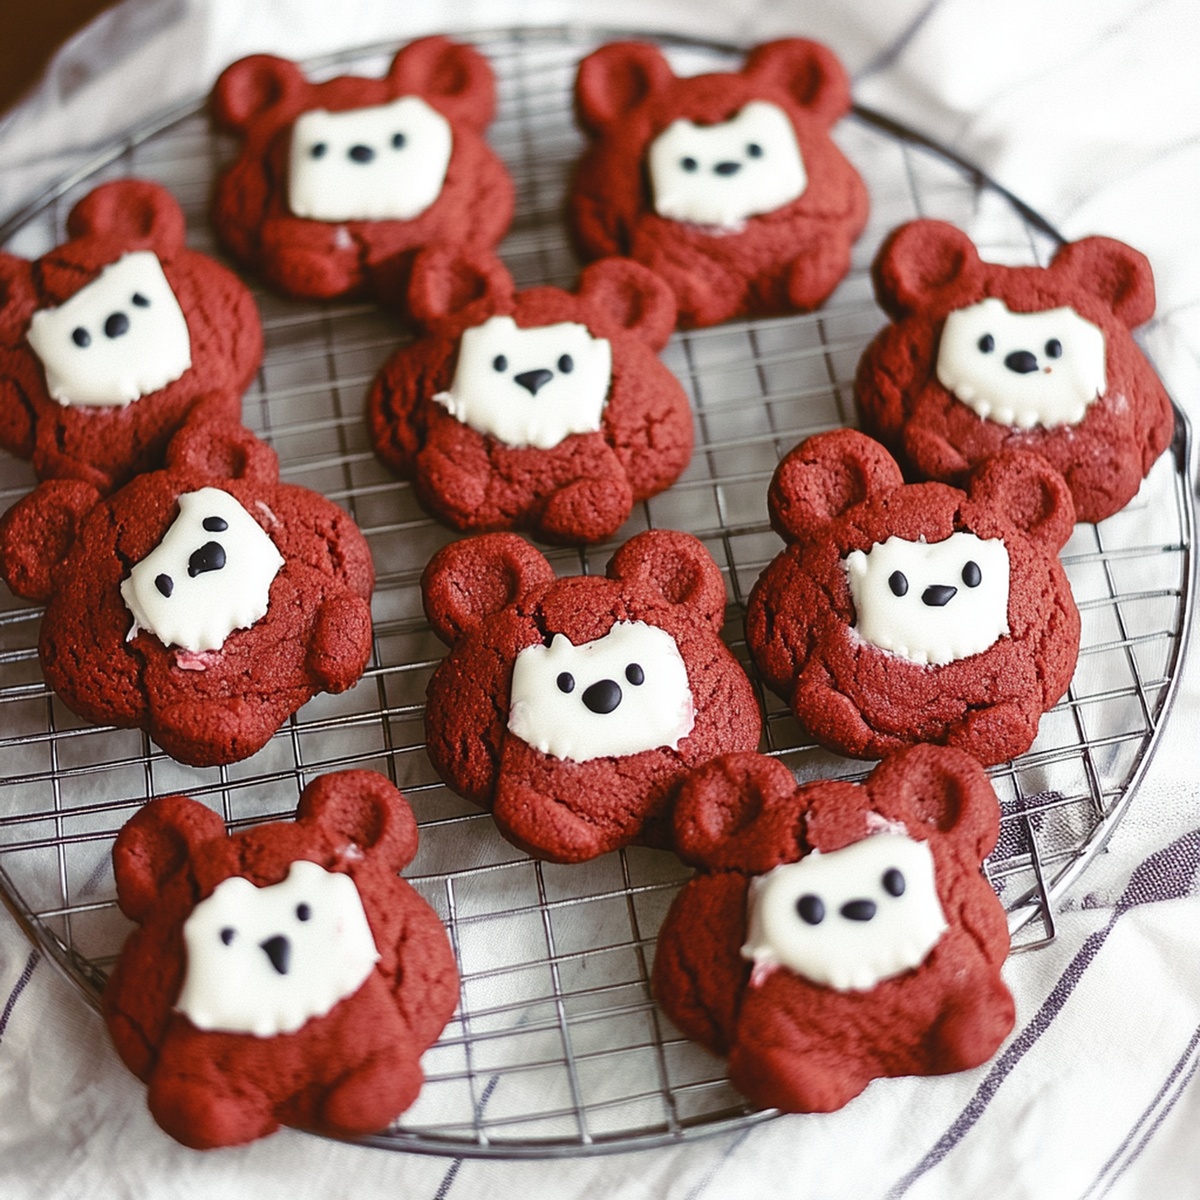
Adorable Red Velvet Bear Cookies Recipe – Sweet Treats with Love
Sweet, crumbly, and utterly irresistible, these red velvet bear cookies capture hearts with their adorable shape and rich cocoa flavor.
Soft crimson dough comes together effortlessly, promising delightful treats that melt in your mouth.
Chocolate lovers will adore the deep, velvety texture and vibrant color of these charming bear-shaped delights.
Each cookie carries a hint of vanilla and subtle chocolate undertones that make them impossible to resist.
Perfect for afternoon tea, children’s parties, or a cozy weekend baking session, these cookies bring whimsy and deliciousness to any gathering.
The playful bear design adds an extra layer of charm that transforms simple cookies into memorable treats.
Dive into this delectable recipe and create something truly special that will have everyone smiling.
Quick Recipe Overview
What You’ll Need For Red Velvet Bear Cookies
For The Base Of The Cookie Dough:For Color And Depth:For Structural Support:For Decorative Details:Equipment For Red Velvet Bear Cookies Prep
Steps To Make Red Velvet Bear Cookies From Scratch
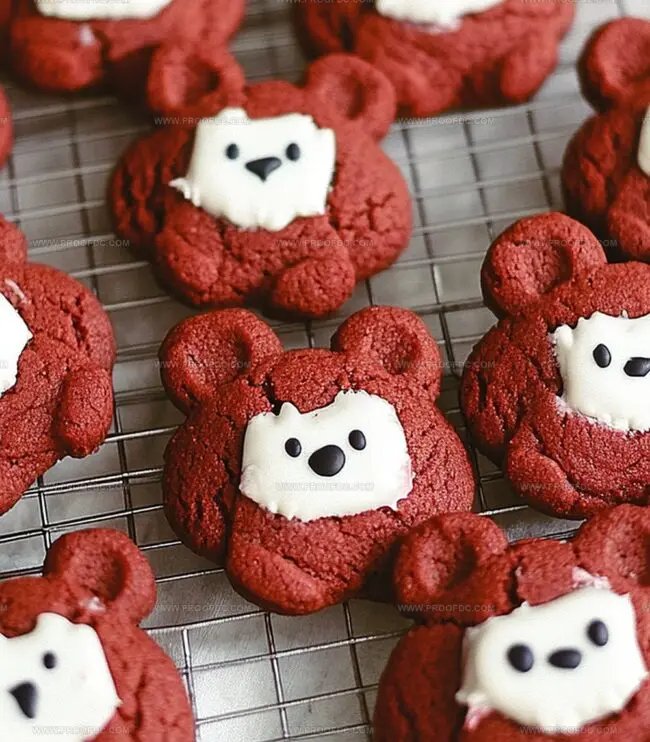
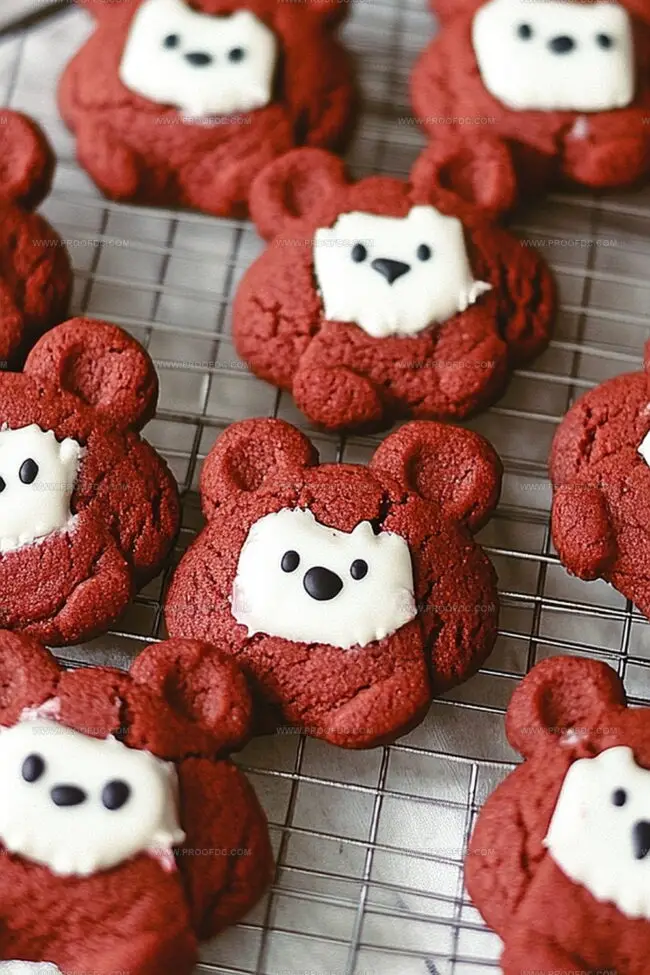
Craft cute bear-shaped treats that bring joy and warmth to your kitchen. These delightful cookies transform simple ingredients into charming edible companions with playful expressions.
Mix butter, sugars, and eggs into a smooth blend. Infuse rich red color and cocoa essence, creating a velvety base that promises delectable results.
Shape round heads with gentle hands, carefully forming tiny ears that give each cookie character. Arrange cookies on baking sheets, allowing space for their unique personalities to develop.
Transform plain cookie faces into expressive characters using chocolate chips for sparkling eyes and cute button noses. Press carefully to create adorable expressions.
Slide cookie sheet into warm oven, letting heat transform soft dough into golden-edged treats. Watch as your bear friends come to life with gentle browning.
Once cooled, add delicate chocolate details like tiny smiles or playful eyebrows. Each cookie becomes a unique sweet friend ready to delight anyone who sees them.
Fun Decorating Tips For Red Velvet Bear Cookies
Serve Red Velvet Bear Cookies On Any Occasion
Store Red Velvet Bear Cookies Without Losing Shape
Print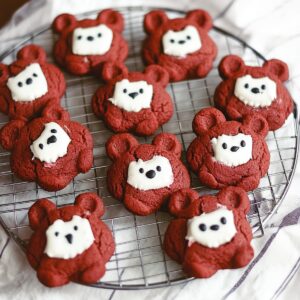
Soft Red Velvet Bear Cookies Recipe
- Total Time: 32 minutes
- Yield: 23 1x
Description
Whimsical red velvet bear cookies combine playful design with rich cocoa flavor. Chocolate lovers will adore these adorable treats that bring joy to dessert tables and spark delightful conversations.
Ingredients
- 1.25 cups (297 ml) all-purpose flour
- 0.5 cup (113 g) unsalted butter, softened
- 1 large egg
- 0.5 cup (100 g) granulated sugar
- 0.25 cup (50 g) brown sugar, packed
- 2 tbsps unsweetened cocoa powder
- 1 tsp vanilla extract
- 1 tsp red food coloring (gel preferred)
- 0.5 tsp baking soda
- 0.25 tsp salt
- 0.25 cup (45 g) mini chocolate chips (for eyes and noses)
- 0.25 cup (60 ml) melted dark or milk chocolate (optional, for extra details)
Instructions
- Preheat Environment: Set oven to 350F (175C) and line baking sheets with parchment paper or silicone mats.
- Mix Base: Cream softened butter with granulated and brown sugars until light and fluffy, then blend in egg, vanilla extract, and red food coloring until fully incorporated.
- Combine Dry Components: Whisk flour, cocoa powder, baking soda, and salt, then gently fold into wet mixture to create a smooth dough.
- Shape Bear Cookies: Form 1-inch dough spheres for bear heads, attaching smaller 1/4-inch balls as ears by gently pressing them into position.
- Prepare for Baking: Arrange bear-shaped cookies on prepared sheets with 2-inch spacing, embedding mini chocolate chips for eyes and nose.
- Bake and Cool: Bake for 10-12 minutes until edges set and centers remain slightly soft, then rest on baking sheets for 5 minutes before transferring to a wire rack.
- Decorate (Optional): Use melted chocolate to add personalized facial details and enhance the bear cookie’s character.
Notes
- Manage Moisture Perfectly: Red velvet demands precise moisture balance; avoid overmixing dough to prevent tough cookies and ensure soft, tender texture.
- Choose Quality Food Coloring: Select gel-based red food coloring for vibrant color without thinning cookie dough, guaranteeing rich, deep red hue without compromising consistency.
- Shape Consistently: Use uniform dough ball sizes when creating bear shapes to ensure even baking and consistent cookie appearance, preventing uneven browning or texture variations.
- Handle Delicate Details: Gently attach ear pieces and press chocolate chip features with light touch to maintain bear cookie structure and prevent crumbling during shaping or baking.
- Prep Time: 12 minutes
- Cook Time: 20 minutes
- Category: Desserts, Snacks
- Method: Baking
- Cuisine: American
Nutrition
- Serving Size: 23
- Calories: 150
- Sugar: 10 g
- Sodium: 80 mg
- Fat: 7 g
- Saturated Fat: 4 g
- Unsaturated Fat: 2.5 g
- Trans Fat: 0 g
- Carbohydrates: 20 g
- Fiber: 1 g
- Protein: 2 g
- Cholesterol: 25 mg
Marcus Foley
Food Critic & Kitchen Coach
Expertise
Recipe Testing and Troubleshooting; Time-Saving Kitchen Hacks; Global Flavor Exploration; Engaging Food Writing and Honest Reviews.
Education
Institute of Culinary Education (ICE), New York, NY
Marcus Foley, based in Atlanta, GA, is a friendly food expert who makes cooking fun and simple.
With hands-on training from the Institute of Culinary Education and years of tasting everything from street food to fine dining, he shares easy kitchen hacks, global flavor ideas, and step-by-step recipes that turn kitchen mishaps into delicious surprises.