
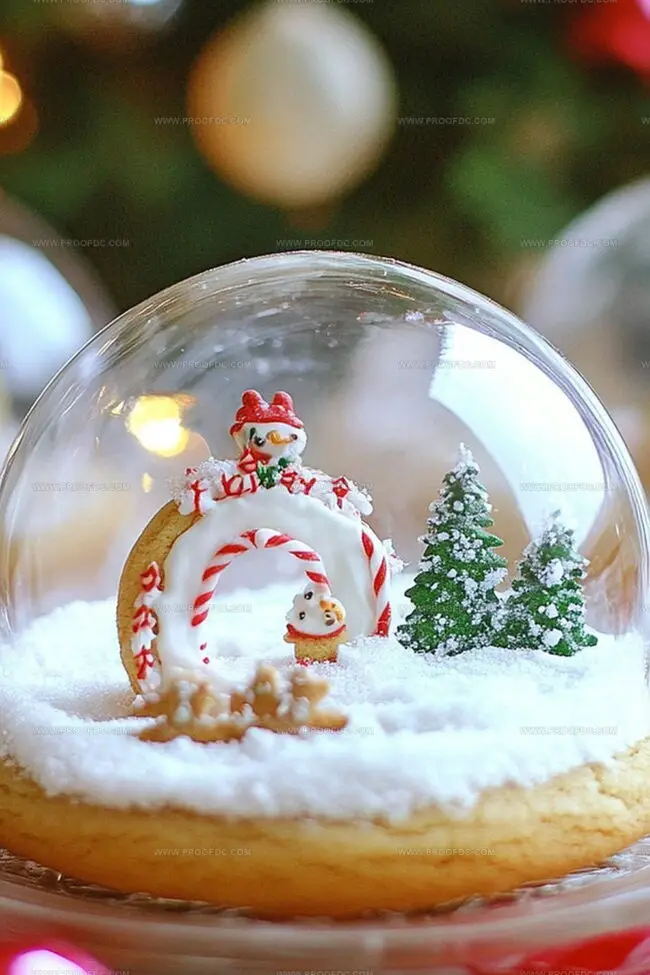
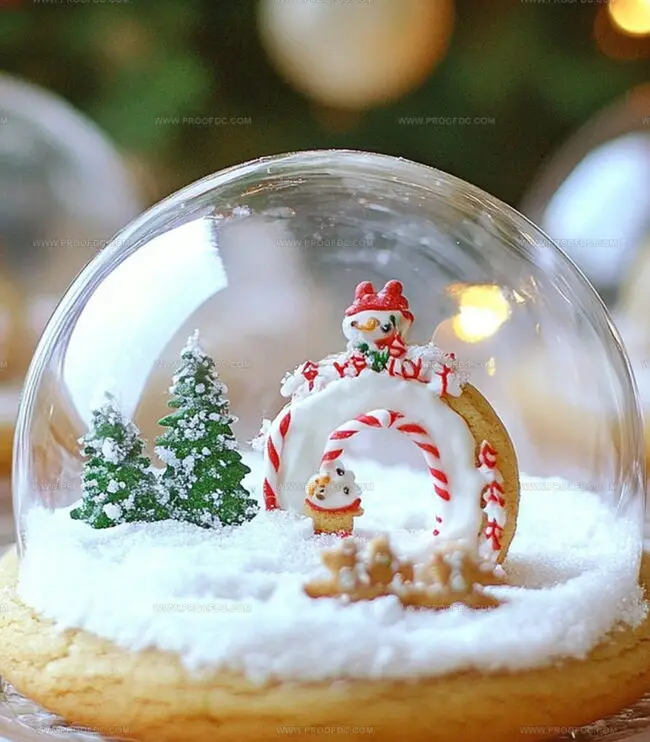
Dreamy Snow Globe Cookies Recipe for Winter Magic
Sweet winter memories dance around these delightful snow globe cookies that sparkle with imagination and nostalgia.
Creating miniature edible landscapes where delicate powdered sugar falls like soft whispers across festive scenes.
Childhood wonder meets culinary creativity in this charming dessert that looks almost too magical to eat.
Delicate sugar cookies become enchanting winter wonderlands with just a few simple decorating techniques.
Intricate details transform ordinary baking into an artistic adventure that captures the whimsy of seasonal celebrations.
Crafting these playful treats lets you channel your inner pastry artist and spread delightful holiday cheer.
Each cookie tells a story of winter’s gentle, sparkling magic waiting to be discovered and savored.
Why Snow Globe Cookies Are As Cute As They Are Tasty
What You’ll Need For Snow Globe Cookies
Dry Ingredients:Wet Ingredients:Flavor Enhancers:How To Make Snow Globe Cookies From Start To Finish
Step 1: Prepare Dry Ingredients
Grab a medium mixing bowl and whisk together flour, baking powder, and salt until perfectly blended. Ensure all dry ingredients are well combined with no lumps.
Step 2: Cream Butter and Sugar
In a spacious mixing bowl, blend butter and sugar using an electric mixer. Whip the mixture until it becomes light, airy, and incredibly fluffy. This process should take about 2-3 minutes, creating a smooth and creamy base.
Step 3: Add Wet Components
Gently introduce egg and vanilla extract into the butter-sugar mixture. Mix thoroughly until the ingredients are fully incorporated, creating a silky smooth batter.
Step 4: Combine Wet and Dry Mixtures
Slowly add the dry ingredients into the wet mixture. Stir gently and consistently until everything blends together seamlessly. The dough should come together without overmixing, maintaining a soft and tender texture.
Step 5: Chill the Dough
Wrap the cookie dough in plastic wrap and refrigerate for at least 30 minutes. Chilling helps the flavors meld and prevents cookies from spreading too much during baking.
Step 6: Shape Snow Globe Cookies
Roll out the chilled dough on a lightly floured surface. Use round cookie cutters to create perfect circular shapes that resemble snow globe bases.
Step 7: Bake to Perfection
Preheat the oven and arrange cookies on a lined baking sheet. Bake until edges turn golden brown, creating delightful snow globe-inspired treats.
Tips For Perfectly Frosted Snow Globe Cookies
How To Store Snow Globe Cookies Without Breaking Them
What To Pair With Snow Globe Cookies
Creative Ideas For Snow Globe Cookies
FAQs About Snow Globe Cookies
These snow globe cookies are adorably decorated to look like miniature winter scenes, turning a simple sugar cookie into a delightful edible craft that captures the magic of winter.
Not at all! These cookies are beginner-friendly. The recipe uses basic ingredients and simple techniques that even novice bakers can master with confidence.
Yes! You can prepare the cookie dough in advance and refrigerate it for 1-2 days before baking. This can help the flavors develop and make your baking process more convenient.
The key is creaming the butter and sugar until light and fluffy, which helps create a tender, soft cookie with a delicate texture. Don’t rush this step – take the full 2-3 minutes to mix them together.
Print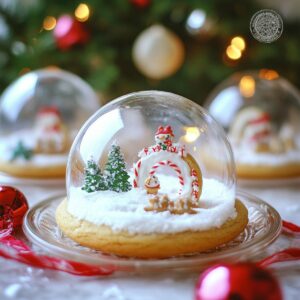
Snow Globe Cookies Recipe
- Total Time: 1 hour 40 minutes
- Yield: 24 1x
Description
Magical winter “snow globe cookies” bring whimsical holiday cheer right to sweet-loving kitchens. Delicate sugar cookies decorated with royal icing and sparkling sugar create miniature wonderlands perfect for festive celebrations.
Ingredients
Main Ingredients (Cookie Base):
- 2 ¾ cups (350 g) all-purpose flour
- 1 cup (225 g) unsalted butter, softened
- 1 cup (200 g) granulated sugar
- 1 large egg
Leavening and Seasoning:
- 1 teaspoon baking powder
- ½ teaspoon salt
- 1 ½ teaspoons vanilla extract
Decorations and Candy Glass:
- ½ cup (100 g) clear hard candies (e.g., Jolly Ranchers or clear mints)
- Royal icing (store-bought or homemade)
- Festive sprinkles, small edible decorations, or mini holiday candies
Instructions
- Sift the flour, baking powder, and salt into a pristine mixing vessel, ensuring a uniform texture without any lumps.
- In a spacious mixing bowl, vigorously blend butter and sugar using an electric mixer, creating a pale, airy mixture that transforms into a cloud-like consistency.
- Introduce the egg and vanilla extract to the butter mixture, whisking until the ingredients harmonize into a smooth, cohesive base.
- Gradually fold the dry ingredients into the wet mixture, stirring gently with a spatula until a uniform dough forms without overmixing.
- Once the dough comes together, gather and compress it into a compact disc, then wrap in plastic film and refrigerate for approximately 30 minutes to allow the ingredients to meld and the dough to firm up.
- After chilling, roll out the dough on a lightly floured surface to an even thickness, creating a smooth, consistent foundation for your snow globe cookies.
Notes
- Chill the dough for at least 30 minutes to prevent spreading and ensure crisp, clean-edged cookies that hold their snow globe shape perfectly.
- Use parchment paper or a silicone baking mat to prevent sticking and create even baking surfaces for uniform cookie results.
- Customize the cookie base by adding a hint of almond extract or lemon zest for a subtle, unexpected flavor twist that elevates the classic sugar cookie recipe.
- For gluten-free variations, substitute the all-purpose flour with a 1:1 gluten-free baking blend to make these cookies accessible to everyone with dietary restrictions.
- Prep Time: 30 minutes
- Cook Time: 10 minutes
- Category: Desserts
- Method: Mixing
- Cuisine: American
Nutrition
- Serving Size: 24
- Calories: 185
- Sugar: 12 g
- Sodium: 100 mg
- Fat: 9 g
- Saturated Fat: 5 g
- Unsaturated Fat: 4 g
- Trans Fat: 0 g
- Carbohydrates: 24 g
- Fiber: 0 g
- Protein: 2 g
- Cholesterol: 30 mg
Jenna Stewart
Head Chef & Recipe Innovator
Expertise
Farm-to-Table Cooking; Seasonal Menu Development; Visual Plating Techniques; Flavor Layering and Simple Prep Hacks.
Education
The Culinary Institute of America, Hyde Park, NY
Jenna Stewart is the inventive spirit behind many of our standout dishes at Pro of Delicious Creations. A proud graduate of The Culinary Institute of America, she built her skills mastering both classic recipes and fresh, modern twists.
Now, Jenna celebrates the beauty of seasonal, local ingredients, often sourced from her garden and nearby markets, to create recipes that are bursting with flavor yet easy to follow. When she’s not experimenting in the kitchen, Jenna loves exploring nature on hikes and discovering new treasures at local co-ops.