
Zippy Mini Lemon Cheesecake Tarts Recipe: No Oven Needed!
Creamy desserts often spark joy at the table, and these smooth lemon cheesecake tarts deliver pure delight with their tangy zest.
Rich cream cheese blends perfectly with bright citrus notes in every delectable bite.
Each small tart promises a burst of sunshine on your plate.
The delicate pastry cradles a silky filling that melts softly against your tongue.
Crisp edges and velvety centers create a sophisticated balance of textures.
Sweet yet tart, these miniature treats pack an elegant punch of flavor.
Prepare to experience a dessert that turns an ordinary moment into something extraordinary.
Quick Recipe Overview
What’s Inside Mini No-Bake Lemon Cheesecake Tarts
For Crust Base:For Creamy Filling:For Garnish:Tools For Mini No-Bake Lemon Cheesecake Tarts
Easy Steps To Make Mini No-Bake Lemon Cheesecake Tarts
Crush graham crackers into fine particles and mix with melted butter. Press mixture firmly into mini tart molds, creating a solid foundation. Pop into refrigerator for quick setting.
Blend soft cream cheese with zesty lemon juice and delicate vanilla. Separately, transform heavy cream into fluffy clouds with vigorous whisking. Delicately merge these two components until silky smooth.
Carefully transfer creamy mixture into prepared tart shells. Use spatula to smooth surfaces, ensuring elegant presentation. Chill thoroughly in refrigerator, allowing flavors to meld and texture to set perfectly.
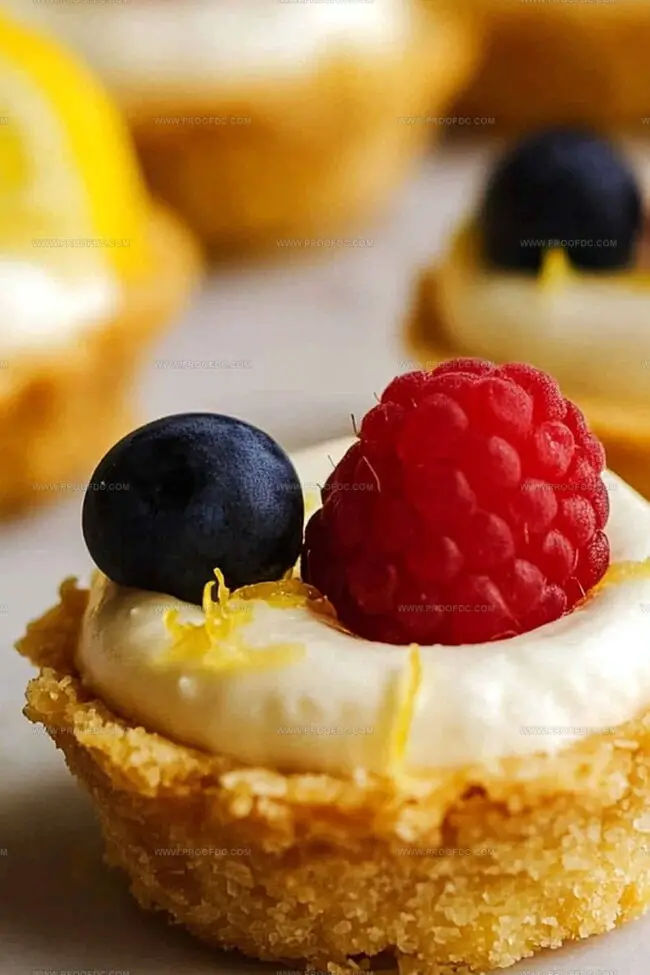
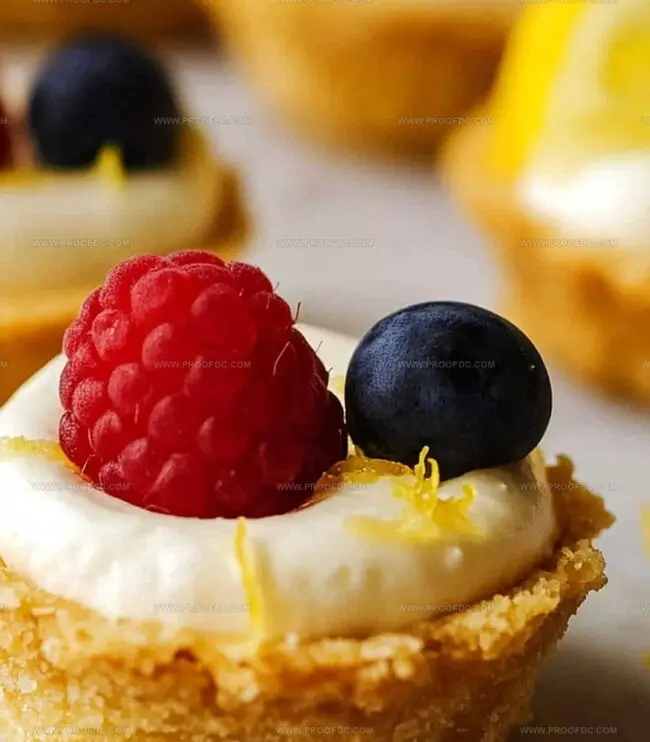
Decorate tarts with dollops of whipped cream or sprinkle of lemon zest. Scatter fresh berries for vibrant color and tangy burst. Serve immediately and watch guests’ faces light up with pure dessert joy.
Mini No-Bake Lemon Cheesecake Tarts: Handy Tips
Serving Guide For Mini No-Bake Lemon Cheesecake Tarts
Storage Tips For Mini No-Bake Lemon Cheesecake Tarts
Print
Smooth Lemon Cheesecake Tarts
- Total Time: 2 hours 15 minutes
- Yield: 7 1x
Description
Delightful mini no-bake lemon cheesecake tarts promise a zesty, creamy escape from ordinary desserts. Tangy citrus notes dance with smooth cream cheese, creating a simple yet elegant treat you’ll savor with pure delight.
Ingredients
- 4 tablespoons (59 ml) unsalted butter, melted
- 1 cup (240 ml) graham cracker crumbs
- 2 tablespoons (25 g) granulated sugar
- 8 ounces (225 g) cream cheese, softened
- ½ cup (120 ml) heavy whipping cream
- ⅓ cup (40 g) powdered sugar
- 2 tablespoons (30 ml) lemon juice, freshly squeezed
- 1 teaspoon lemon zest
- ½ teaspoon vanilla extract
- Whipped cream
- Fresh berries
- Lemon zest
- Mint leaves
Instructions
- Crust Creation: Pulverize graham crackers with sugar and melted butter until the texture mimics slightly damp sand, then meticulously press the mixture into mini tart molds, ensuring a compact and uniform base.
- Crust Chilling: Refrigerate the molded crusts for 15-20 minutes to establish a robust structural foundation that will support the forthcoming filling.
- Cream Cheese Preparation: Whip cream cheese until silky smooth, gradually blending in powdered sugar, fresh lemon juice, vibrant lemon zest, and vanilla extract to create a harmonious and zesty mixture.
- Cream Transformation: Whip heavy cream to stiff, billowy peaks in a separate bowl, then gently fold into the cream cheese mixture, preserving the delicate, airy consistency.
- Filling Assembly: Elegantly distribute the lemon cheesecake filling into the chilled tart shells using a spoon or piping bag, creating pristine, smooth surfaces.
- Final Chilling: Refrigerate the assembled tarts for a minimum of two hours, allowing flavors to harmonize and the filling to set completely.
- Garnishing and Serving: Adorn with delicate whipped cream rosettes, sprinkle additional lemon zest, or scatter fresh berries for an enhanced visual and flavor profile, then serve thoroughly chilled for optimal enjoyment.
Notes
- Chill Crust Perfectly: Ensure graham cracker base is refrigerated exactly 15-20 minutes for optimal firmness, preventing crumbling when removing from molds.
- Prevent Lumpy Filling: Soften cream cheese at room temperature beforehand and beat thoroughly to eliminate any potential texture inconsistencies.
- Fold Gently: When combining whipped cream and cream cheese, use a spatula with soft, circular motions to maintain the light, airy texture without deflating the mixture.
- Control Lemon Intensity: Adjust lemon juice and zest quantities based on personal preference, starting with smaller amounts and tasting progressively to achieve desired tanginess without overwhelming the dessert.
- Prep Time: 15 minutes
- Cook Time: 2 hours
- Category: Desserts, Snacks
- Method: Mixing
- Cuisine: American
Nutrition
- Serving Size: 7
- Calories: 290
- Sugar: 16 g
- Sodium: 160 mg
- Fat: 21 g
- Saturated Fat: 12 g
- Unsaturated Fat: 8 g
- Trans Fat: 0 g
- Carbohydrates: 24 g
- Fiber: 1 g
- Protein: 3 g
- Cholesterol: 70 mg
Marcus Foley
Food Critic & Kitchen Coach
Expertise
Recipe Testing and Troubleshooting; Time-Saving Kitchen Hacks; Global Flavor Exploration; Engaging Food Writing and Honest Reviews.
Education
Institute of Culinary Education (ICE), New York, NY
Marcus Foley, based in Atlanta, GA, is a friendly food expert who makes cooking fun and simple.
With hands-on training from the Institute of Culinary Education and years of tasting everything from street food to fine dining, he shares easy kitchen hacks, global flavor ideas, and step-by-step recipes that turn kitchen mishaps into delicious surprises.