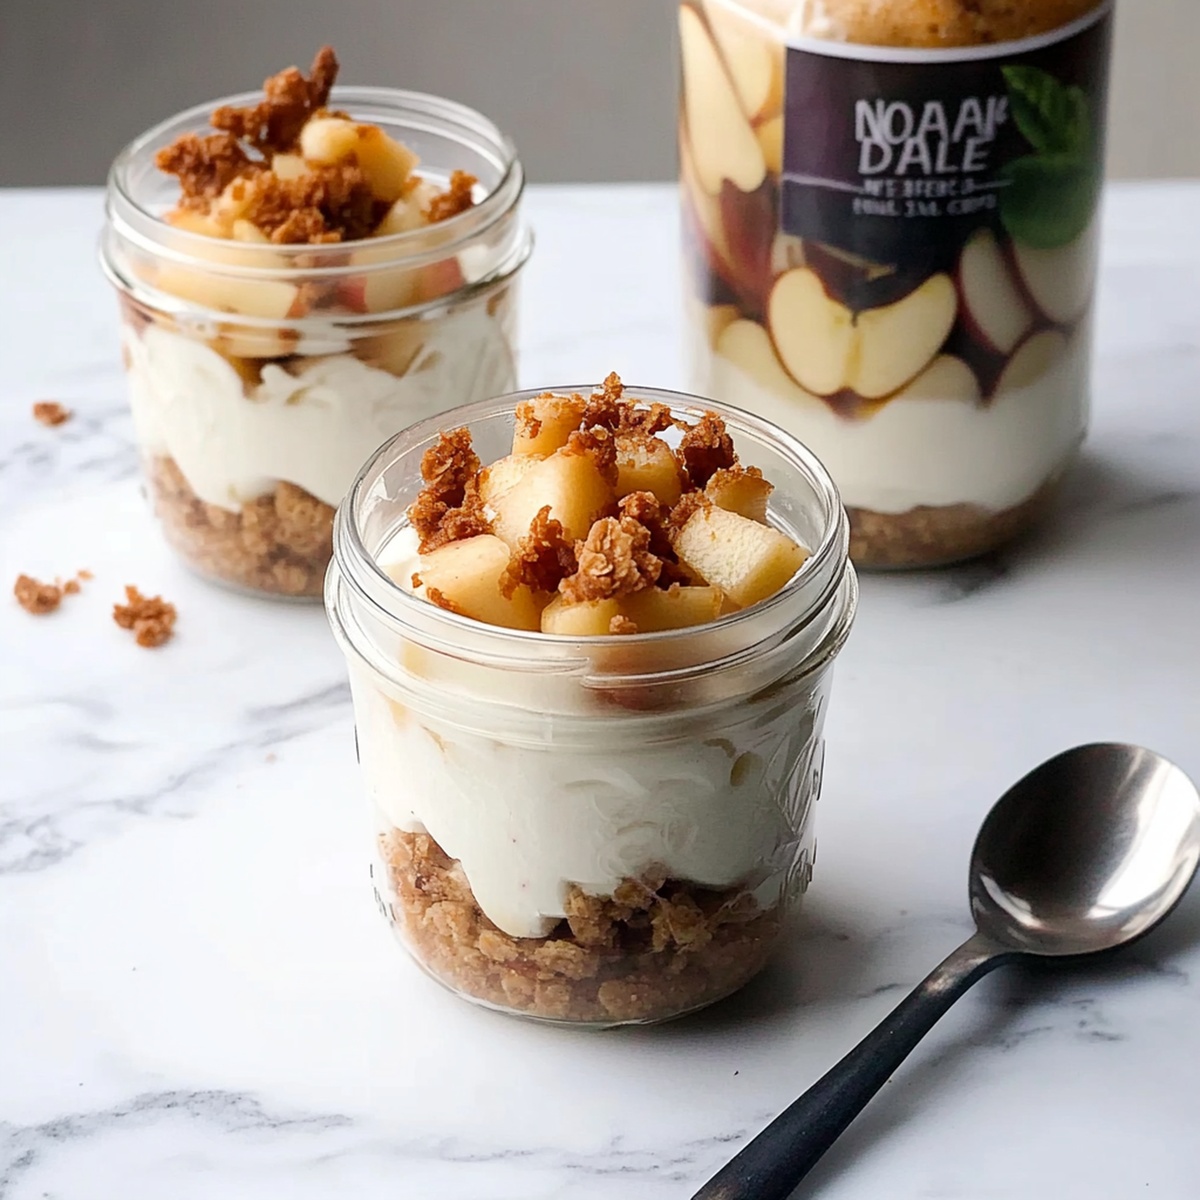
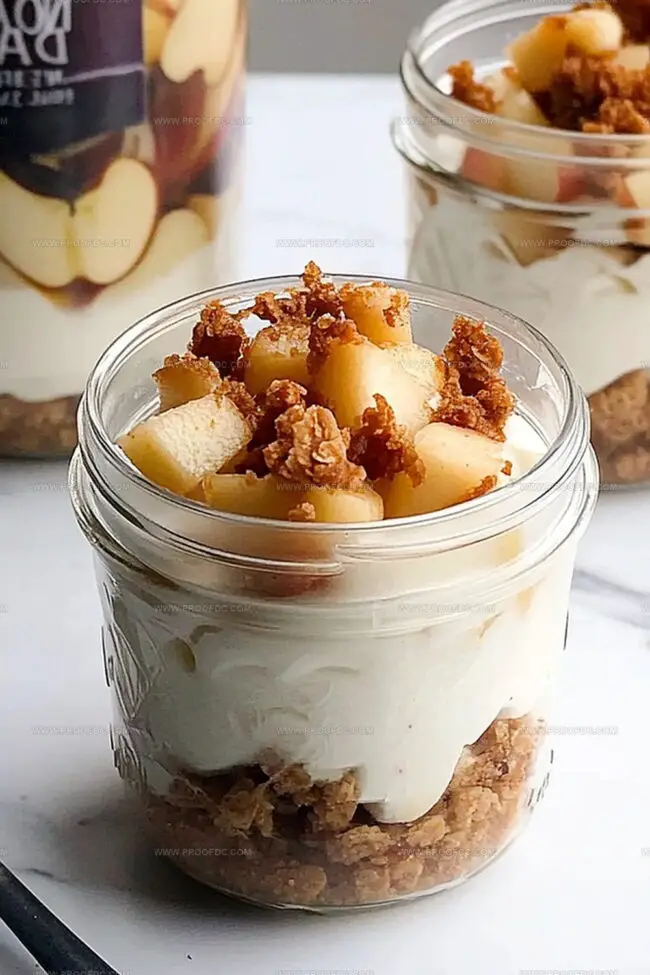
Dreamy No-Bake Apple Cheesecake Jars Recipe for Sweet Lovers
Sweet, creamy, and utterly irresistible, these smooth apple cheesecake jars bring a delightful twist to traditional desserts.
Layers of velvety cheesecake blend perfectly with tender cinnamon-spiced apples nestled in charming glass containers.
Each spoonful promises a harmonious dance of textures and flavors that will enchant your taste buds.
The crumbly graham cracker base adds a delightful crunch to the silky filling.
Seasonal apples elevate this dessert from ordinary to extraordinary, creating a portable treat that looks as amazing as it tastes.
No fancy baking skills required – just simple ingredients and a few easy steps.
Prepare to fall in love with this elegant and crowd-pleasing dessert that’s sure to become a new favorite.
Quick Recipe Overview
What You’ll Need For No-Bake Apple Cheesecake Jars
For Crust:For Cheesecake Filling:For Apple Topping:Handy Tools For No-Bake Apple Cheesecake Jars
Easy Steps To Make No-Bake Apple Cheesecake Jars
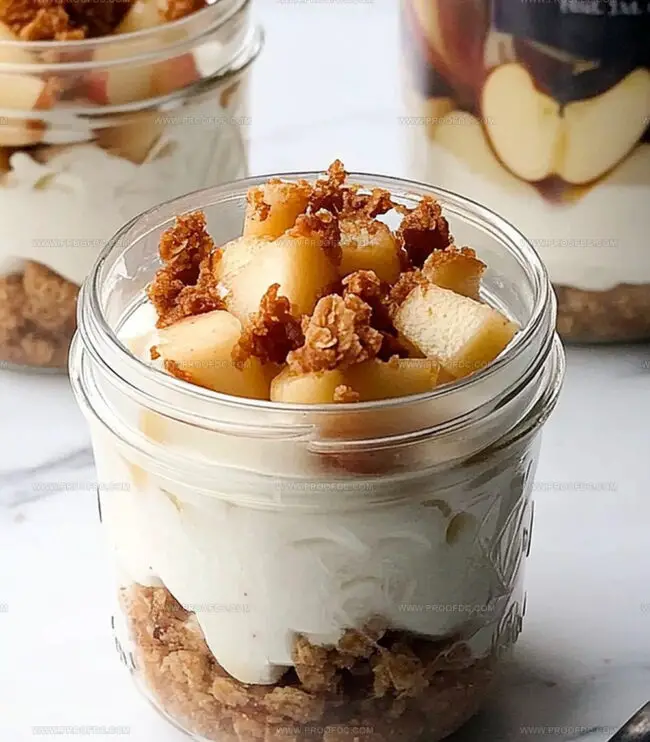
Crush graham crackers and blend with melted butter and sugar. Press this delightful mixture into the bottom of charming jars, creating a sweet and sturdy base that will make your dessert pop with texture.
Beat cream cheese until silky smooth, folding in whipped cream to create a cloud-like filling that will melt in your mouth. Gently layer this heavenly mixture over the graham cracker crust, ensuring each spoonful is pure bliss.
Simmer diced apples with brown sugar and warm spices in a pan. Let the fruit soften and transform into a luscious, golden topping that will make your taste buds dance with excitement. Thicken the sauce to create a rich, glossy finish.
Crown your creamy cheesecake with the warm apple mixture. For an extra touch of indulgence, drizzle with caramel or sprinkle with crunchy nuts. Chill briefly to let the flavors mingle and develop a luxurious, velvety texture.
Tips To Improve No-Bake Apple Cheesecake Jars
Best Ways To Serve No-Bake Apple Cheesecake Jars
How To Store No-Bake Apple Cheesecake Jars Properly
Print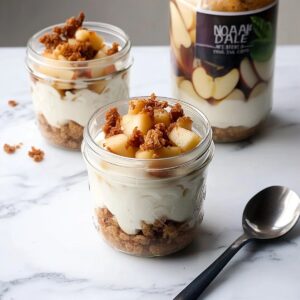
Smooth Apple Cheesecake Jars
- Total Time: 25 minutes
- Yield: 5 1x
Description
Creamy no-bake apple cheesecake jars blend sweet American orchard flavors with silky cream cheese layers. Crisp graham cracker bases and cinnamon-spiced apple compote create delightful dessert perfection you will savor spoonful by spoonful.
Ingredients
- 8 oz (225 g) cream cheese, softened
- 2 medium apples, peeled, cored, and diced (Granny Smith or Honeycrisp)
- 1 cup graham cracker crumbs
- ½ cup heavy whipping cream
- 4 tbsps unsalted butter, melted
- ⅓ cup powdered sugar
- 2 tbsps granulated sugar
- 2 tbsps brown sugar
- ½ tsp vanilla extract
- ½ tsp cinnamon
- ¼ tsp nutmeg
- 1 tsp lemon juice
- 1 tsp cornstarch
- 1 tbsp water
- Whipped cream
- Caramel sauce
- Chopped nuts (pecans or walnuts)
Instructions
- Crust Creation: Merge graham cracker crumbs, sugar, and melted butter into a cohesive sandy texture. Firmly press the mixture into serving jars, creating a solid foundation. Briefly refrigerate to stabilize the base while preparing subsequent layers.
- Creamy Filling Fusion: Blend cream cheese with powdered sugar and vanilla until achieving a velvety smooth consistency. Separately whip heavy cream to stiff peaks, then gently fold into the cream cheese mixture, maintaining a light, airy composition. Distribute the luxurious filling evenly over the chilled graham cracker base.
- Apple Compote Transformation: In a saucepan, combine diced apples with brown sugar, cinnamon, nutmeg, and lemon juice. Sauté until apples soften and caramelize, developing rich, deep flavors. Introduce a cornstarch slurry to create a glossy, thickened sauce. Allow to cool slightly, concentrating the aromatic spices.
- Final Assembly and Garnish: Artfully spoon the spiced apple compote atop the cream cheese layer, ensuring complete coverage. Elevate the dessert with optional embellishments like whipped cream, caramel drizzle, or toasted nut sprinkles. Serve chilled for optimal texture and flavor integration.
Notes
- Choose Precise Graham Cracker Base: Press crumbs firmly and evenly to prevent crumbling and ensure a stable foundation for your cheesecake jars.
- Control Cream Cheese Texture: Whip ingredients at room temperature to avoid lumps and achieve a smooth, velvety consistency that blends seamlessly.
- Master Apple Compote Technique: Cook apples slowly to develop deep caramel notes and prevent burning; use low-medium heat for perfect softening and flavor development.
- Enhance Serving Flexibility: Prepare components separately and assemble just before serving to maintain optimal texture and prevent soggy graham cracker layers.
- Prep Time: 10 minutes
- Cook Time: 15 minutes
- Category: Desserts, Snacks
- Method: Mixing
- Cuisine: American
Nutrition
- Serving Size: 5
- Calories: 350
- Sugar: 18 g
- Sodium: 150 mg
- Fat: 22 g
- Saturated Fat: 12 g
- Unsaturated Fat: 8 g
- Trans Fat: 0 g
- Carbohydrates: 36 g
- Fiber: 2 g
- Protein: 4 g
- Cholesterol: 60 mg
Marcus Foley
Food Critic & Kitchen Coach
Expertise
Recipe Testing and Troubleshooting; Time-Saving Kitchen Hacks; Global Flavor Exploration; Engaging Food Writing and Honest Reviews.
Education
Institute of Culinary Education (ICE), New York, NY
Marcus Foley, based in Atlanta, GA, is a friendly food expert who makes cooking fun and simple.
With hands-on training from the Institute of Culinary Education and years of tasting everything from street food to fine dining, he shares easy kitchen hacks, global flavor ideas, and step-by-step recipes that turn kitchen mishaps into delicious surprises.