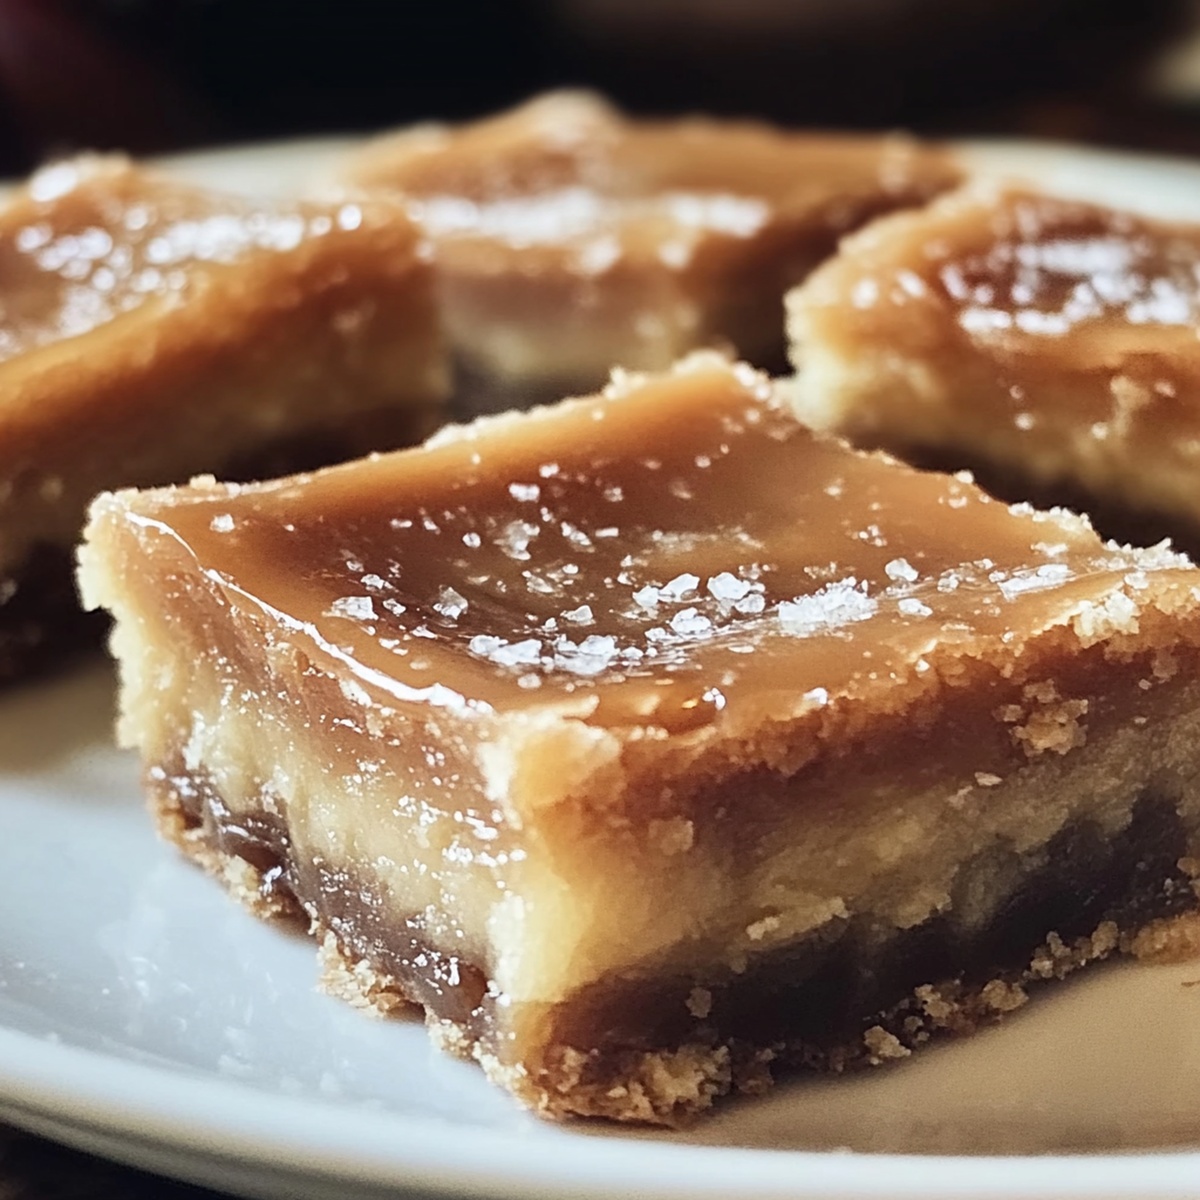
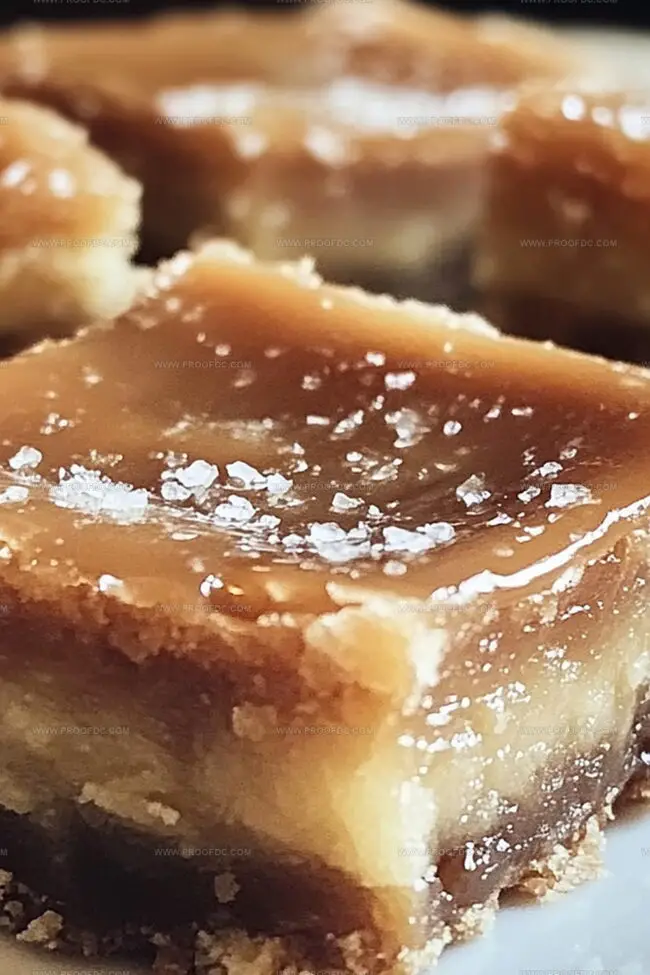
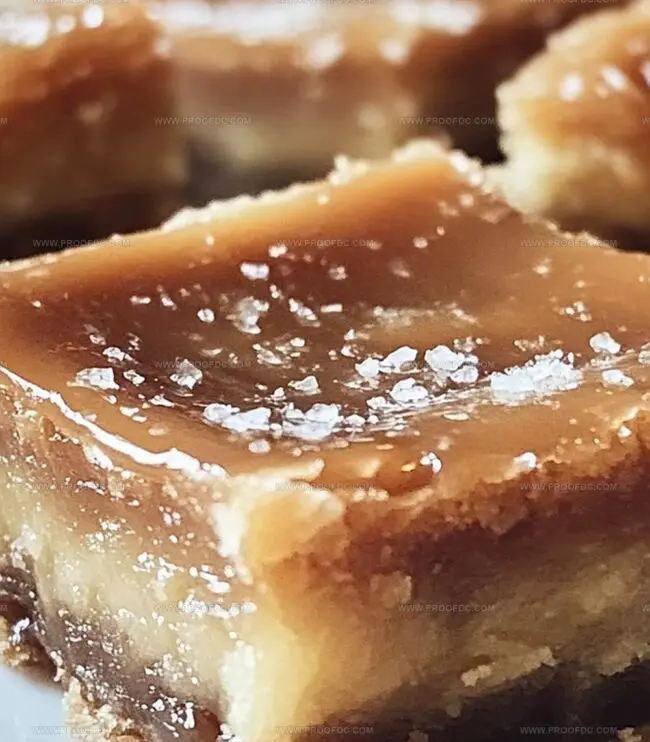
Irresistibly Gooey Salted Caramel Butter Bars Recipe
Sinking your teeth into a decadent salted caramel butter bars dream that melts perfectly on your tongue.
Sweet and salty flavors dance together in this irresistible treat.
Buttery layers promise an indulgent experience that will make your taste buds sing.
Each crumbly bite carries a rich, golden essence of pure comfort.
Crisp edges hint at the delightful texture waiting to surprise you.
Rich caramel swirls through delicate pastry, creating a symphony of deliciousness.
Grab a plate and get ready for a dessert that feels like a warm hug from your favorite bakery.
Reasons To Crave Salted Caramel Butter Bars
What You’ll Need For Salted Caramel Butter Bars
Base Ingredients:Caramel Ingredients:Baking Essentials:How To Prepare Salted Caramel Butter Bars
Step 1: Prepare the Baking Canvas
Grab a 9×13-inch baking pan and line it with parchment paper. Alternatively, give the pan a light coating of cooking spray. Fire up the oven to a cozy 325°F (165°C), creating the perfect warm environment for your delectable treat.
Step 2: Whip Up the Magical Dough
In a spacious mixing bowl, unleash the magic by combining:Cream these ingredients until they transform into a fluffy cloud of deliciousness. Splash in some vanilla extract for an extra flavor boost. Gently fold in flour and salt, mixing until the dough becomes a crumbly wonderland.
Step 3: Create the Delicious Foundation
Spread half of your dreamy dough across the bottom of the pan, pressing it down to form an even, golden crust. Slide the pan into the preheated oven and bake for 15 minutes until it turns a light golden color. Carefully remove and let it cool slightly.
Step 4: Craft the Caramel Masterpiece
In a small bowl, blend caramel sauce with sea salt. Play around with the salt levels to match your taste buds’ desires. This is where you become the flavor artist!
Step 5: Drizzle the Liquid Gold
Generously pour the salted caramel sauce over the partially baked crust, ensuring an even distribution of sweet and salty goodness.
Step 6: Crown with Crumbly Topping
Sprinkle the remaining dough over the caramel layer like a delicate blanket. Aim for an even coverage that will make your bars look absolutely irresistible.
Step 7: Bake to Perfection
Return the pan to the oven and let it bake for 25-30 minutes. Watch for a light golden top that signals your bars are ready to become a legendary dessert.
Step 8: Patience Brings Sweetness
Allow the bars to cool completely in the pan. For picture-perfect slices, pop the pan in the refrigerator for 30 minutes before cutting. This helps the bars set and makes cutting a breeze.
Helpful Hints For Salted Caramel Butter Bars
How To Keep Salted Caramel Butter Bars Fresh And Warm
Great Matches For Salted Caramel Butter Bars
New Ways To Enjoy Salted Caramel Butter Bars
Salted Caramel Butter Bars Questions Made Simple
The salted caramel butter bars combine a rich, buttery crust with a decadent caramel layer, creating a perfect balance of sweet and salty flavors that melt in your mouth.
Absolutely! Homemade caramel sauce works wonderfully and can add an extra depth of flavor to these bars. Just ensure it’s cooled slightly before adding to the recipe.
Look for a light golden color on the top layer and a set texture. The edges should be slightly firm but not dark brown. If the center still looks too soft, give it a few more minutes in the oven.
The sea salt enhances the caramel’s sweetness and creates a complex flavor profile. It cuts through the richness of the butter and adds a sophisticated twist to the traditional sweet bar.
Print
No-Bake Banana Split Cake Recipe
- Total Time: 2 hours 30 minutes
- Yield: 12 1x
Description
Indulgent no-bake banana split cake brings classic dessert dreams to life with layers of creamy goodness. Smooth graham cracker crust, luscious cream cheese filling, and fresh banana slices create a chilled summer treat you’ll crave again and again.
Ingredients
Main Ingredients:
- 4 large bananas, sliced
- 2 (8 ounces) packages cream cheese, softened
- 1 (20 ounces) can crushed pineapple, drained
- 1 (16 ounces) container frozen whipped topping, thawed
Crust and Sweeteners:
- 2 cups graham cracker crumbs
- ¾ cup granulated sugar
- ½ cup unsalted butter, melted
- 1 ½ cups powdered sugar
- 1 teaspoon vanilla extract
Toppings:
- ½ cup chopped nuts (such as peanuts or pecans)
- Maraschino cherries
- Chocolate syrup or hot fudge sauce (optional)
Instructions
- Craft a robust foundation by thoroughly blending graham cracker crumbs with sugar and melted butter until the mixture resembles coarse sand. Press the mixture compactly into a rectangular dish, creating a uniform base layer. Chill in the refrigerator to solidify the crust.
- Whip cream cheese with powdered sugar and vanilla until achieving a velvety, lump-free consistency. Carefully spread this luxurious mixture across the chilled graham cracker foundation, ensuring complete and even coverage.
- Create a vibrant fruit landscape by laying fresh banana slices in neat, overlapping rows across the cream cheese surface. Follow with a generous distribution of drained pineapple chunks, covering the banana layer completely.
- Crown the fruity foundation with a soft, billowing layer of whipped topping. Spread gently to preserve the underlying fruit arrangement and create a smooth, cloud-like surface.
- Embellish the dessert with a delicate shower of chopped nuts, providing textural contrast. Strategically place bright maraschino cherries for visual appeal and optional chocolate drizzle for decadent finishing touches.
- Allow the assembled dessert to rest and harmonize in the refrigerator for several hours or overnight. This chilling period enables flavors to meld and the dessert to set perfectly. Serve thoroughly chilled for optimal taste and texture.
Notes
- Opt for room temperature ingredients to ensure smooth, lump-free cream cheese layer that spreads evenly and blends perfectly.
- Drain pineapple thoroughly using a fine-mesh strainer to prevent excess liquid from making the dessert soggy and maintaining a firm texture.
- Experiment with alternative crusts like crushed chocolate cookies or gluten-free graham crackers to accommodate different dietary preferences and add unique flavor profiles.
- Prepare this dessert a day ahead for enhanced flavor melding and easier serving, allowing the layers to set and develop a more cohesive taste experience.
- Prep Time: 30 minutes
- Cook Time: 2 hours
- Category: Desserts, Snacks
- Method: Mixing
- Cuisine: American
Nutrition
- Serving Size: 12
- Calories: 350
- Sugar: 30 g
- Sodium: 150 mg
- Fat: 20 g
- Saturated Fat: 10 g
- Unsaturated Fat: 8 g
- Trans Fat: 0 g
- Carbohydrates: 40 g
- Fiber: 2 g
- Protein: 3 g
- Cholesterol: 25 mg
Jenna Stewart
Head Chef & Recipe Innovator
Expertise
Farm-to-Table Cooking; Seasonal Menu Development; Visual Plating Techniques; Flavor Layering and Simple Prep Hacks.
Education
The Culinary Institute of America, Hyde Park, NY
Jenna Stewart is the inventive spirit behind many of our standout dishes at Pro of Delicious Creations. A proud graduate of The Culinary Institute of America, she built her skills mastering both classic recipes and fresh, modern twists.
Now, Jenna celebrates the beauty of seasonal, local ingredients, often sourced from her garden and nearby markets, to create recipes that are bursting with flavor yet easy to follow. When she’s not experimenting in the kitchen, Jenna loves exploring nature on hikes and discovering new treasures at local co-ops.