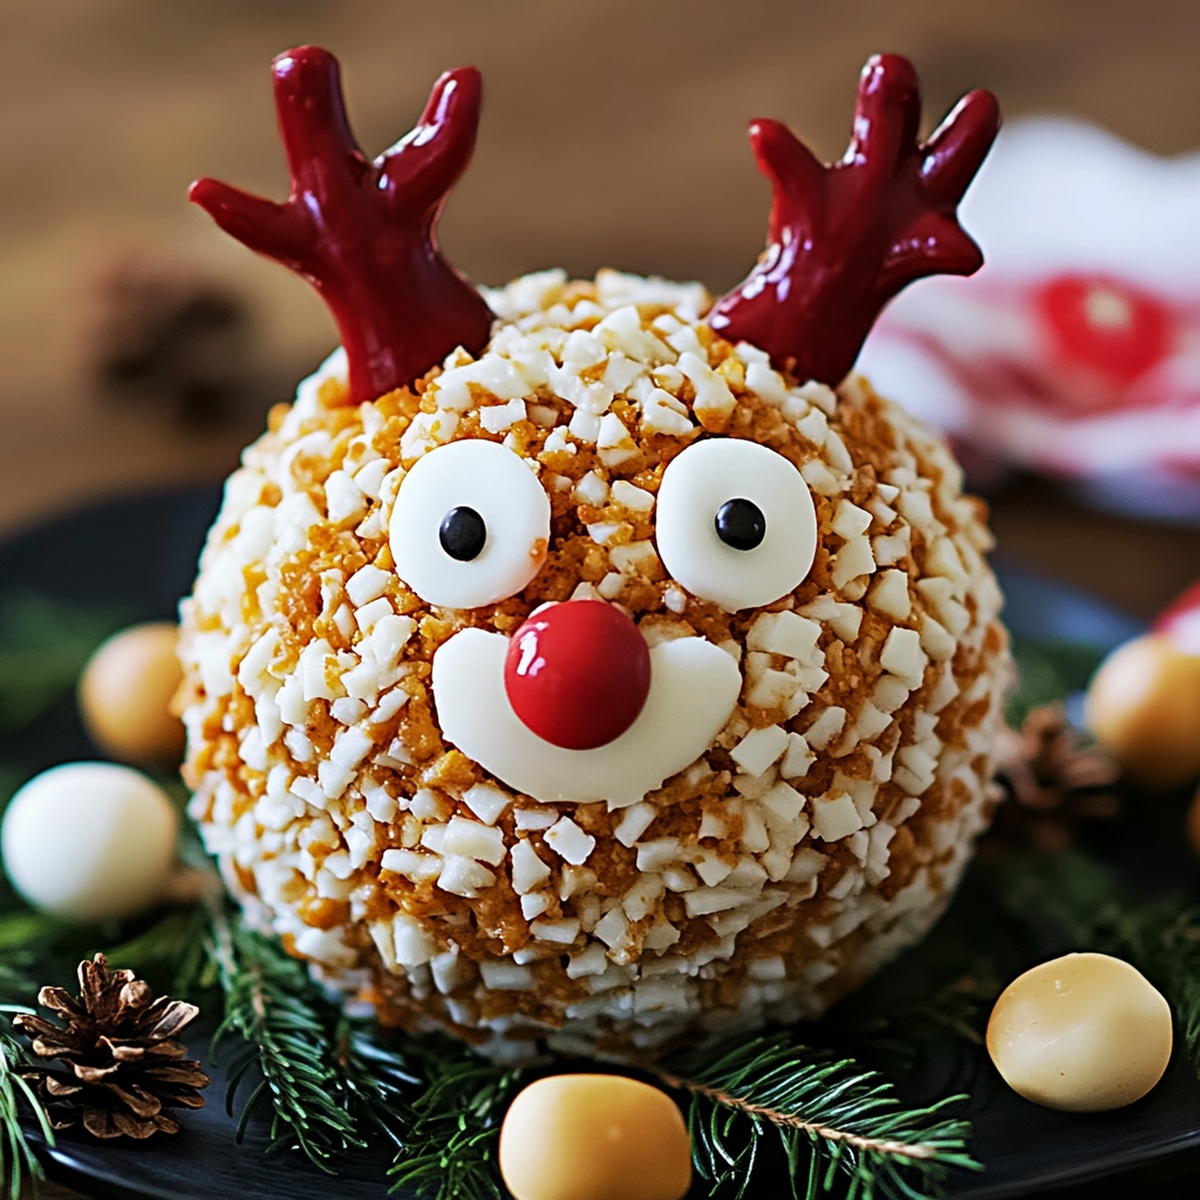
Jolly Rudolph Christmas Cheese Ball Recipe for Holiday Magic
A festive Rudolph Christmas cheese ball that brings whimsy to your holiday spread.
Unexpected ingredients dance together in this playful appetizer.
Red pepper and cream cheese create a delightful canvas for creativity.
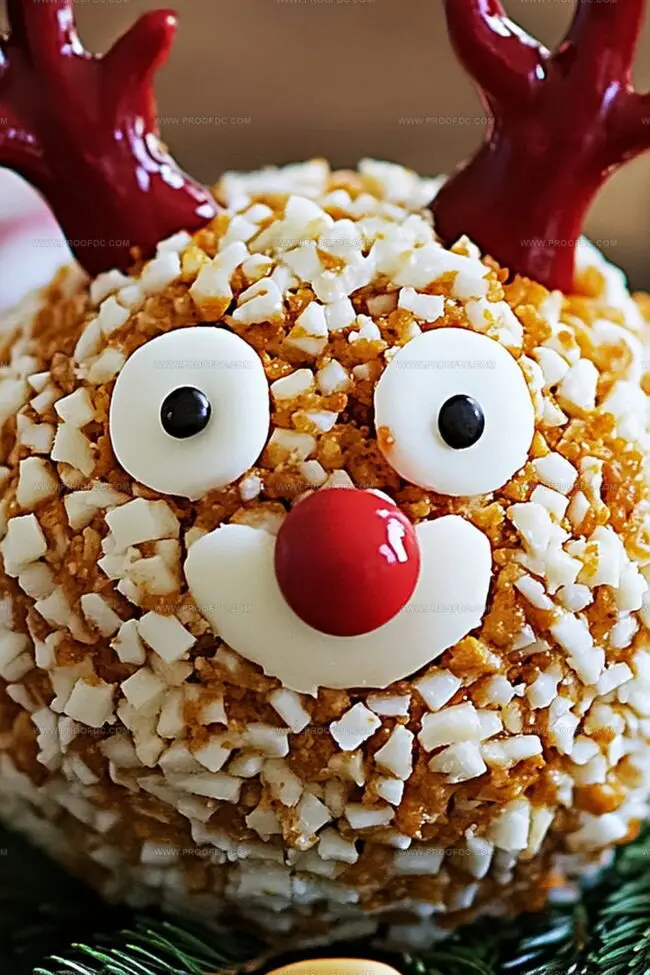
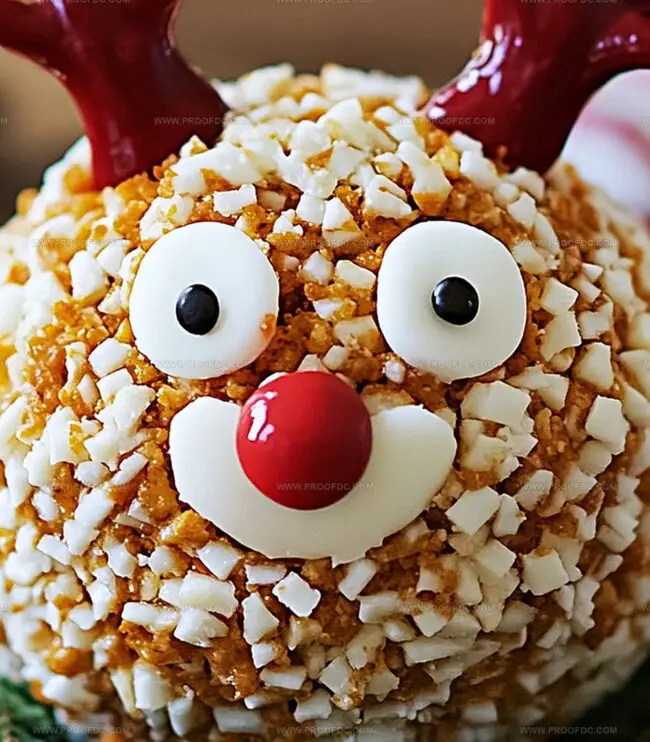
Adorned with pretzels and olive details, this snack captures seasonal cheer.
Partygoers will marvel at the clever design mimicking santa’s famous reindeer.
The smiles and laughter when you present this charming centerpiece.
Get ready to become the star of any holiday gathering with this memorable treat.
Why Rudolph Christmas Cheese Ball Is Fun And Festive
What You’ll Need For Rudolph Christmas Cheese Ball
Main Cheese Components:Seasoning Blend:Decoration and Serving Components:How To Shape Rudolph Christmas Cheese Ball Perfectly
Step 1: Whip Up The Cheesy Base
In a spacious mixing bowl, gather these delightful ingredients:Blend everything together until smoothly combined. Sculpt the mixture into a perfect round shape. Snugly wrap the cheese ball in plastic wrap and tuck it into the refrigerator. Let it chill and firm up for about an hour.
Step 2: Transform Into Rudolph’s Masterpiece
When the cheese ball feels firm and cold, roll it generously in:Gently place your festive creation on a serving plate. Now for the magical touches:Step 3: Dive Into Deliciousness
Serve your cheerful reindeer cheese ball with an array of dippers:Get ready for holiday munching and festive snacking!
Tips To Make Rudolph Christmas Cheese Ball Stand Out
How To Store Rudolph Christmas Cheese Ball For Freshness
What Goes Great With Rudolph Christmas Cheese Ball
New Ideas For Rudolph Christmas Cheese Ball Designs
FAQs About Rudolph Christmas Cheese Ball
This adorable holiday appetizer is not just delicious, but it’s a total conversation starter that brings fun and whimsy to your festive table. Kids and adults alike will love the playful reindeer design that transforms a classic cheese ball into a memorable party treat.
Absolutely! You can make the cheese ball up to 2-3 days before your event. Prepare the base mixture, shape it, and store it wrapped in the refrigerator. Just add the decorative elements like pretzel antlers, candy eyes, and red nose right before serving to keep everything looking fresh and cute.
The key is to let your cream cheese soften at room temperature before mixing. This helps create a smooth, easy-to-blend mixture that will hold its shape perfectly. Mix ingredients thoroughly but avoid overmixing, which can make the cheese ball too dense.
No worries! Get creative with what you have. If you can’t find candy eyes, use small pieces of black olives. Instead of a red candy, a cherry tomato works great. The goal is to capture the playful Rudolph spirit, so have fun with your decorations.
Print
Rudolph Christmas Cheese Ball Recipe
- Total Time: 1 hour 15 minutes
- Yield: 12 1x
Description
Festive holiday cheer meets creamy delights in this Rudolph Christmas Cheese Ball, perfect for spreading seasonal joy at gatherings. Guests will love its playful reindeer design and rich, tangy flavor that brings Christmas spirit right to the appetizer table.
Ingredients
Cheese Ball Base:
- 2 cups shredded cheddar cheese
- 8 ounces (226 grams) cream cheese, softened
- ¼ cup sour cream
Spices and Seasonings:
- ¼ teaspoon garlic powder
- ¼ teaspoon onion powder
- ¼ teaspoon smoked paprika
- Salt to taste
- Pepper to taste
Decoration:
- ¼ cup crushed pecans or crushed pretzels
- 2 large pretzel sticks
- 1 red candy or cherry tomato
- 2 candy eyes or small rounds of cream cheese/olives
Instructions
- In a spacious mixing vessel, thoroughly blend softened cream cheese, sharp cheddar, tangy sour cream, aromatic garlic powder, zesty onion powder, warm paprika, delicate salt, and cracked pepper until the mixture achieves a smooth, uniform consistency.
- Gently shape the creamy amalgamation into a perfectly rounded sphere, ensuring compact formation and minimal air pockets.
- Encase the cheese formation completely in transparent plastic wrap, securing it tightly to maintain its structural integrity.
- Refrigerate the wrapped delicacy for a minimum of 60 minutes, allowing the flavors to meld and the texture to firm up completely.
- After chilling, carefully roll the cheese ball through a bed of crushed pecans or crisp pretzels, creating an even, textured exterior coating.
- Transfer the nut-encrusted sphere to an elegant serving platter, preparing for its festive transformation.
- Craft Rudolph’s distinctive features by strategically positioning two candy eyes to capture his playful essence.
- Insert crisp pretzel sticks at the top of the cheese ball, angling them to mimic realistic antler branches.
- Complete the whimsical character by placing a vibrant red candy or petite cherry tomato to represent his iconic glowing nose.
- Present alongside an assortment of crisp crackers, crunchy pretzels, or fresh vegetable batons for delightful dipping.
Notes
- Customize the cheese ball’s flavor by experimenting with different cheese combinations like sharp cheddar, monterey jack, or gouda for unique taste profiles.
- For a gluten-free version, replace pretzel coating with crushed nuts like almonds or use gluten-free crackers for decoration and serving.
- Make the cheese ball ahead of time and refrigerate up to 3 days before serving to enhance flavor melding and reduce day-of preparation stress.
- Create lighter variations by using reduced-fat cream cheese and Greek yogurt instead of sour cream without compromising delicious holiday spirit.
- Prep Time: 15 minutes
- Cook Time: 1 hour
- Category: Appetizer, Snacks
- Method: Mixing
- Cuisine: American
Nutrition
- Serving Size: 12
- Calories: 195
- Sugar: 1 g
- Sodium: 300 mg
- Fat: 15 g
- Saturated Fat: 8 g
- Unsaturated Fat: 7 g
- Trans Fat: 0 g
- Carbohydrates: 6 g
- Fiber: 0 g
- Protein: 8 g
- Cholesterol: 40 mg
Jenna Stewart
Head Chef & Recipe Innovator
Expertise
Farm-to-Table Cooking; Seasonal Menu Development; Visual Plating Techniques; Flavor Layering and Simple Prep Hacks.
Education
The Culinary Institute of America, Hyde Park, NY
Jenna Stewart is the inventive spirit behind many of our standout dishes at Pro of Delicious Creations. A proud graduate of The Culinary Institute of America, she built her skills mastering both classic recipes and fresh, modern twists.
Now, Jenna celebrates the beauty of seasonal, local ingredients, often sourced from her garden and nearby markets, to create recipes that are bursting with flavor yet easy to follow. When she’s not experimenting in the kitchen, Jenna loves exploring nature on hikes and discovering new treasures at local co-ops.