
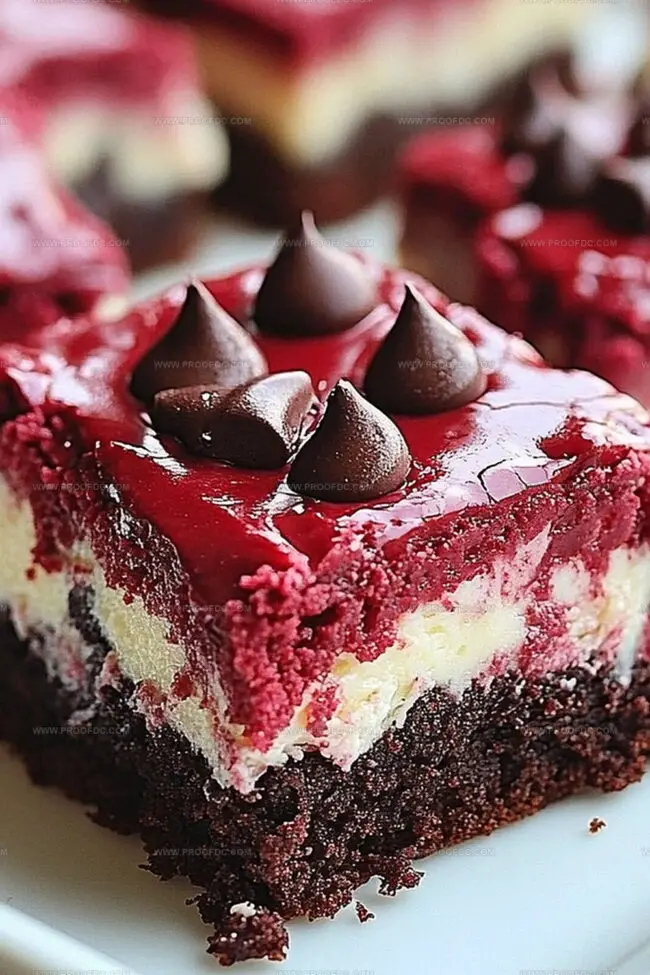
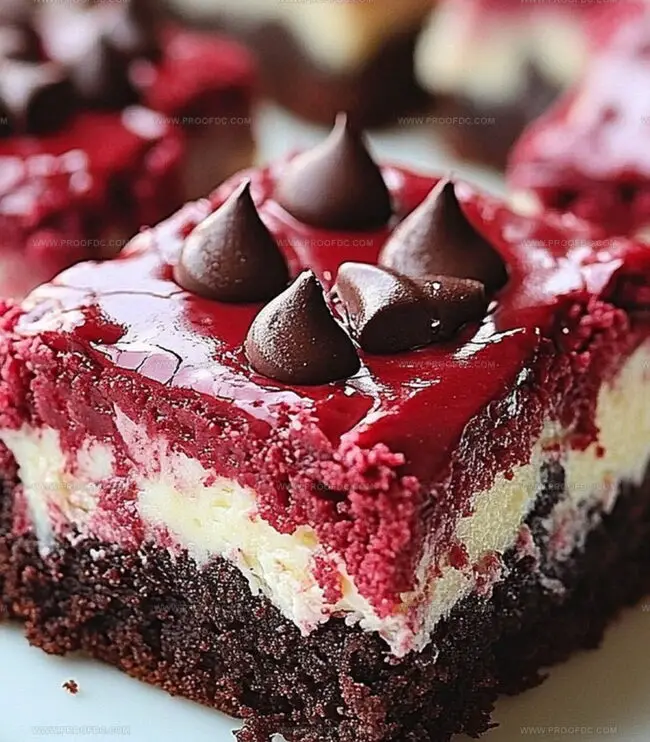
Irresistible Red Velvet Cheesecake Brownie Bars Recipe
Biting into a decadent red velvet cheesecake brownie bar that melts effortlessly on your tongue.
Layers of rich, crimson cake swirl together with creamy cheesecake in a dessert that promises pure indulgence.
Chocolate lovers and sweet enthusiasts will absolutely adore this stunning mashup of classic treats.
Soft, fudgy textures complement the tangy cream cheese filling in unexpected ways.
Each square delivers a luxurious experience that transforms an ordinary afternoon into something extraordinary.
We guarantee these bars will become your new favorite dessert obsession.
Prepare to impress everyone with this showstopping recipe that looks as incredible as it tastes.
Why People Love Red Velvet Cheesecake Brownie Bars
What You Need For Red Velvet Cheesecake Brownie Bars
Base Ingredients:Dry Ingredients:Cheesecake and Flavor Ingredients:How To Bake Red Velvet Cheesecake Brownie Bars
Step 1: Prepare Baking Pan
Grab an 8×8-inch baking dish and line it with parchment paper, allowing extra paper to hang over the sides. This trick makes lifting out the bars super easy later.
Step 2: Craft Red Velvet Brownie Base
Grab a large mixing bowl and blend these ingredients:Sift in:Gently fold everything together until just combined. Keep a small portion of batter aside for later magic. Spread the remaining batter evenly across the prepared pan.
Step 3: Whip Up Creamy Cheesecake Layer
In a separate bowl, create a smooth mixture by beating:Add:Mix until wonderfully creamy. Pour this luscious layer over the red velvet base, spreading it gently and evenly.
Step 4: Create Stunning Marbled Swirls
Take those reserved red velvet batter dollops and scatter them playfully across the cheesecake surface. Use a toothpick or knife to create gorgeous swirling patterns, blending colors without overmixing.
Step 5: Bake To Perfection
Slide the pan into a preheated 350°F oven. Bake for 30-35 minutes until the center looks set and a toothpick comes out clean. The aroma will be absolutely irresistible!
Step 6: Chill And Slice
Allow the bars to cool completely in the pan. Refrigerate for at least 2 hours to help them set perfectly. When ready, lift out using the parchment paper edges and slice into delectable squares.
Step 7: Serve And Enjoy
Serve these stunning bars chilled or at room temperature. Watch everyone’s eyes light up with the first bite of this decadent dessert!
Top Tricks For Red Velvet Cheesecake Brownie Bars
How To Store And Reheat Red Velvet Cheesecake Brownie Bars
Pairing Ideas For Red Velvet Cheesecake Brownie Bars
Red Velvet Cheesecake Brownie Bars With A Twist
Red Velvet Cheesecake Brownie Bars FAQ
The vibrant red color comes from red food coloring, which is carefully added to create the classic red velvet appearance. The food coloring doesn’t affect the taste but provides the signature look.
Yes, you can substitute the all-purpose flour with a gluten-free flour blend. Just ensure it’s a 1:1 replacement to maintain the right texture and consistency of the brownies.
The bars are done when the center is set but still slightly soft, and a toothpick inserted into the middle comes out clean. This typically takes about 30-35 minutes in the oven at 350F.
Swirling creates a beautiful marbled effect that makes the bars visually appealing. It also helps distribute the red velvet flavor throughout the cheesecake layer, adding an extra dimension of taste and texture.
Print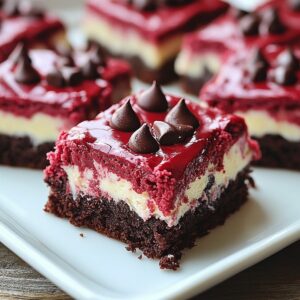
Red Velvet Cheesecake Brownie Bars Recipe
- Total Time: 2 hours 50 minutes
- Yield: 12 1x
Description
Red velvet cheesecake brownie bars blend luxurious chocolate and creamy cheesecake into one irresistible dessert. Delightful layers of rich flavors promise a sensational treat that will satisfy sweet cravings and impress guests with minimal effort.
Ingredients
Dairy and Sweet Base:
- ½ cup (115 g) unsalted butter, melted
- 8 ounces (225 g) cream cheese, softened
- 1 ⅓ cups (265 g) granulated sugar
- 3 large eggs
Flour and Dry Ingredients:
- ¾ cup (95 g) all-purpose flour
- ¼ cup (25 g) unsweetened cocoa powder
- ¼ teaspoon salt
Flavor and Color Enhancers:
- 1 tablespoon red food coloring
- 1 ½ teaspoons vanilla extract
Instructions
- Prepare the baking workspace by lining an 8×8-inch baking dish with parchment paper, ensuring overhanging edges for effortless removal. Preheat the oven to 350°F (175°C), creating an ideal environment for baking.
- Craft the red velvet brownie foundation by whisking melted butter and granulated sugar until silky. Incorporate eggs, vanilla extract, and vibrant red food coloring, blending until harmonious. Gently fold sifted cocoa powder, flour, and salt into the liquid mixture, maintaining a light touch to prevent overmixing.
- Distribute the red velvet batter across the prepared pan, smoothing the surface to create an even base. Set aside a small portion of the batter for decorative swirling later.
- Construct the creamy cheesecake layer by beating cream cheese and sugar until luxuriously smooth. Introduce an egg and vanilla extract, mixing until perfectly integrated. Carefully pour the cheesecake mixture over the red velvet base, ensuring complete coverage.
- Create an artistic marbled effect by dotting reserved red velvet batter across the cheesecake surface. Use a toothpick or thin knife to delicately weave the colored droplets, generating an elegant swirled pattern.
- Transfer the pan to the preheated oven, allowing the bars to bake for 30-35 minutes. Look for a set center and a clean toothpick test as indicators of perfect doneness.
- Remove from the oven and allow complete cooling at room temperature. Refrigerate for a minimum of 2 hours to achieve optimal texture and firmness.
- Once thoroughly chilled, lift the dessert from the pan using parchment paper edges. Slice into precise squares, presenting a visually stunning and decadent treat ready to be savored.
Notes
- Customize the red food coloring amount to achieve your desired vibrant red shade without affecting the batter’s consistency.
- Ensure cream cheese is at room temperature for smoother, lump-free mixing during cheesecake layer preparation.
- Avoid overmixing the brownie batter to maintain a tender, fudgy texture that doesn’t become tough or dense.
- Refrigerate the bars for at least 2 hours to help them set properly and enhance the flavor melding between layers.
- Prep Time: 15 minutes
- Cook Time: 35 minutes
- Category: Desserts, Snacks
- Method: Baking
- Cuisine: American
Nutrition
- Serving Size: 12
- Calories: 290
- Sugar: 24 g
- Sodium: 180 mg
- Fat: 15 g
- Saturated Fat: 9 g
- Unsaturated Fat: 5 g
- Trans Fat: 0 g
- Carbohydrates: 34 g
- Fiber: 1 g
- Protein: 4 g
- Cholesterol: 70 mg
Jenna Stewart
Head Chef & Recipe Innovator
Expertise
Farm-to-Table Cooking; Seasonal Menu Development; Visual Plating Techniques; Flavor Layering and Simple Prep Hacks.
Education
The Culinary Institute of America, Hyde Park, NY
Jenna Stewart is the inventive spirit behind many of our standout dishes at Pro of Delicious Creations. A proud graduate of The Culinary Institute of America, she built her skills mastering both classic recipes and fresh, modern twists.
Now, Jenna celebrates the beauty of seasonal, local ingredients, often sourced from her garden and nearby markets, to create recipes that are bursting with flavor yet easy to follow. When she’s not experimenting in the kitchen, Jenna loves exploring nature on hikes and discovering new treasures at local co-ops.