Quick and Easy No-Knead Bread Recipe: Foolproof Homemade Delight
A magical no-knead bread that emerges from your kitchen with minimal effort.
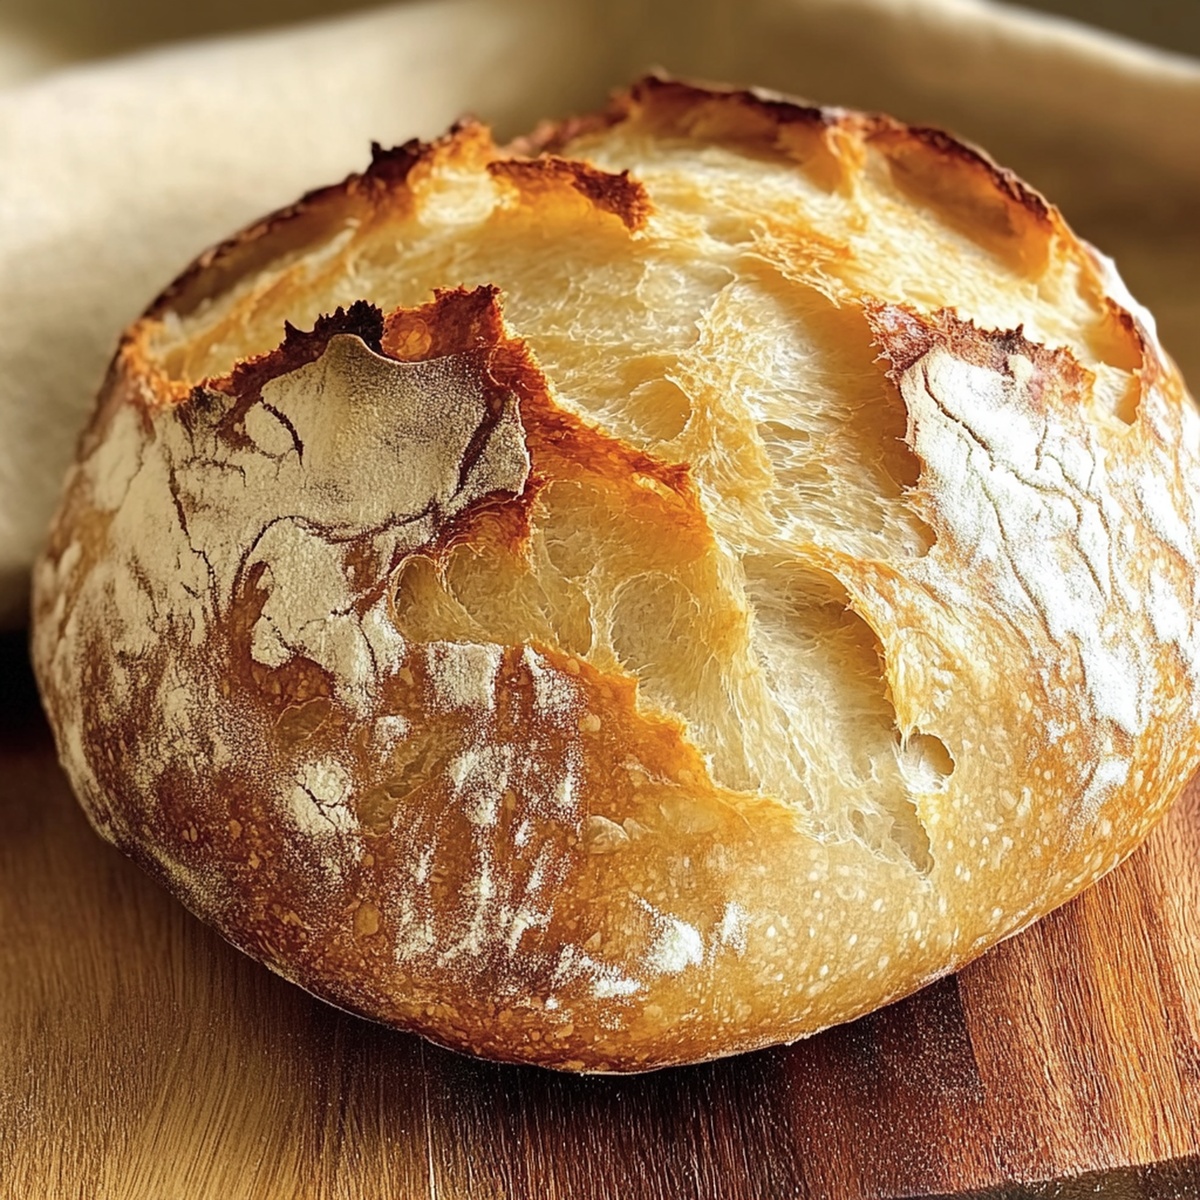
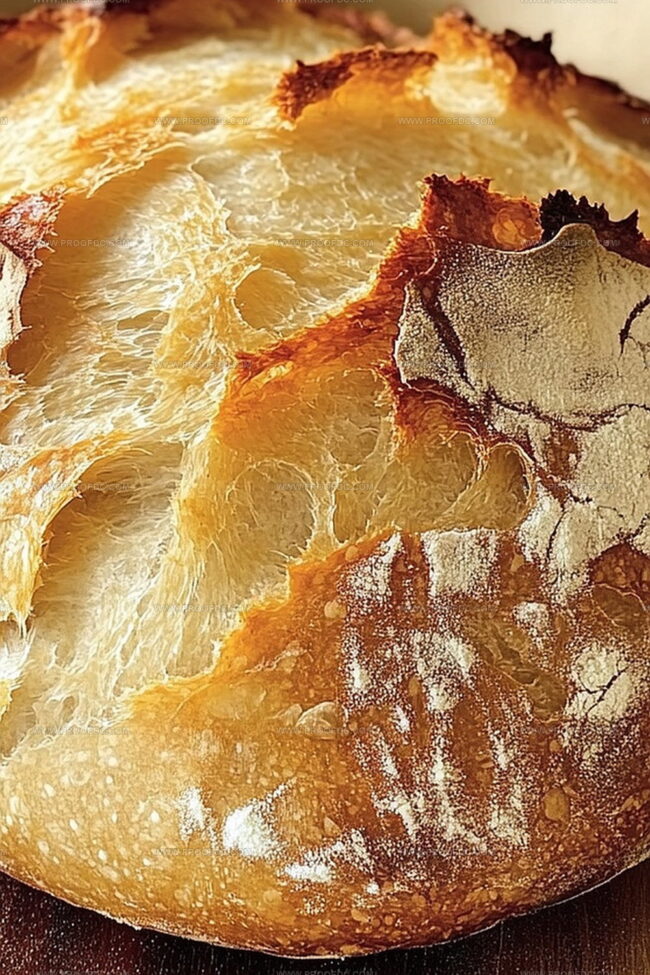
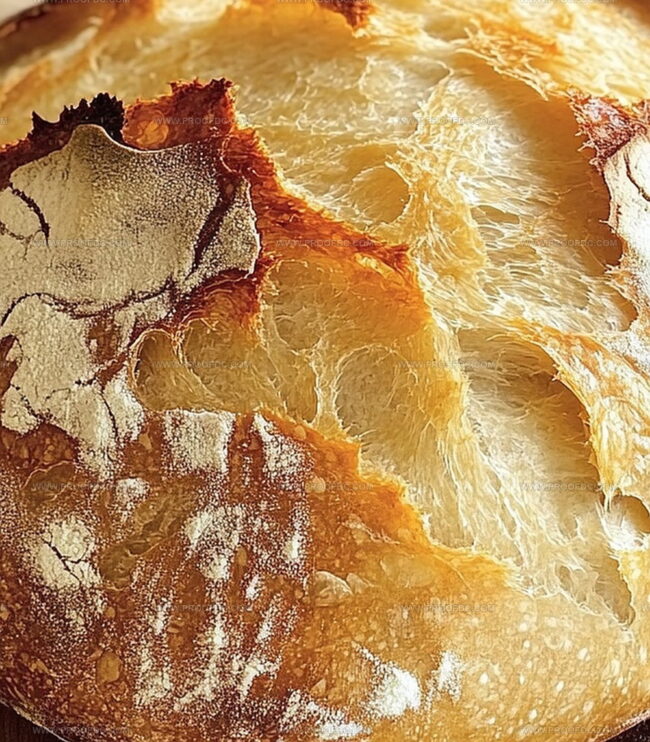
Crispy golden crusts and soft, pillowy interiors await you without complicated techniques.
Impressing everyone with a homemade loaf that seems like it came from a professional bakery.
Flour, water, yeast, and salt become your simple ingredients for culinary success.
Professional bakers might guard their secrets, but this technique democratizes bread making for everyone.
The beauty of this method lies in its incredible simplicity and hands-off approach.
Trust me, you’ll feel like a bread-making genius after pulling this gorgeous loaf from the oven.
Grab a slice while it’s warm and savor your delicious creation.
Love Making Quick And Easy No-Knead Bread
What Goes In Quick And Easy No-Knead Bread
Dry Ingredients:Wet Ingredients:Baking Accessories:Steps To Make Quick And Easy No-Knead Bread
Step 1: Create Magical Dough Mixture
Grab a big mixing bowl and combine your ingredients:Stir everything with a wooden spoon until the mixture looks messy and sticky. This weird-looking dough is exactly what you want! Cover the bowl and let it sit quietly at room temperature for 12 hours. Watch the magic happen as the dough bubbles and grows.
Step 2: Shape Your Bread Creation
Sprinkle some flour on your kitchen counter and hands. Gently scoop the risen dough onto the surface. Softly fold the dough over itself a few times to create a rough round shape. Transfer the dough onto parchment paper and let it rest for 20-30 minutes while preparing to bake.
Step 3: Warm Up Your Baking Equipment
Turn your oven to 450 degrees Fahrenheit. Place a heavy Dutch oven or oven-safe pot with a lid inside the oven. Let it heat up for 30 minutes. This creates the perfect environment for a crusty exterior.
Step 4: Transform Dough Into Bread
Carefully remove the hot Dutch oven. Using the parchment paper, transfer the dough into the pot. Cover with the lid and bake for 30 minutes. Then remove the lid and bake for an additional 10-15 minutes until the bread turns a beautiful golden brown.
Step 5: Serve Your Masterpiece
Gently remove the bread from the pot using the parchment paper. Place it on a wire rack and let it cool for 10-15 minutes. This helps the inside set perfectly. Slice and enjoy with butter, jam, or alongside your favorite soup or stew!
Helpful Tips For Quick And Easy No-Knead Bread
Storing And Warming Up Quick And Easy No-Knead Bread
What To Eat With Quick And Easy No-Knead Bread
Switch Things Up In Quick And Easy No-Knead Bread
Common Questions About Quick And Easy No-Knead Bread
This method eliminates the traditional hand-kneading process. You simply mix ingredients and let time and fermentation develop gluten and bread structure naturally, making it super easy for home bakers.
Yes! While all-purpose flour works best, you can experiment with bread flour or whole wheat flour. Just ensure you maintain the same liquid-to-flour ratio for proper consistency.
Don’t worry! A shaggy, messy-looking dough is exactly right. The long resting time helps develop flavor and texture, so resist the urge to make it look neat and smooth.
A Dutch oven is ideal, but you can use any heavy, oven-safe pot with a lid that can withstand high temperatures. The key is creating steam for a crispy crust and even baking.
Print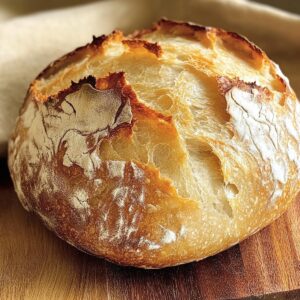
Quick And Easy No-Knead Bread Recipe
- Total Time: 50 minutes
- Yield: 12 1x
Description
Rustic no-knead bread brings European bakery charm straight to home kitchens with minimal effort. Simple ingredients blend magically, delivering crisp crust and tender crumb you’ll savor with pure satisfaction.
Ingredients
Main Ingredients:
- 3 cups (375 g) all-purpose flour
- 1 ½ cups (360 ml) warm water
- 2 teaspoons instant yeast
- 1 ½ teaspoons salt
Finishing/Optional Ingredients:
- 1 tablespoon olive oil
Instructions
- Prepare the foundational mixture by combining flour, instant yeast, and salt in a spacious mixing vessel. Vigorously integrate warm water using a wooden implement until a rough, cohesive texture emerges with a slightly disheveled appearance.
- Drape the container with protective covering and allow the mixture to transform at ambient temperature. Let it expand and develop bubbles over approximately 12 hours, signaling fermentation and readiness.
- Dust a clean workspace and hands with flour. Gently transfer the risen mixture, softly folding and manipulating it into a loosely rounded configuration without aggressive manipulation.
- Position the dough onto parchment paper, permitting additional relaxation while heat preparation commences. Simultaneously, activate the oven, setting the temperature to an intense 450F.
- Introduce a substantial, heavy-bottomed cooking vessel with lid into the heating chamber. Allow the pot to become scorching hot for roughly 30 minutes, creating an ideal baking environment.
- Extract the superheated pot with extreme caution. Carefully lower the dough-laden parchment into the vessel, securing the lid immediately.
- Initiate the initial baking phase, maintaining the covered state for 30 minutes. Subsequently, unveil the lid and continue cooking until the exterior achieves a rich, golden-bronze complexion.
- Transfer the freshly baked creation to a cooling surface. Allow substantial resting time before slicing to ensure optimal internal structure and texture.
- Serve the artisan loaf alongside complementary accompaniments like creamy butter, fruity preserves, or as a delectable companion to hearty soups and stews.
Notes
- Customize the flour blend by mixing whole wheat, rye, or gluten-free varieties to create unique flavor profiles and accommodate different dietary needs.
- Add seeds like sunflower, sesame, or poppy seeds to the dough before the first rise for extra texture and nutritional boost.
- Reduce rising time in warm environments by placing the dough in a cooler spot to prevent over-fermentation and maintain optimal bread structure.
- Enhance crust crispiness by spritzing water into the hot Dutch oven before adding the dough, creating steam that promotes a golden, crusty exterior.
- Prep Time: 5 minutes
- Cook Time: 40-45 minutes
- Category: Breakfast, Lunch, Dinner, Snacks
- Method: Baking
- Cuisine: American
Nutrition
- Serving Size: 12
- Calories: 140
- Sugar: 0 g
- Sodium: 125 mg
- Fat: 1.5 g
- Saturated Fat: 0.2 g
- Unsaturated Fat: 1.3 g
- Trans Fat: 0 g
- Carbohydrates: 28 g
- Fiber: 1 g
- Protein: 4 g
- Cholesterol: 0 mg
Jenna Stewart
Head Chef & Recipe Innovator
Expertise
Farm-to-Table Cooking; Seasonal Menu Development; Visual Plating Techniques; Flavor Layering and Simple Prep Hacks.
Education
The Culinary Institute of America, Hyde Park, NY
Jenna Stewart is the inventive spirit behind many of our standout dishes at Pro of Delicious Creations. A proud graduate of The Culinary Institute of America, she built her skills mastering both classic recipes and fresh, modern twists.
Now, Jenna celebrates the beauty of seasonal, local ingredients, often sourced from her garden and nearby markets, to create recipes that are bursting with flavor yet easy to follow. When she’s not experimenting in the kitchen, Jenna loves exploring nature on hikes and discovering new treasures at local co-ops.