
Heavenly No-Bake Pecan Pie Balls Recipe: Sweet Bliss in Every Bite
Rolling delectable pecan pie balls that melt effortlessly in your mouth without ever touching an oven.
These delightful treats capture the essence of classic Southern desserts in one bite-sized wonder.
Crushing graham crackers and blending them with smooth cream cheese creates a magical base for this simple confection.
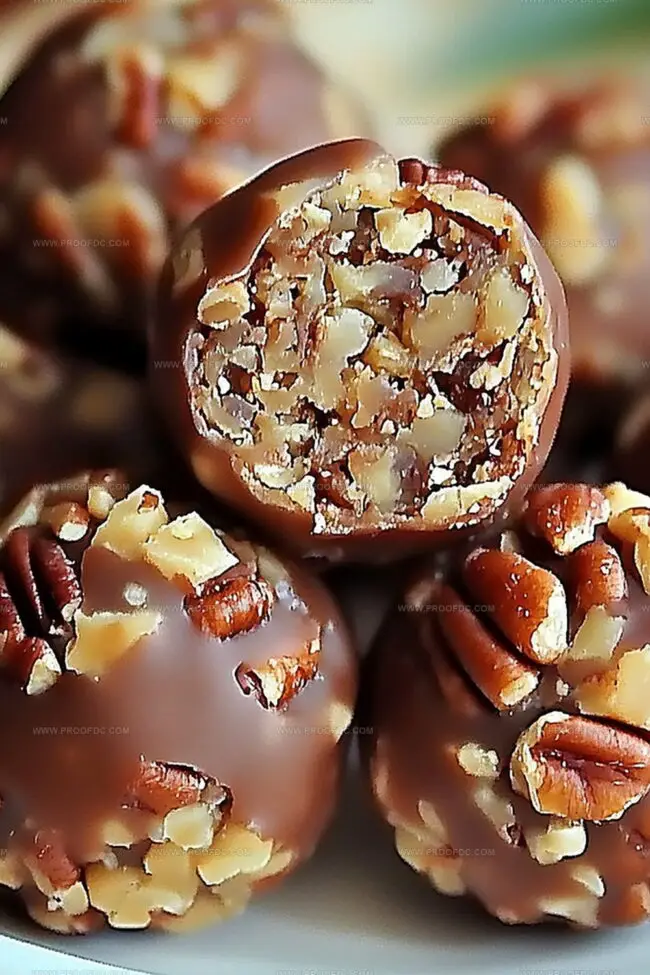
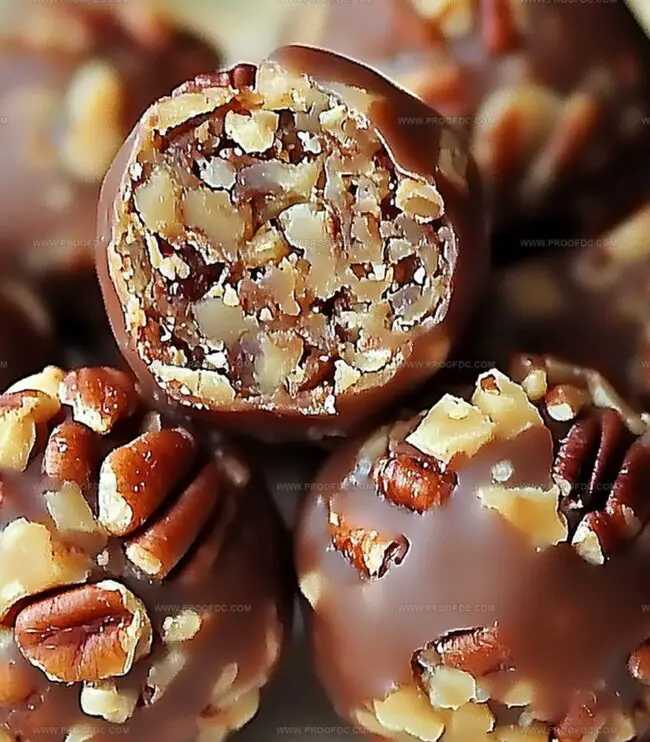
Pecans bring a rich, nutty crunch that perfectly complements the sweet, creamy mixture.
Chilled and coated with a delicate chocolate shell, these (no-bake) delights offer an irresistible alternative to traditional pie.
Minimal ingredients and zero baking time mean you can whip up these decadent spheres in minutes.
Grab a mixing bowl and let the delicious adventure begin!
What Makes Pecan Pie Balls (No-Bake) A Favorite
Everything That Goes Into Pecan Pie Balls (No-Bake)
Base Ingredients:Spice and Seasoning:Coating Ingredient:How To Prepare Pecan Pie Balls (No-Bake) Easily
Step 1: Whip Up The Nutty Base
Grab a spacious mixing bowl and toss in these delectable ingredients:Pour in maple syrup and vanilla extract. Stir everything with enthusiasm until the mixture transforms into a deliciously sticky dough that holds together perfectly.
Step 2: Roll Into Delicious Morsels
Using your hands, scoop out small portions of the mixture. Gently roll each portion between your palms, creating smooth, round bites. Continue until you’ve transformed the entire batch into adorable little spheres of goodness.
Step 3: Create A Sweet Snowfall
Generously dust each bite with powdered sugar, ensuring they’re completely covered. Lay the sugar-coated treats on a parchment-lined tray, creating a tempting display of sweet treasures.
Step 4: Chill And Set
Slide the tray into the refrigerator. Let these delightful bites rest and firm up for about 30 minutes. This cooling period helps them maintain their perfect shape and enhances their incredible flavor.
Step 5: Enjoy And Preserve
Serve these delectable bites chilled or at room temperature. Keep any leftovers in an airtight container in the refrigerator for up to a week. For longer storage, these treats can be frozen for up to 3 months, ready to satisfy your sweet tooth anytime.
Pro Tip: These no-bake bites are perfect for parties, quick snacks, or when you need a sweet pick-me-up without turning on the oven!
Helpful Tips For Pecan Pie Balls (No-Bake) Lovers
How To Store And Reheat Pecan Pie Balls (No-Bake)
Perfect Pairings For Pecan Pie Balls (No-Bake)
Try Fun Spins On Pecan Pie Balls (No-Bake)
Questions People Ask About Pecan Pie Balls (No-Bake)
These delightful treats are prepared without using an oven, making them quick and easy to assemble. The ingredients are mixed together and chilled, eliminating the need for baking.
While the recipe contains graham cracker crumbs (which typically have gluten), you can easily make them gluten-free by using gluten-free graham cracker crumbs or substituting with almond flour.
Absolutely! These balls are perfect for advance preparation. You can make them up to a week in advance and store them in the refrigerator, or freeze them for up to 3 months for longer storage.
Ensure you mix the ingredients thoroughly and compress them well when rolling. If the mixture seems too dry, add a little more maple syrup to help bind the ingredients together.
Print
Pecan Pie Balls (No-Bake) Recipe
- Total Time: 45 minutes
- Yield: 24 1x
Description
Irresistible Pecan Pie Balls dance with Southern charm, blending classic dessert flavors into bite-sized perfection. Sweet, nutty morsels bring comfort and delight, inviting you to savor each delectable moment.
Ingredients
Main Ingredients:
- 2 cups (473 ml) finely chopped pecans
- 1 cup (236 ml) graham cracker crumbs
- ½ cup (118 ml) brown sugar (light or dark)
Binding and Flavoring Ingredients:
- ¼ cup (59 ml) maple syrup (or corn syrup)
- 1 teaspoon vanilla extract
- ¼ teaspoon ground cinnamon
- ¼ teaspoon salt
Coating Ingredient:
- 1 cup (236 ml) powdered sugar (for rolling)
Instructions
- Gather the pecans, graham cracker crumbs, brown sugar, cinnamon, and salt in a spacious mixing vessel, creating a dry foundation for the delectable treats.
- Drizzle maple syrup and vanilla extract over the dry ingredients, using a spatula to blend everything into a cohesive, slightly tacky mixture that holds together when pressed.
- Employ clean hands to gently roll small portions of the mixture into compact, uniform spheres, ensuring each ball is approximately the size of a bite-sized morsel.
- Delicately tumble each formed sphere through a drift of powdered sugar, allowing a fine, sweet coating to envelop the entire surface of the pecan confection.
- Transfer the sugar-dusted orbs onto a parchment-lined tray, creating a neat arrangement that facilitates even chilling.
- Nestle the tray into the refrigerator, allowing the balls to rest and solidify for a minimum of half an hour, which helps them maintain their structured shape.
- Once chilled, these nutty delights can be savored immediately or stored in a sealed container within the refrigerator for up to seven days, or preserved in the freezer for a trio of months.
Notes
- Toasting pecans beforehand intensifies their nutty flavor and adds a delightful depth to the no-bake balls.
- Use room temperature ingredients to ensure smoother mixing and easier ball formation.
- Wet your hands slightly with water when rolling to prevent the mixture from sticking and create more uniform balls.
- For gluten-free version, swap graham cracker crumbs with almond flour or gluten-free cookie crumbs to maintain texture and binding.
- Prep Time: 15 minutes
- Cook Time: 30 minutes
- Category: Desserts, Snacks
- Method: Mixing
- Cuisine: American
Nutrition
- Serving Size: 24
- Calories: 150
- Sugar: 11 g
- Sodium: 50 mg
- Fat: 8 g
- Saturated Fat: 1 g
- Unsaturated Fat: 7 g
- Trans Fat: 0 g
- Carbohydrates: 18 g
- Fiber: 1 g
- Protein: 2 g
- Cholesterol: 0 mg
Jenna Stewart
Head Chef & Recipe Innovator
Expertise
Farm-to-Table Cooking; Seasonal Menu Development; Visual Plating Techniques; Flavor Layering and Simple Prep Hacks.
Education
The Culinary Institute of America, Hyde Park, NY
Jenna Stewart is the inventive spirit behind many of our standout dishes at Pro of Delicious Creations. A proud graduate of The Culinary Institute of America, she built her skills mastering both classic recipes and fresh, modern twists.
Now, Jenna celebrates the beauty of seasonal, local ingredients, often sourced from her garden and nearby markets, to create recipes that are bursting with flavor yet easy to follow. When she’s not experimenting in the kitchen, Jenna loves exploring nature on hikes and discovering new treasures at local co-ops.