
Magical Melt-in-Your-Mouth Peanut Butter Snowballs Recipe
Crafting delightful peanut butter snowballs brings pure winter magic to your kitchen.
Sweet memories dance around these delectable treats that sparkle like frosted confections.
Kids absolutely adore rolling these creamy spheres in powdery coconut or confectioners’ sugar.
Each bite promises a delicious adventure of smooth, rich flavors melting on your tongue.
Surprising loved ones with these elegant yet simple dessert bites that look professionally crafted.
Minimal ingredients and straightforward steps make these snowballs a perfect weekend cooking project.
Grab your apron and let’s create something wonderfully delicious that will have everyone asking for seconds.
Why Peanut Butter Snowballs Make Everyone Smile

What Goes Into Peanut Butter Snowballs
Base Ingredients:Coating Ingredients:Optional Garnish Ingredients:How To Roll Peanut Butter Snowballs With Ease

Step 1: Craft the Creamy Peanut Butter Base
In a spacious mixing bowl, blend together:Mix everything until the ingredients transform into a soft, moldable dough that holds together perfectly.
Step 2: Roll Magical Snow Spheres
Gently shape the mixture into small, round balls about the size of a golf ball. Place each ball on a parchment-lined baking sheet. Pop the tray into the freezer for a quick 15-20 minute chill to help them firm up.
Step 3: Melt Silky White Chocolate
Select a microwave-safe bowl and gradually melt the white chocolate. Use short 30-second bursts, stirring between each interval to ensure smooth, glossy chocolate with no lumps.
Step 4: Create Snowy Chocolate Coating
Carefully dip each frozen peanut butter ball into the melted white chocolate. Use a fork or toothpick to help coat evenly and let excess chocolate drip off. Return the coated balls to the parchment paper.
Step 5: Add Playful Decorative Touches
While the chocolate coating remains wet, sprinkle your favorite toppings:Step 6: Let Snowballs Set and Shine
Allow the snowballs to rest at room temperature or place in the refrigerator until the chocolate hardens completely. Serve chilled or at room temperature for a delightful treat that’ll make everyone smile.
Helpful Tips For Peanut Butter Snowballs
How To Save And Reheat Peanut Butter Snowballs Right
Drinks And Treats To Serve With Peanut Butter Snowballs
New Ways To Enjoy Peanut Butter Snowballs
Peanut Butter Snowballs FAQs Answered Clearly
Not at all! They’re super easy and require no baking. Even beginners can whip these up quickly with just a few simple ingredients and basic mixing skills.
Absolutely! Crunchy peanut butter works great and adds extra texture to your snowballs. Just make sure it’s well-mixed with other ingredients for a consistent dough.
Stored in an airtight container in the refrigerator, these treats will stay delicious for about 5-7 days. Just make sure to keep them cool to maintain their shape and taste.
Yes! Kids will love helping roll the balls and decorating them with sprinkles. It’s a fun, simple recipe that’s perfect for family baking time and creates sweet memories.
Print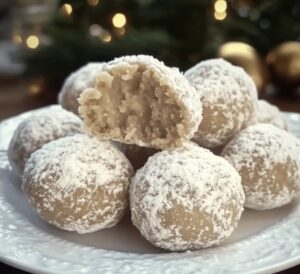
Peanut Butter Snowballs Recipe
- Total Time: 35 minutes
- Yield: 24 1x
Description
Creamy peanut butter snowballs dance with sweet charm, offering a delightful winter treat that melts hearts. Rolled in powdered sugar and chilled to perfection, these bite-sized delights will enchant desert lovers with their irresistible simplicity.
Ingredients
Main Ingredients:
- 1 ½ cups graham crackers (crushed, about 12 sheets)
- 1 cup creamy peanut butter
- ½ cup unsalted butter (softened)
- 2 cups powdered sugar
Flavoring Ingredients:
- 1 teaspoon vanilla extract
Coating/Garnish Ingredients:
- 8 ounces (226 grams) white chocolate (for dipping)
- Optional garnishes: sprinkles, shredded coconut, or crushed peanuts
Instructions
- Create a creamy base by thoroughly blending peanut butter, softened butter, powdered sugar, crushed graham crackers, and vanilla extract in a spacious mixing bowl until the ingredients form a cohesive, moldable texture.
- Craft uniform spheres by gently rolling the mixture into compact, bite-sized orbs approximately one inch in diameter, carefully positioning each on a parchment-lined baking tray.
- Rapidly chill the prepared balls in the freezer for 15-20 minutes, ensuring they maintain a solid structure for the upcoming chocolate coating process.
- Transform white chocolate into a smooth, velvety liquid by gradually heating in a microwave-safe container, stirring intermittently to prevent scorching and achieve a consistent melted consistency.
- Delicately immerse each frozen peanut butter sphere into the molten white chocolate, utilizing a fork or toothpick to ensure complete coverage and allowing excess chocolate to gracefully drip away.
- While the chocolate remains glossy and wet, embellish the snowballs with decorative elements like festive sprinkles, delicate shredded coconut, or finely crushed peanuts to enhance visual appeal.
- Allow the chocolate-coated treats to solidify naturally at room temperature or expedite the process by refrigerating, then serve chilled or at ambient temperature for a delightful winter-inspired confection.
Notes
- Chill the mixture thoroughly before rolling to prevent sticky hands and ensure easier ball formation.
- Use room temperature ingredients for smoother mixing and consistent texture throughout the peanut butter mixture.
- Opt for natural peanut butter with minimal added sugar to control overall sweetness and create a more balanced flavor profile.
- Keep snowballs refrigerated in an airtight container for up to a week, making them perfect for make-ahead dessert preparations.
- Prep Time: 10 minutes
- Cook Time: 20 minutes
- Category: Snacks, Desserts
- Method: Mixing
- Cuisine: American
Nutrition
- Serving Size: 24
- Calories: 168
- Sugar: 10 g
- Sodium: 45 mg
- Fat: 11 g
- Saturated Fat: 4 g
- Unsaturated Fat: 7 g
- Trans Fat: 0 g
- Carbohydrates: 17 g
- Fiber: 1 g
- Protein: 3 g
- Cholesterol: 5 mg
Jenna Stewart
Head Chef & Recipe Innovator
Expertise
Farm-to-Table Cooking; Seasonal Menu Development; Visual Plating Techniques; Flavor Layering and Simple Prep Hacks.
Education
The Culinary Institute of America, Hyde Park, NY
Jenna Stewart is the inventive spirit behind many of our standout dishes at Pro of Delicious Creations. A proud graduate of The Culinary Institute of America, she built her skills mastering both classic recipes and fresh, modern twists.
Now, Jenna celebrates the beauty of seasonal, local ingredients, often sourced from her garden and nearby markets, to create recipes that are bursting with flavor yet easy to follow. When she’s not experimenting in the kitchen, Jenna loves exploring nature on hikes and discovering new treasures at local co-ops.