Homemade Whipped Peanut Butter Fudge Recipe for Sweet Dreams
Creamy, dreamy peanut butter fudge has been my secret weapon for instant dessert happiness.
Sweet memories flood back whenever I whip up this nostalgic treat.
Childhood afternoons spent in grandmother’s kitchen inspire every delectable bite.
Smooth chocolate and rich peanut butter create an irresistible combination that melts hearts.
Simple ingredients come together in minutes, making this recipe a total game-changer.
Quick preparation means you can satisfy sudden sugar cravings without complicated steps.
Serving this decadent fudge and watching faces light up with pure joy.
Grab a slice and let the deliciousness transport you to dessert heaven.
What Makes Peanut Butter Fudge So Satisfying
Ingredients List For Peanut Butter Fudge
Main Ingredients:
Peanut Butter Base:Sweetening Agents:Additional Flavor Enhancers:Step-By-Step Guide For Peanut Butter Fudge
Step 1: Prepare Cozy Fudge Homes
Grab your parchment paper and line several baking pans. Make sure the paper hangs over the edges like a soft blanket, creating an easy escape route for your soon-to-be-delicious fudge.
Step 2: Create Smooth Butter Fusion
Combine peanut butter and butter in a large saucepan:Melt these delicious ingredients over medium heat. Stir constantly until they become a silky, dreamy mixture that looks absolutely irresistible. Watch for that perfect smooth consistency – it should take about 5-7 minutes.
Step 3: Sweet Sugar Symphony
Remove the saucepan from heat and welcome these flavor friends:Gently stir in the vanilla first. Then slowly introduce the powdered sugar, adding it in gradual waves. Mix thoroughly after each addition. The mixture will transform into a thick, glossy dream that’ll make your taste buds dance.
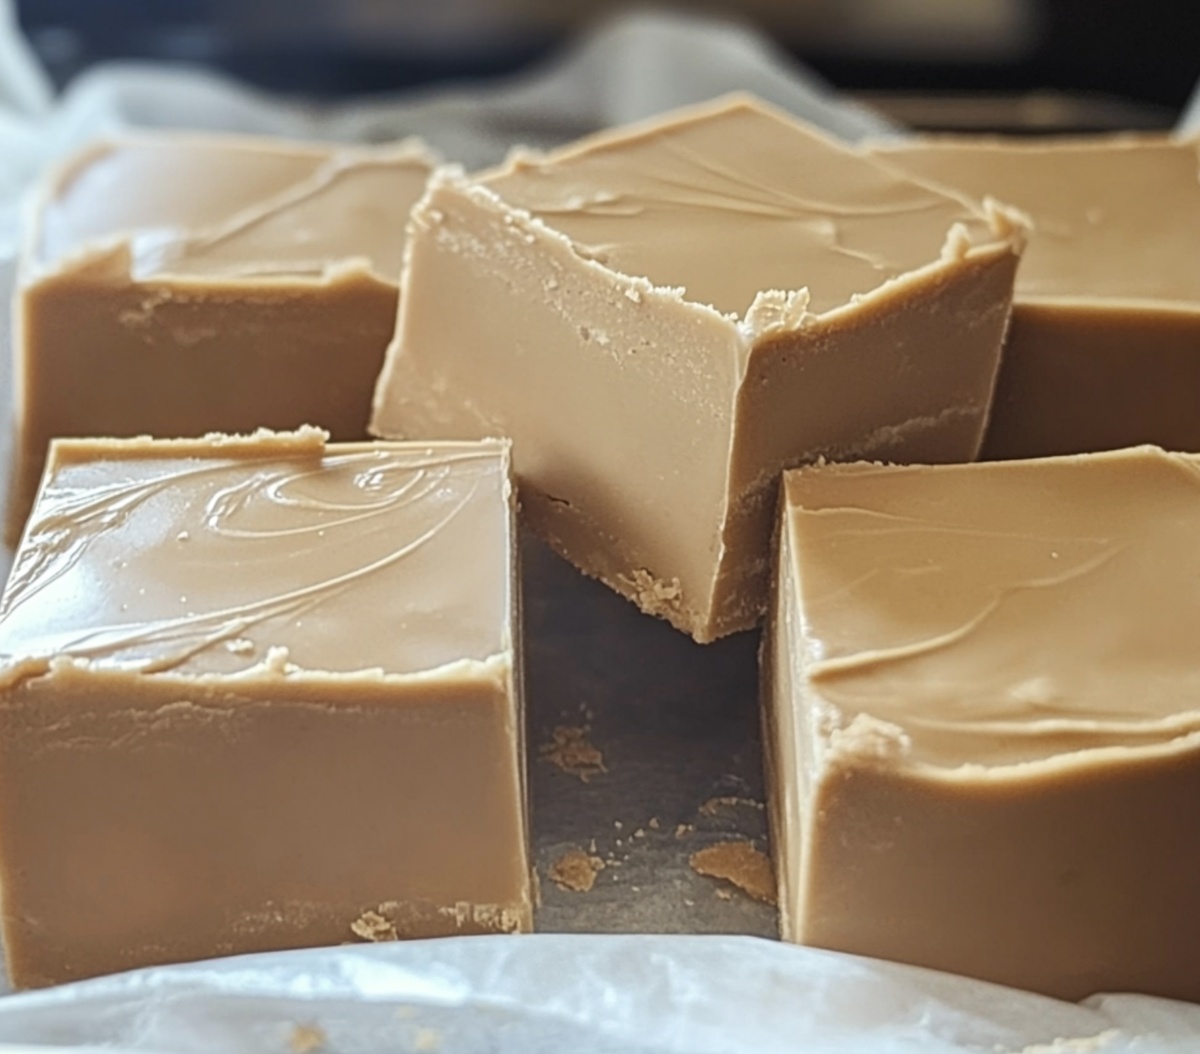
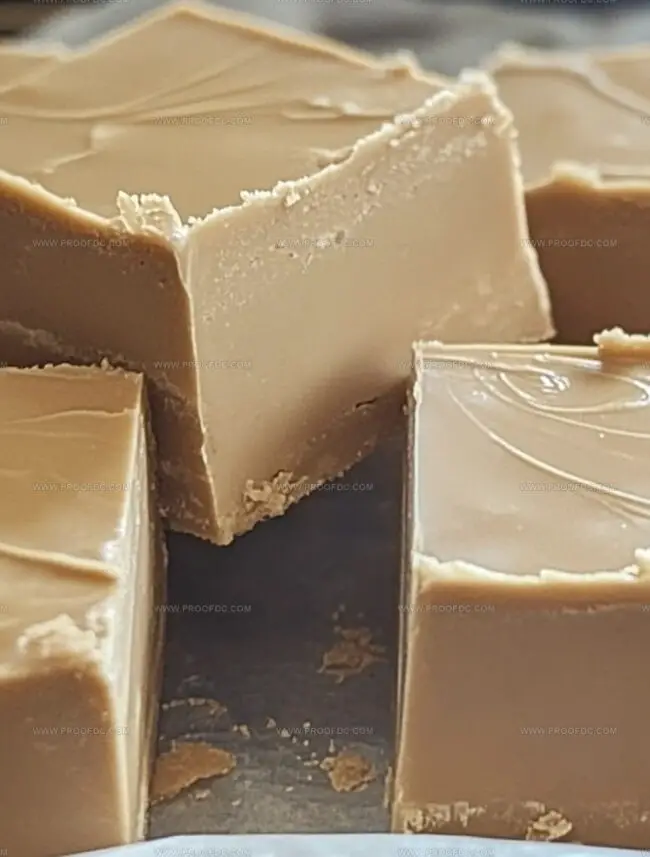
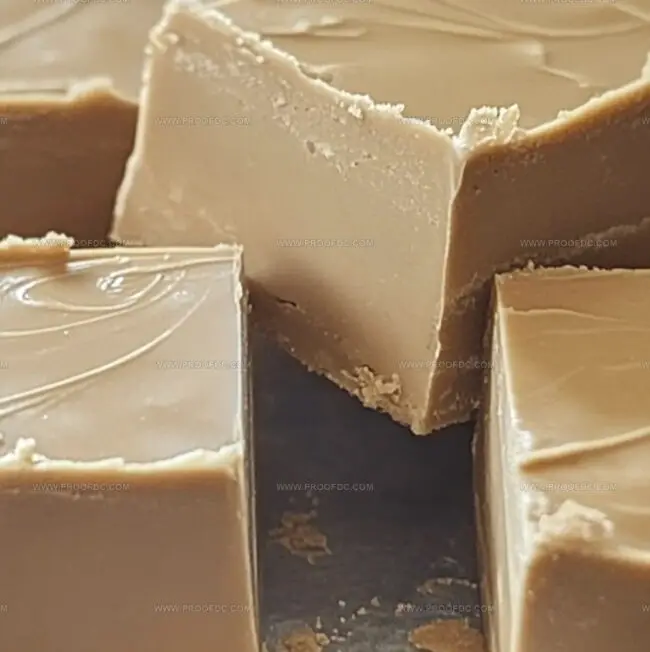
Step 4: Spread the Fudge Love
Pour the magical mixture into your prepared pans. Use a spatula to create an even, smooth surface. Make it look as beautiful as a work of art!
Step 5: Patience Brings Perfection
Allow your fudge to chill and set at room temperature. If you’re feeling impatient, pop the pans in the refrigerator for a quick 30-60 minute transformation. Once firm, lift the fudge out using the parchment paper handles. Slice into perfect squares with a sharp knife.
Pro Advice For Peanut Butter Fudge Success
Keeping Peanut Butter Fudge Fresh And Soft
Best Pairings With Peanut Butter Fudge
Ways To Change Up Peanut Butter Fudge
Peanut Butter Fudge FAQs You’ll Want To Know
This recipe is super simple and requires no candy thermometer or complicated cooking techniques. It’s a no-bake fudge that uses just a few ingredients and is almost foolproof to make.
Stick with traditional creamy peanut butter like Jif or Skippy. Natural peanut butter has different oil content and might make your fudge separated or grainy.
The fudge is quite sweet due to the powdered sugar. If you prefer less sweetness, you can reduce the sugar slightly, but it might affect the texture and setting of the fudge.
If your fudge is too soft, it likely needs more powdered sugar or more cooling time. Place it in the refrigerator for 30-60 minutes to help it firm up completely.
Print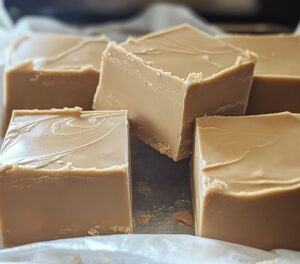
Peanut Butter Fudge Recipe
- Total Time: 2 hours 30 minutes
- Yield: 12 1x
Description
Creamy peanut butter fudge promises pure dessert bliss with minimal ingredients and maximum flavor. Chocolate drizzle and smooth texture elevate this classic treat, making each bite a delightful indulgence you cannot resist.
Ingredients
Main Ingredients:
- 3 cups (720 milliliters) unsalted butter
- 3 cups (720 milliliters) creamy peanut butter
- 12 cups (1.4 kilograms) powdered sugar
Flavor Enhancers:
- 3 tablespoons vanilla extract
Kitchen Tools (not ingredients):
- Large saucepan
- 3 large mixing bowls
- Spatulas
- 3 9×13-inch baking pans
- Parchment paper
Instructions
- Prepare a workspace with three 9-inch baking dishes, ensuring each is lined with parchment paper that extends slightly over the edges for effortless removal.
- In a spacious saucepan, gently combine butter and peanut butter over medium heat, stirring consistently until the mixture transforms into a silky, uniform consistency, which typically requires 5-7 minutes of careful attention.
- Carefully remove the saucepan from the heat source and incorporate vanilla extract, creating a fragrant base for the fudge.
- Progressively introduce powdered sugar into the warm mixture, integrating one cup at a time and stirring thoroughly after each addition until the blend becomes dense and incredibly smooth.
- Distribute the fudge mixture evenly across the prepared pans, using a flexible spatula to create a uniform surface with gentle, deliberate strokes.
- Allow the fudge to stabilize at room temperature, giving it sufficient time to set completely – this can take approximately 12 hours for optimal consistency.
- For those seeking faster results, refrigeration for 30-45 minutes can expedite the setting process.
- Once the fudge has solidified, utilize the overhanging parchment paper to lift the entire block from the pan.
- With a sharp knife, slice the fudge into precise, equal-sized squares, creating a delectable treat ready for serving and enjoyment.
Notes
- Adjust peanut butter type based on dietary needs, using natural or low-fat versions for healthier alternatives.
- Experiment with different sugar substitutes like monk fruit sweetener or stevia for low-sugar or diabetic-friendly options.
- Use a candy thermometer to ensure precise temperature control, preventing potential texture issues during the melting process.
- Store fudge in an airtight container between parchment paper layers to maintain freshness and prevent sticking for up to two weeks at room temperature.
- Prep Time: 20 minutes
- Cook Time: 10 minutes
- Category: Desserts, Snacks
- Method: Mixing
- Cuisine: American
Nutrition
- Serving Size: 12
- Calories: 390
- Sugar: 32 g
- Sodium: 60 mg
- Fat: 30 g
- Saturated Fat: 18 g
- Unsaturated Fat: 12 g
- Trans Fat: 0 g
- Carbohydrates: 39 g
- Fiber: 1 g
- Protein: 6 g
- Cholesterol: 60 mg
Jenna Stewart
Head Chef & Recipe Innovator
Expertise
Farm-to-Table Cooking; Seasonal Menu Development; Visual Plating Techniques; Flavor Layering and Simple Prep Hacks.
Education
The Culinary Institute of America, Hyde Park, NY
Jenna Stewart is the inventive spirit behind many of our standout dishes at Pro of Delicious Creations. A proud graduate of The Culinary Institute of America, she built her skills mastering both classic recipes and fresh, modern twists.
Now, Jenna celebrates the beauty of seasonal, local ingredients, often sourced from her garden and nearby markets, to create recipes that are bursting with flavor yet easy to follow. When she’s not experimenting in the kitchen, Jenna loves exploring nature on hikes and discovering new treasures at local co-ops.