Ooey-Gooey Peanut Butter Cup Dump Cake Recipe for Sweet Lovers
A decadent peanut butter cup dump cake that melts in your mouth like a sweet dream.
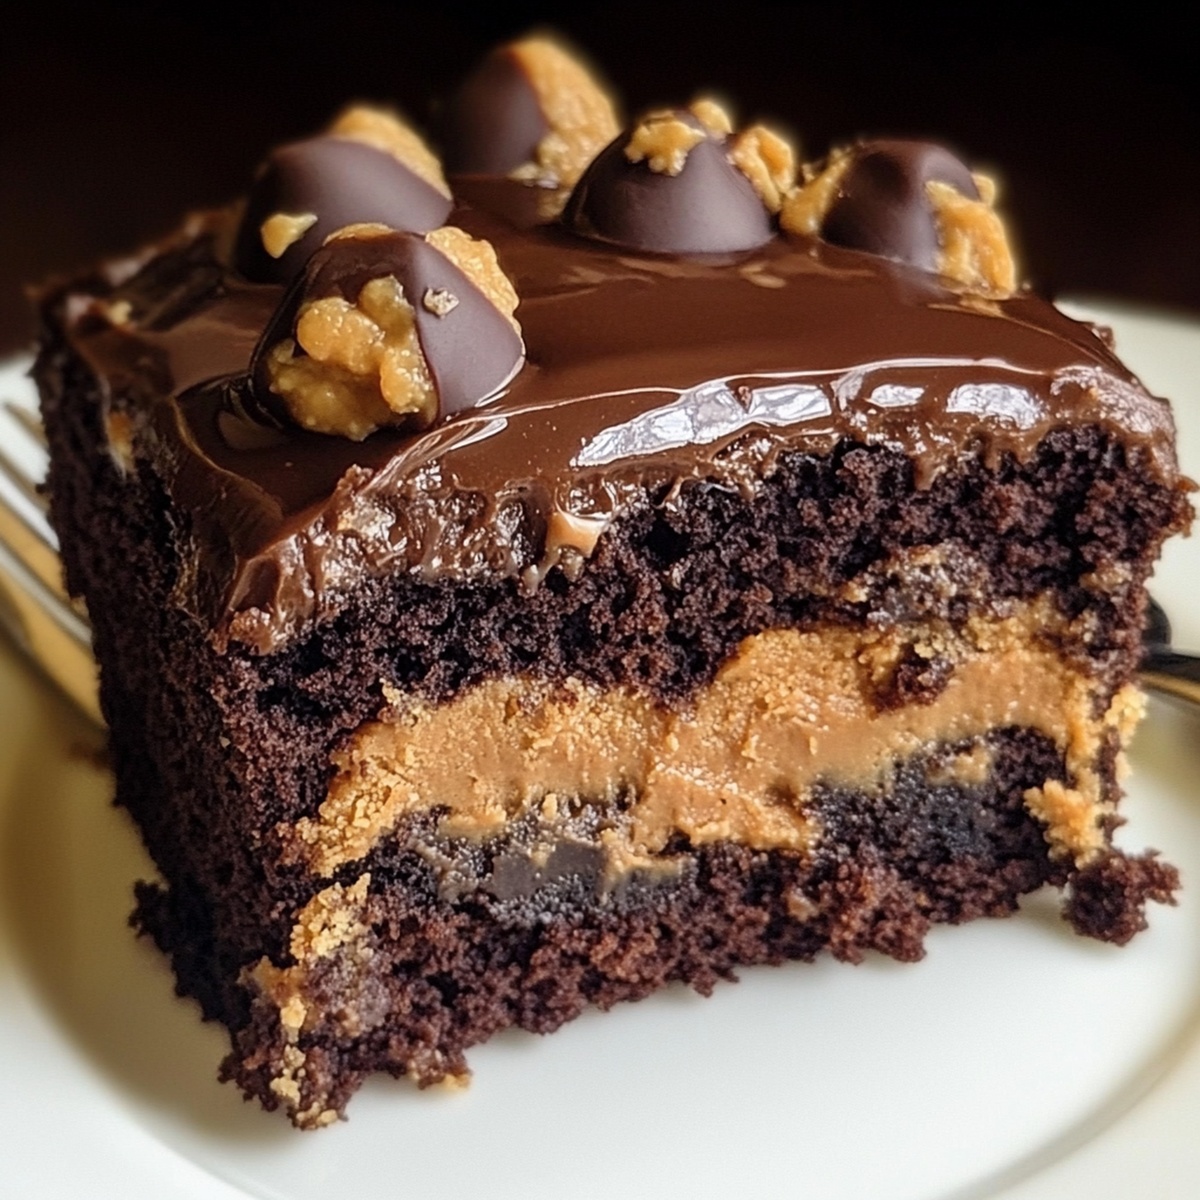
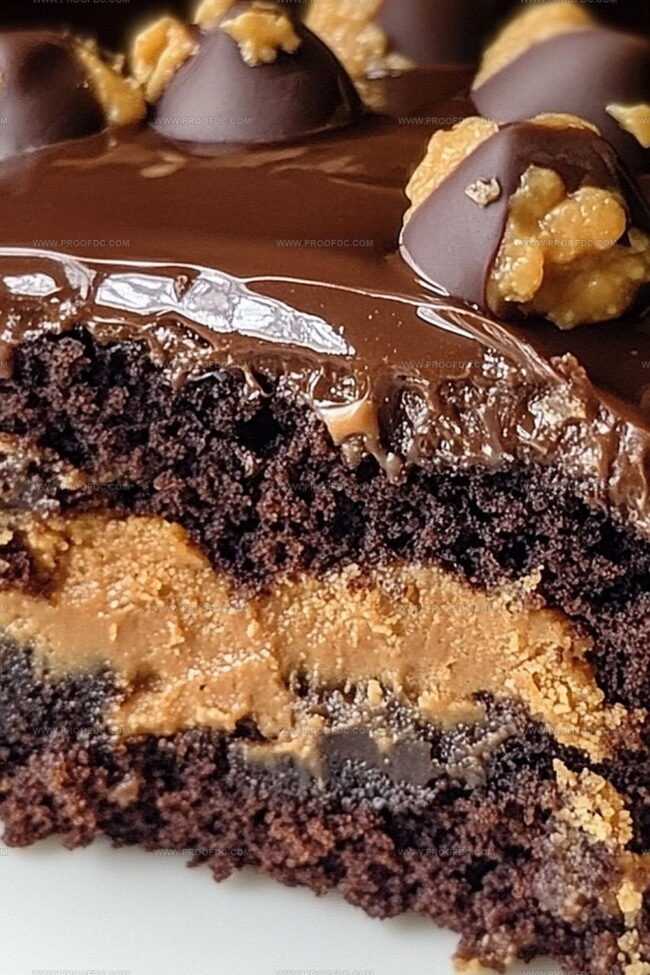
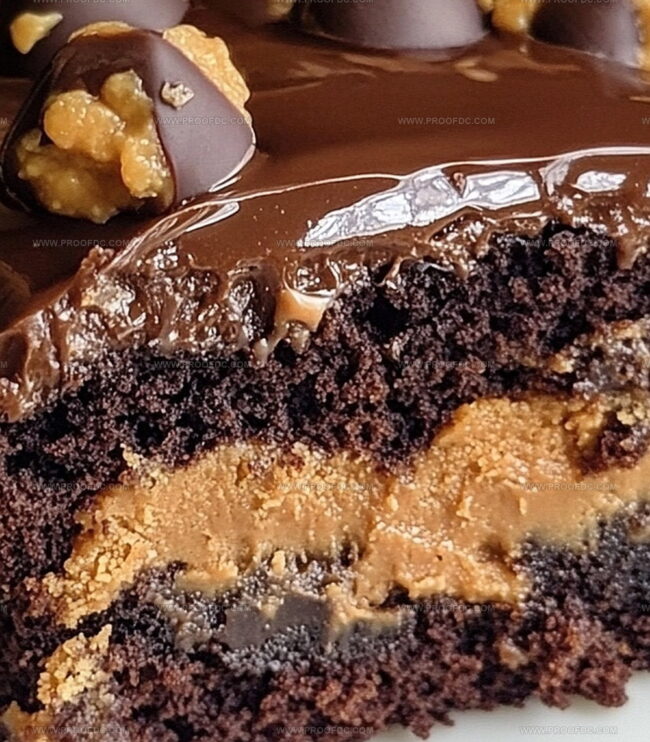
Chocolate and peanut butter lovers will absolutely go crazy for this ridiculously simple dessert.
Tossing together ingredients without complicated mixing or precise measurements.
Each bite promises rich, gooey goodness that feels like pure indulgence.
The magic happens when layers of cake mix, pudding, and chopped peanut butter cups create an irresistible combination.
Minimal effort delivers maximum flavor in this crowd-pleasing treat.
You won’t believe how something so easy can taste so incredible – get ready to become the dessert hero at your next gathering!
Why Peanut Butter Cup Dump Cake Stands Out
What Goes In Peanut Butter Cup Dump Cake
Base Ingredients:Topping Ingredients:Liquid and Binding Ingredients:Easy Way To Make Peanut Butter Cup Dump Cake
Step 1: Prepare Baking Dish
Grab your 9×13-inch baking pan and give it a light coating of non-stick spray. Smooth out a generous layer of creamy peanut butter across the entire bottom of the dish, creating a delectable foundation for your decadent dessert.
Step 2: Create Candy Layer
Scatter a delightful amount of chopped peanut butter cups across the peanut butter base. Gently pour sweetened condensed milk over the candy, letting it seep into every delicious crevice. Evenly sprinkle dry chocolate cake mix to create a magical blanket of chocolatey goodness.
Step 3: Add Buttery Topping
Drizzle melted butter across the cake mix, ensuring maximum coverage. Sprinkle a generous handful of milk chocolate chips and the remaining peanut butter cup pieces over the top, creating an irresistible landscape of sweet textures.
Step 4: Bake to Perfection
Slide the pan into a preheated oven at 350°F (175°C). Bake for 35-40 minutes, watching for a bubbly, slightly crisp top that promises pure indulgence.
Step 5: Cool and Serve
Let the cake rest for 10-15 minutes, allowing the flavors to meld together. Serve while warm, optionally topped with a scoop of vanilla ice cream or a dollop of whipped cream for an extra touch of heavenly delight.
Quick Tips For Peanut Butter Cup Dump Cake
How To Save And Reheat Peanut Butter Cup Dump Cake
Perfect Pairings For Peanut Butter Cup Dump Cake
Peanut Butter Cup Dump Cake Recipe Swaps
Peanut Butter Cup Dump Cake Answers
This dump cake combines the irresistible flavors of peanut butter and chocolate in an incredibly easy dessert. Unlike traditional cakes, you simply layer ingredients without complicated mixing, making it perfect for beginners or anyone who wants a quick, delicious treat.
Stick with creamy, processed peanut butter like Jif or Skippy. Natural peanut butter might separate during baking and won’t provide the same smooth, consistent base for the cake.
Absolutely! This peanut butter cup dump cake is a crowd-pleaser that comes together quickly and looks impressive. Its rich, indulgent flavors make it perfect for gatherings where you want to wow people without spending hours in the kitchen.
Look for a bubbly, slightly crisp top and golden-brown edges. The cake should be set but still moist. If the top browns too quickly, you can cover it loosely with aluminum foil to prevent burning.
Print
Peanut Butter Cup Dump Cake Recipe
- Total Time: 50 minutes
- Yield: 12 1x
Description
Indulgent Peanut Butter Cup Dump Cake brings chocolate and peanut butter lovers together in one irresistible dessert. Layers of rich cake mix, creamy peanut butter, and chopped chocolate candies create a simple yet luxurious treat you won’t be able to resist.
Ingredients
Cake Base:
- 1 box chocolate cake mix
- ½ cup (113 grams) melted butter
Peanut Butter and Chocolate Elements:
- 1 cup creamy peanut butter
- 1 cup milk chocolate chips
- 1 ½ cups (226 grams) chopped peanut butter cups
Liquid and Dairy:
- 1 can (14 ounces / 400 milliliters) sweetened condensed milk
Optional Serving Suggestions:
- Whipped cream
- Vanilla ice cream
- Extra chopped peanut butter cups for garnish
Instructions
- Prepare the foundation by preheating the oven to 350F (175C) and coating a 9×13-inch baking dish with a light layer of non-stick spray or butter.
- Spread a uniform layer of smooth peanut butter across the entire bottom of the prepared dish, creating a rich and creamy base.
- Generously distribute half of the roughly chopped peanut butter cups over the peanut butter layer, ensuring even coverage.
- Carefully pour the sweetened condensed milk across the candy layer, allowing it to create a smooth, sweet foundation.
- Evenly scatter the dry chocolate cake mix over the condensed milk, covering the entire surface with a light, dusty layer.
- Drizzle melted butter across the cake mix, making sure to cover as much of the dry mixture as possible to ensure a moist texture.
- Sprinkle the remaining chopped peanut butter cups and milk chocolate chips over the top, creating a tempting and decadent appearance.
- Transfer the dish to the preheated oven and bake for 35-40 minutes, watching for a bubbly, slightly crisp surface that indicates perfect doneness.
- Remove from the oven and let the cake rest for 10-15 minutes, allowing the layers to settle and the flavors to meld together.
- Serve warm, optionally topping with a dollop of whipped cream or a scoop of vanilla ice cream for an extra indulgent dessert experience.
Notes
- Customize the cake mix by using gluten-free or sugar-free alternatives for those with dietary restrictions.
- Prevent peanut butter cups from sinking by freezing them briefly before chopping and adding to the recipe.
- Cut back on sweetness by using dark chocolate cake mix or reducing the amount of condensed milk for a more balanced flavor.
- Enhance the texture by using room temperature ingredients, which helps create a more uniform and smooth dump cake consistency.
- Prep Time: 10 minutes
- Cook Time: 40 minutes
- Category: Desserts, Snacks
- Method: Baking
- Cuisine: American
Nutrition
- Serving Size: 12
- Calories: 320
- Sugar: 26 g
- Sodium: 350 mg
- Fat: 18 g
- Saturated Fat: 7 g
- Unsaturated Fat: 9 g
- Trans Fat: 0 g
- Carbohydrates: 38 g
- Fiber: 2 g
- Protein: 6 g
- Cholesterol: 30 mg
Jenna Stewart
Head Chef & Recipe Innovator
Expertise
Farm-to-Table Cooking; Seasonal Menu Development; Visual Plating Techniques; Flavor Layering and Simple Prep Hacks.
Education
The Culinary Institute of America, Hyde Park, NY
Jenna Stewart is the inventive spirit behind many of our standout dishes at Pro of Delicious Creations. A proud graduate of The Culinary Institute of America, she built her skills mastering both classic recipes and fresh, modern twists.
Now, Jenna celebrates the beauty of seasonal, local ingredients, often sourced from her garden and nearby markets, to create recipes that are bursting with flavor yet easy to follow. When she’s not experimenting in the kitchen, Jenna loves exploring nature on hikes and discovering new treasures at local co-ops.