
Heavenly Peanut Butter Chocolate Chip Cookie Cups Recipe
My kitchen adventure with peanut butter chocolate chip cookie cups started on a lazy Sunday afternoon.
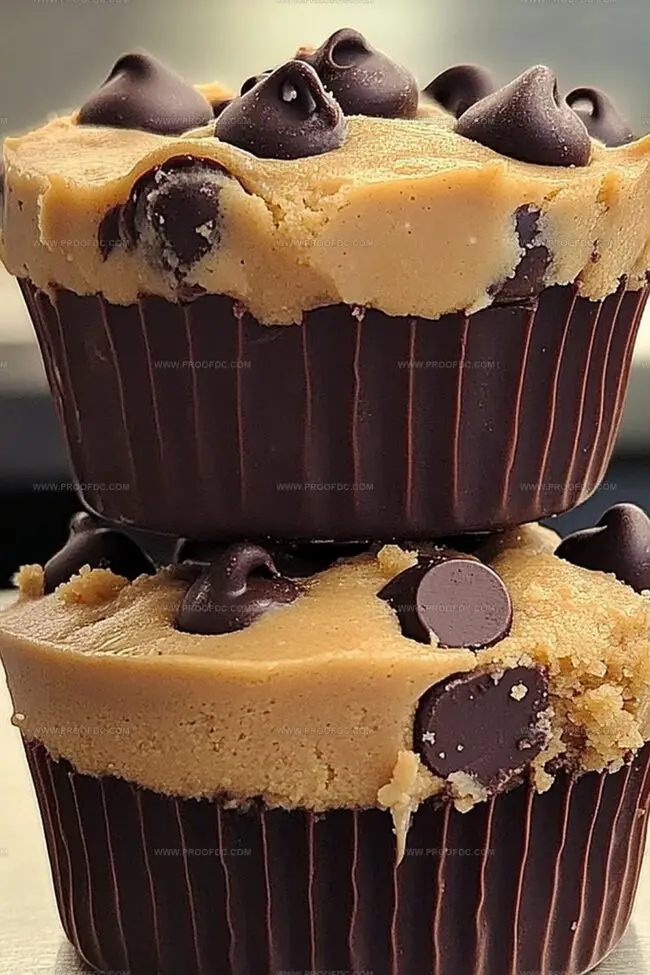
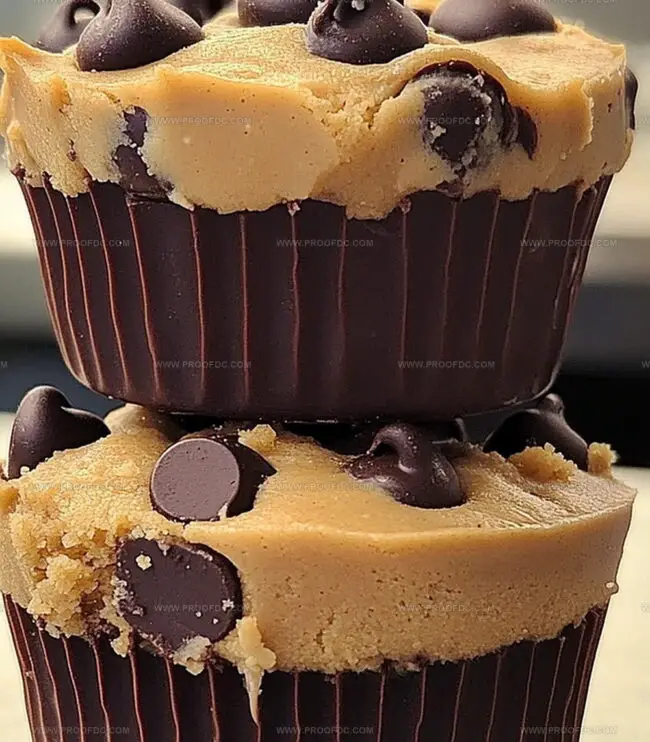
These delightful treats combine two classic flavors into one irresistible bite-sized dessert.
Sinking your teeth into a soft, chewy cookie shell filled with rich chocolate morsels.
Each cup promises a perfect balance of nutty smoothness and sweet indulgence.
Small enough to pop in your mouth, yet decadent enough to satisfy serious dessert cravings.
Home bakers will appreciate how simple these cookie cups are to create.
You are just moments away from experiencing a mouthwatering treat that will have everyone asking for seconds.
Why Peanut Butter Chocolate Chip Cookie Cups Are A Sweet Treat
What Goes Into Peanut Butter Chocolate Chip Cookie Cups
Base Ingredients:Fat and Flavor Ingredients:Chocolate and Seasoning Ingredients:How To Make Peanut Butter Chocolate Chip Cookie Cups Easily
Step 1: Prepare the Baking Station
Warm up your oven to 350°F (175°C). Grab a mini muffin tin and either lightly coat it with cooking spray or nestle in some adorable paper liners. This ensures your cookie cups will pop out perfectly golden and gorgeous.
Step 2: Mix the Dry Ingredients
Gather your dry ingredients:Whisk these together in a medium bowl until they’re completely blended and free of any lumps. The smooth mixture will be the foundation of your delightful treats.
Step 3: Cream Butter and Sugars
In a large mixing bowl, grab your electric mixer and blend:Whip these ingredients until they transform into a light, fluffy cloud-like consistency. The key is to beat until the mixture looks creamy and slightly pale.
Step 4: Build the Cookie Dough
Add to your creamed mixture:Mix thoroughly until everything is beautifully incorporated. Then gently fold in your dry ingredient mixture. Once combined, sprinkle in chocolate chips and stir just enough to distribute them evenly.
Step 5: Shape the Cookie Cups
Use a small cookie scoop or tablespoon to drop rounded balls of dough into each muffin tin cavity. Press the dough gently to fill about two-thirds of each cup.
Step 6: Bake to Perfection
Slide the muffin tin into the preheated oven. Bake for 12-15 minutes, watching for edges that turn golden brown. The centers should look slightly soft but set.
Step 7: Cool and Enjoy
Remove from the oven and let the cookie cups rest in the tin for 5 minutes. Then carefully transfer to a wire rack. As they cool, they’ll develop a perfect crispy-chewy texture that’s absolutely irresistible.
Helpful Tips For Peanut Butter Chocolate Chip Cookie Cups
How To Store And Reheat Peanut Butter Chocolate Chip Cookie Cups
What To Serve With Peanut Butter Chocolate Chip Cookie Cups
Flavor Twists On Peanut Butter Chocolate Chip Cookie Cups
FAQs About Peanut Butter Chocolate Chip Cookie Cups
These cookie cups combine the irresistible flavors of creamy peanut butter and rich chocolate chips in a bite-sized, adorable format that’s perfect for snacking or entertaining.
While creamy peanut butter works best, you can use natural peanut butter, but be aware that it might slightly change the texture and may require a bit more flour to balance the consistency.
Absolutely! These cookie cups are super easy to prepare and are a fun baking project for kids. They’ll love helping mix the dough and watching them bake into cute little cups.
When baking, gently press the centers with the back of a spoon immediately after removing from the oven to create a perfect cup-like indentation while the cookies are still warm and soft.
Print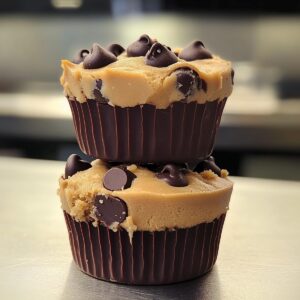
Peanut Butter Chocolate Chip Cookie Cups Recipe
- Total Time: 30 minutes
- Yield: 12 1x
Description
Indulgent Peanut Butter Chocolate Chip Cookie Cups deliver a heavenly blend of rich flavors nestled in a perfectly baked base. Creamy peanut butter and melted chocolate dance together, creating an irresistible treat with classic comfort that calls you to savor each delightful bite.
Ingredients
Main Ingredients:
- ½ cup (115 g) unsalted butter, softened
- 1 cup (175 g) semi-sweet chocolate chips
- ¾ cup (180 g) creamy peanut butter
- 1 ½ cups (190 g) all-purpose flour
- ½ cup (100 g) granulated sugar
- ½ cup (100 g) packed brown sugar
Cookie Base Ingredients:
- 1 large egg
- 1 teaspoon vanilla extract
- ½ teaspoon baking soda
- ¼ teaspoon salt
Filling Ingredients:
- ¼ cup (50 g) powdered sugar
- 2 tablespoons unsalted butter, softened
Instructions
- Arrange an oven rack in the middle position and warm the oven to a toasty 350F (175C), creating an ideal baking environment for these delectable treats.
- Thoroughly coat a mini muffin tin with non-stick cooking spray or delicately line each cavity with paper liners to ensure easy cookie removal.
- Cream together softened butter and peanut butter until the mixture becomes smooth and uniform, blending the rich, nutty flavors seamlessly.
- Incorporate granulated and brown sugars into the butter mixture, whisking vigorously until the combination transforms into a light, fluffy texture.
- Introduce eggs and vanilla extract, mixing gently to create a cohesive and silky base that will bind the cookie cups together.
- Gradually fold in flour, baking soda, and salt, stirring until a uniform dough forms without overmixing, which could lead to tough cookies.
- Gently fold chocolate chips into the dough, distributing them evenly to ensure each cookie cup will have delightful chocolate morsels.
- Using a small cookie scoop or spoon, carefully place rounded portions of dough into each muffin tin cavity, filling approximately two-thirds full.
- Bake in the preheated oven for 10-12 minutes, watching for edges to turn golden brown and centers to appear slightly set.
- Remove from the oven and let the cookie cups cool in the tin for 5 minutes, allowing them to firm up and easily release from the pan.
- Carefully transfer the cups to a wire rack to complete cooling, ensuring they maintain their perfect shape and texture.
Notes
- Customize the sweetness by adjusting the amount of chocolate chips or using dark chocolate for a more intense flavor profile.
- Ensure room temperature butter and eggs blend smoothly, creating a more uniform cookie texture that holds its shape perfectly in the muffin tin.
- For gluten-free options, swap all-purpose flour with a 1:1 gluten-free baking blend, maintaining the same delicious taste and tender crumb.
- Cool cookies completely in the tin before removing to prevent breaking, allowing them to set and develop a delightful crisp exterior while keeping a soft, chewy center.
- Prep Time: 15 minutes
- Cook Time: 15 minutes
- Category: Desserts, Snacks
- Method: Baking
- Cuisine: American
Nutrition
- Serving Size: 12
- Calories: 252
- Sugar: 15 g
- Sodium: 115 mg
- Fat: 13 g
- Saturated Fat: 5 g
- Unsaturated Fat: 8 g
- Trans Fat: 0 g
- Carbohydrates: 30 g
- Fiber: 1 g
- Protein: 5 g
- Cholesterol: 25 mg
Jenna Stewart
Head Chef & Recipe Innovator
Expertise
Farm-to-Table Cooking; Seasonal Menu Development; Visual Plating Techniques; Flavor Layering and Simple Prep Hacks.
Education
The Culinary Institute of America, Hyde Park, NY
Jenna Stewart is the inventive spirit behind many of our standout dishes at Pro of Delicious Creations. A proud graduate of The Culinary Institute of America, she built her skills mastering both classic recipes and fresh, modern twists.
Now, Jenna celebrates the beauty of seasonal, local ingredients, often sourced from her garden and nearby markets, to create recipes that are bursting with flavor yet easy to follow. When she’s not experimenting in the kitchen, Jenna loves exploring nature on hikes and discovering new treasures at local co-ops.