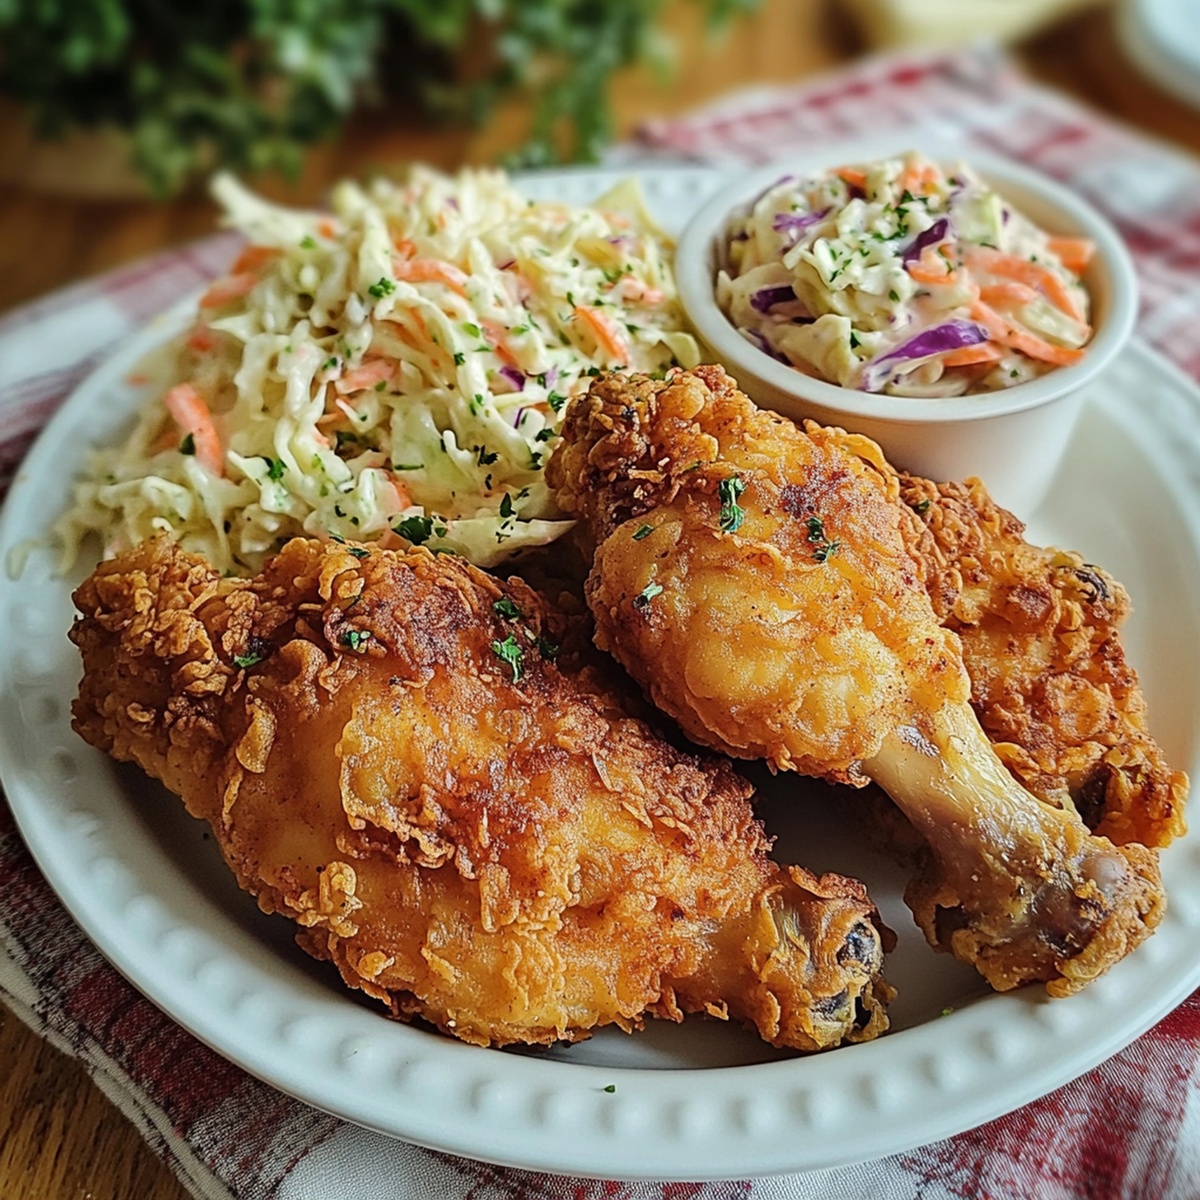
Golden Oven-Fried Chicken with Homemade Coleslaw Recipe
This crispy oven-fried chicken with homemade coleslaw promises a delightful twist on classic comfort food.
Sinking your teeth into perfectly golden, crunchy chicken without the mess of deep-frying.
Traditional methods meet modern kitchen magic in this simple yet impressive dish.
Lean and flavorful, the chicken pairs beautifully with a tangy, fresh coleslaw that adds bright crunch to every bite.
Weeknight dinners just got a serious upgrade with minimal effort and maximum satisfaction.
Hungry friends and weekend crowds will be begging you to make this crowd-pleasing meal again and again.
Grab your apron and let’s transform an ordinary evening into a seriously delicious feast.
Why Oven-Fried Chicken With Homemade Coleslaw Is A Winner
What Goes Into Oven-Fried Chicken With Homemade Coleslaw
Chicken and Marinade:Coating Ingredients:Finishing Ingredients:Step By Step Oven-Fried Chicken With Homemade Coleslaw
Step 1: Preheat Your Cooking Station
Get your oven blazing hot at 425F. Grab a baking sheet and line it with parchment paper. Place a wire cooling rack on top and give it a quick spray of non-stick cooking magic.
Step 2: Create Flavor Bath
Mix in a large bowl:Submerge chicken pieces completely. Let them soak up all the deliciousness in the refrigerator for 30 minutes to 8 hours.
Step 3: Craft Crispy Coating
In a wide, shallow dish, blend together:Whisk until perfectly combined.
Step 4: Transform Chicken
Pull chicken from its flavor bath, letting excess liquid drip away. Roll each piece in the seasoned coating, pressing gently to ensure a complete crispy embrace.
Step 5: Bake to Golden Perfection
Arrange coated chicken on the prepared rack. Drizzle with olive oil or melted butter for extra crispiness. Slide into the hot oven and bake 35-40 minutes. Flip chicken halfway through cooking. Listen for the sizzle and watch for a gorgeous golden-brown color. Chicken is ready when internal temperature hits 165F.
Bonus Tip: Let chicken rest for 5-10 minutes after baking to lock in those incredible juices.
Good To Know Tips For Oven-Fried Chicken With Homemade Coleslaw
Keep Oven-Fried Chicken With Homemade Coleslaw Fresh And Tasty
What Works Well With Oven-Fried Chicken With Homemade Coleslaw
Try These Variations For Oven-Fried Chicken With Homemade Coleslaw
FAQ About Oven-Fried Chicken With Homemade Coleslaw
Buttermilk helps tenderize the chicken by breaking down proteins, making it juicier and more flavorful. The acidity also helps the coating stick better, creating a crispier exterior.
Yes! Simply substitute the all-purpose flour with gluten-free flour or almond flour. Make sure to use cornmeal that is certified gluten-free to maintain the recipe’s crispy texture.
Use a meat thermometer to check the internal temperature reaches 165F (74C). This ensures the chicken is safe to eat while keeping it moist. Avoid overcooking by checking the temperature early and frequently.
Oven-fried chicken uses less oil and bakes in the oven, creating a crispy coating similar to deep-frying but with fewer calories. The wire rack and oil drizzle help achieve that classic crispy texture without excessive oil.
Print
Oven-Fried Chicken With Homemade Coleslaw Recipe
- Total Time: 1 hour
- Yield: 4 1x
Description
Crispy oven-fried chicken with homemade coleslaw delivers Southern comfort right to your plate. Savory breaded chicken meets tangy, crunchy slaw for a perfect balance of flavors you’ll crave again and again.
Ingredients
Protein:
- 4 bone-in chicken thighs or drumsticks
- 1 cup (240 milliliters/8 fluid ounces) buttermilk
- 1 teaspoon hot sauce (optional)
Coating and Seasoning:
- 1 cup (120 grams/4.2 ounces) all-purpose flour
- ½ cup (60 grams/2.1 ounces) yellow cornmeal
- 1 teaspoon paprika
- 1 teaspoon garlic powder
- 1 teaspoon onion powder
- ½ teaspoon cayenne pepper (optional)
- 1 teaspoon salt
- ½ teaspoon black pepper
- 3 tablespoons olive oil or melted butter
Coleslaw Ingredients:
- 4 cups shredded green cabbage (or coleslaw mix)
- 1 cup shredded carrots
- ¼ cup chopped red onion (optional)
- ½ cup (120 milliliters/4 fluid ounces) mayonnaise
- 2 tablespoons apple cider vinegar
- 1 tablespoon Dijon mustard
- 1 tablespoon honey or granulated sugar
- Salt and pepper, to taste
Instructions
- Prepare the oven environment for optimal chicken roasting by heating to 425F (220C). Create a strategic cooking surface by lining a baking sheet with parchment paper and positioning a wire rack, then apply a light coating of non-stick spray.
- Craft a flavor-enhancing marinade by whisking buttermilk and hot sauce in a spacious container. Submerge chicken pieces completely, ensuring thorough coverage. Allow flavors to meld by refrigerating for a minimum of 30 minutes or up to 8 hours.
- Develop a textural coating mixture combining flour, cornmeal, and an aromatic blend of spices including paprika, garlic powder, onion powder, cayenne pepper, salt, and black pepper in a wide, shallow dish.
- Extract marinated chicken, allowing excess liquid to cascade off. Meticulously dredge each piece in the seasoned coating, applying gentle pressure to ensure an even, comprehensive layer of crispy protection.
- Arrange coated chicken pieces strategically on the prepared wire rack. Enhance crispiness by delicately drizzling olive oil or melted butter across the surface.
- Roast the chicken in the preheated oven, rotating midway through cooking. Monitor until the exterior achieves a golden-brown hue and internal temperature reaches 165F (74C), typically requiring 35-40 minutes of cooking time.
Notes
- Perfectly crisp exterior starts with thoroughly draining buttermilk marinade to ensure coating sticks evenly and doesn’t become soggy.
- Use a meat thermometer to guarantee chicken reaches safe internal temperature without overcooking, maintaining juicy texture.
- For gluten-free version, swap regular flour with almond or rice flour, keeping same measurements and coating technique.
- Want spicier kick? Increase cayenne pepper or add hot smoked paprika to flour mixture for extra heat and depth of flavor.
- Prep Time: 20 minutes
- Cook Time: 40 minutes
- Category: Dinner, Lunch
- Method: Baking
- Cuisine: American
Nutrition
- Serving Size: 4
- Calories: 495
- Sugar: 6 g
- Sodium: 800 mg
- Fat: 28 g
- Saturated Fat: 5 g
- Unsaturated Fat: 20 g
- Trans Fat: 0 g
- Carbohydrates: 37 g
- Fiber: 3 g
- Protein: 25 g
- Cholesterol: 85 mg
Jenna Stewart
Head Chef & Recipe Innovator
Expertise
Farm-to-Table Cooking; Seasonal Menu Development; Visual Plating Techniques; Flavor Layering and Simple Prep Hacks.
Education
The Culinary Institute of America, Hyde Park, NY
Jenna Stewart is the inventive spirit behind many of our standout dishes at Pro of Delicious Creations. A proud graduate of The Culinary Institute of America, she built her skills mastering both classic recipes and fresh, modern twists.
Now, Jenna celebrates the beauty of seasonal, local ingredients, often sourced from her garden and nearby markets, to create recipes that are bursting with flavor yet easy to follow. When she’s not experimenting in the kitchen, Jenna loves exploring nature on hikes and discovering new treasures at local co-ops.