The Dreamiest No-Bake Oreo Balls Recipe You’ll Adore
Irresistible chocolate Oreo balls have been my secret weapon at potlucks for years.
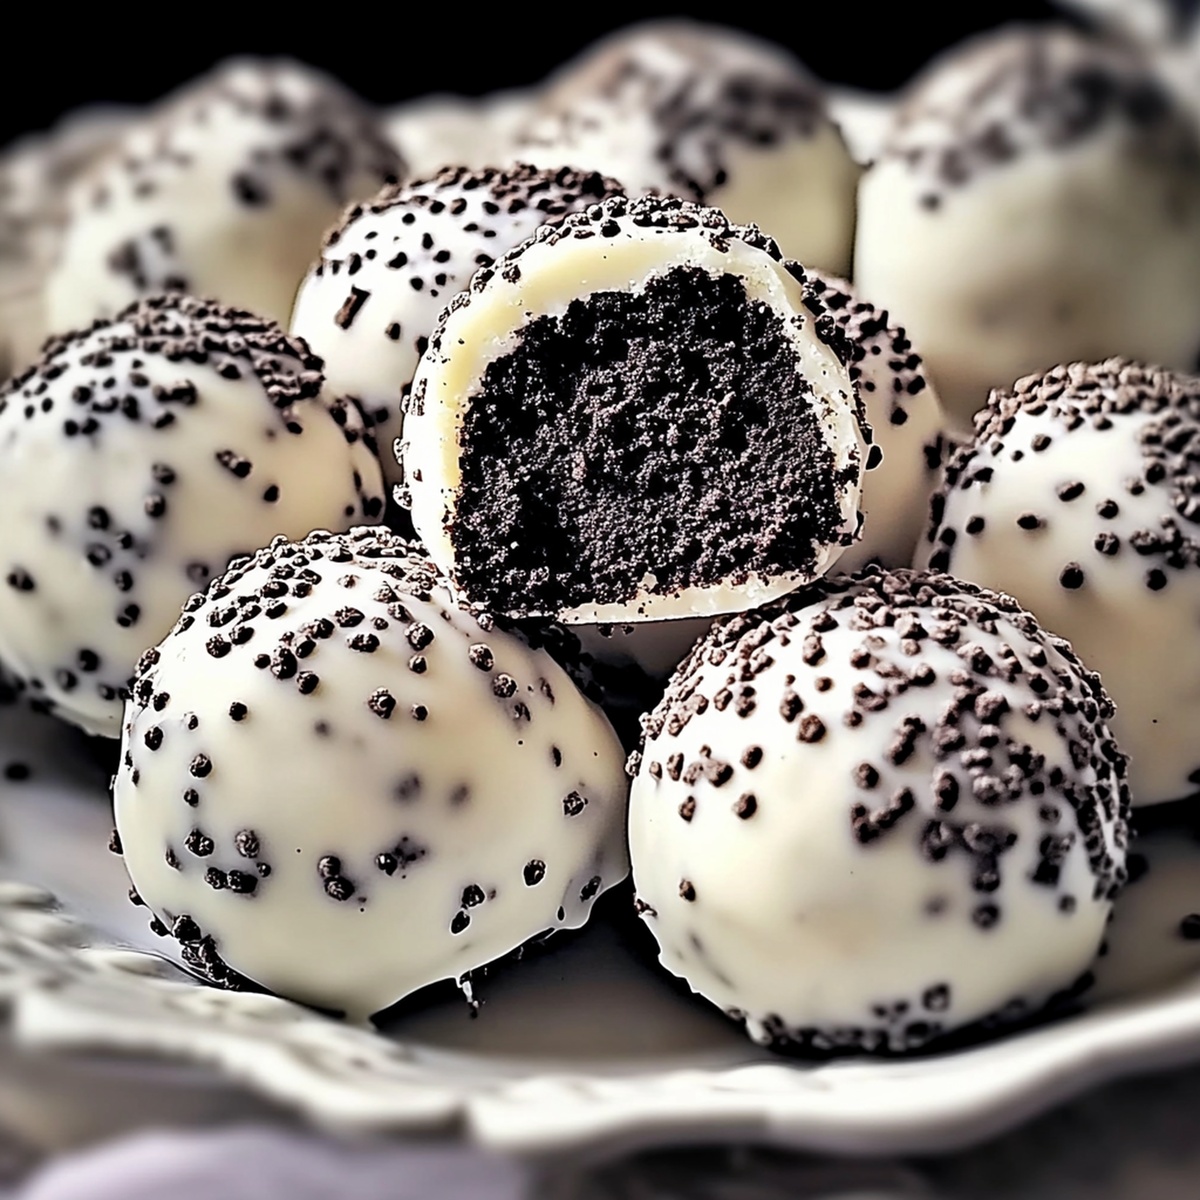
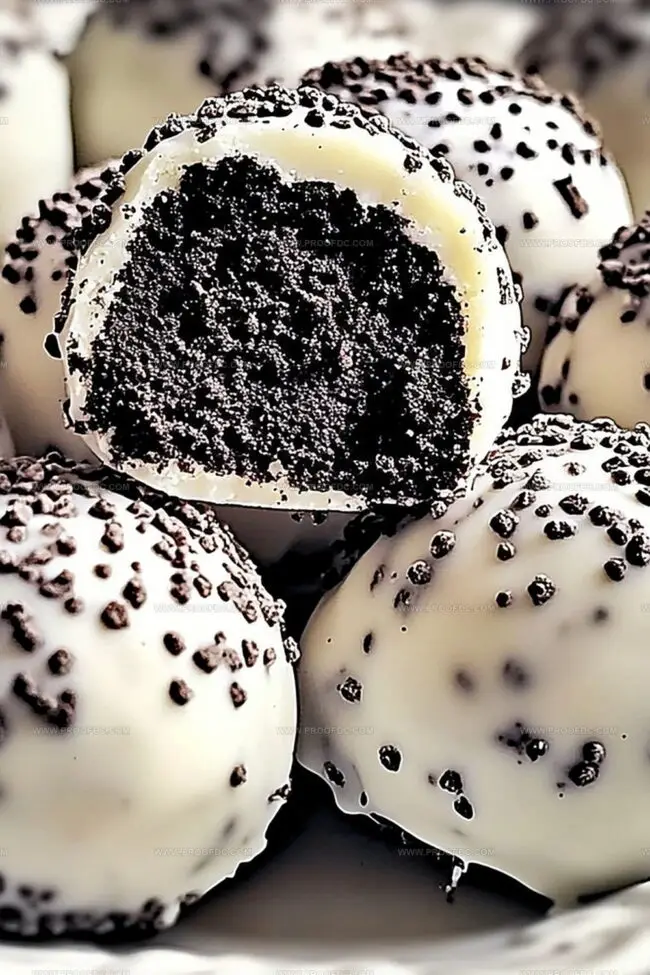
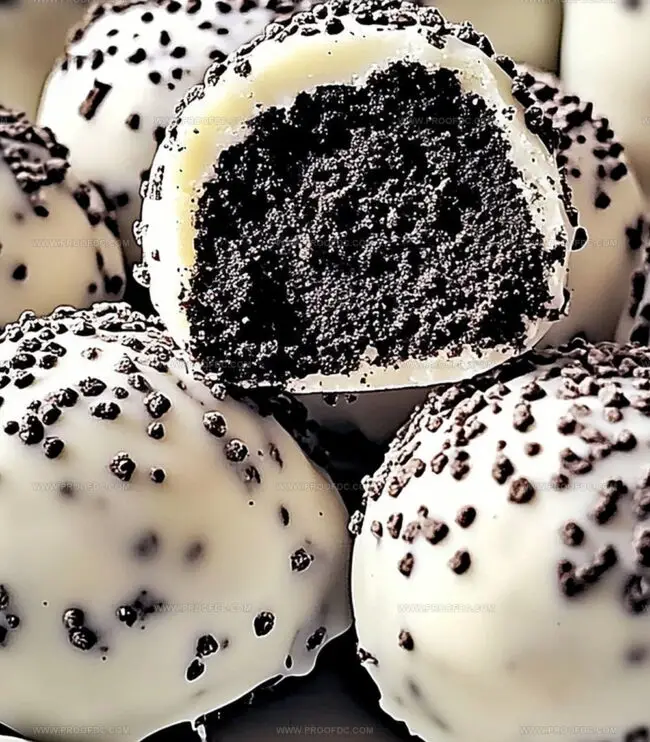
These bite-sized delights combine creamy textures with rich chocolate in a simple no-bake treat.
Anyone can master this recipe with just three ingredients and minimal kitchen skills.
The magic happens when classic Oreo cookies crumble into a decadent mixture that melts in your mouth.
Smooth cream cheese binds the crumbs together, creating perfectly round spheres of pure indulgence.
Each Oreo ball offers a delightful contrast between crunchy chocolate coating and soft inner filling.
You’ll become a dessert hero when friends taste these addictive little morsels.
Grab your mixing bowl and let’s make something deliciously unforgettable.
Why Oreo Balls Are The No-Bake Dessert Everyone Loves
What You’ll Use For Oreo Balls
Base Ingredients:Garnish Ingredients:Optional Topping Ingredients:How To Shape And Chill Oreo Balls Right
Step 1: Crush Oreo Cookies
Toss entire Oreo cookies (cream and all) into a food processor. Pulse until the cookies transform into fine, sandy crumbs. Set aside a small portion of crumbs for decorating later. The goal is to create a uniform, powdery texture that will mix smoothly.
Step 2: Blend Creamy Mixture
In a spacious mixing bowl, combine:Knead and mix thoroughly until the ingredients merge into a consistent, moldable dough. The mixture should hold together easily when pressed.
Step 3: Shape Delightful Spheres
Using clean hands, roll the Oreo mixture into small, uniform balls. Each ball should be roughly the size of a golf ball. Arrange these spheres on a parchment-lined tray, ensuring they’re not touching each other.
Step 4: Chill the Oreo Spheres
Place the tray of Oreo balls in the refrigerator. Let them firm up for about 30 minutes. This cooling period helps them maintain their shape during the chocolate coating process.
Step 5: Melt Chocolate Coating
Select your preferred chocolate (milk, dark, or white). Melt the chocolate in a microwave-safe bowl. Heat in short 30-second bursts, stirring between each interval to prevent burning. Continue until the chocolate reaches a smooth, glossy consistency.
Step 6: Chocolate Dunking
Carefully dip each chilled Oreo ball into the melted chocolate. Use a fork to lift and gently tap off excess chocolate. Ensure each ball is evenly coated and returns to the parchment-lined tray.
Step 7: Garnish and Decorate
While the chocolate coating remains wet, sprinkle:Get creative with your decorations!
Step 8: Final Chilling
Return the decorated Oreo balls to the refrigerator. Allow them to set for approximately 20 minutes until the chocolate hardens completely.
Step 9: Serve and Enjoy
Remove the Oreo balls from the refrigerator. Arrange on a serving platter and watch them disappear quickly at parties or family gatherings. Store any leftovers in an airtight container in the refrigerator.
Tips For Dipping Oreo Balls Neatly
How To Store Oreo Balls Without A Mess
What Pairs Well With Oreo Balls
Flavor Ideas For Oreo Balls You’ll Crave
Oreo Balls Questions Answered
Oreo Balls are delicious no-bake dessert treats made by crushing Oreo cookies, mixing them with cream cheese, forming them into bite-sized balls, and coating them in melted chocolate.
Not at all! They’re super easy and require no baking. Even beginner cooks can make these delightful treats with just a few simple steps and minimal ingredients.
When stored in an airtight container in the refrigerator, Oreo Balls can last up to 1 week. Just make sure to keep them chilled to maintain their texture and flavor.
Absolutely! You can crush the Oreos by placing them in a sealed plastic bag and using a rolling pin to crush them into fine crumbs. It works just as well and gives you a great arm workout!
Print
Oreo Balls Recipe
- Total Time: 45 minutes
- Yield: 24 1x
Description
Creamy Oreo Balls deliver a delightful chocolate-coated treat that melts in your mouth with rich cookie crumbs and smooth cream cheese. Sweet indulgence meets simple preparation, making these bite-sized delights perfect for parties or quick dessert cravings you’ll savor.
Ingredients
Main Ingredients:
- 36 Oreo cookies (1 standard package)
- 8 ounces (226 grams) cream cheese, softened
- 12 ounces (340 grams) semi-sweet chocolate chips or melting chocolate
Topping Options:
- Sprinkles
- Crushed Oreos
- White chocolate drizzle
Instructions
- Pulverize the Oreo cookies completely in a food processor, ensuring both cookies and filling are transformed into uniform, fine crumbs. Separate a small portion of crumbs for later garnishing.
- Transfer the processed crumbs into a spacious mixing bowl and incorporate softened cream cheese. Knead the mixture thoroughly until a cohesive, moldable dough emerges.
- Gently shape the combined mixture into uniform, compact spheres approximately one inch in diameter. Arrange these delicate orbs on a parchment-lined tray.
- Chill the formed balls in the refrigerator, allowing them to firm up and maintain their structured shape for approximately 20-30 minutes.
- Carefully melt chocolate chips using gentle microwave intervals, stirring consistently to achieve a smooth, glossy consistency.
- Delicately immerse each chilled ball into the melted chocolate, utilizing a fork to ensure complete coverage and remove excess chocolate.
- Return the chocolate-enrobed spheres to the parchment-lined surface, creating an elegant presentation.
- While the chocolate coating remains wet, elegantly dust with reserved Oreo crumbs or sprinkle decorative elements like colorful sprinkles.
- Complete the process by returning the decorated Oreo balls to the refrigerator, allowing them to set and solidify for an additional 15-20 minutes before serving.
Notes
- Pulse Oreos finely to ensure smooth, consistent texture without large cookie chunks that might disrupt the ball’s shape.
- Cream cheese temperature matters: use room temperature for easier mixing and smoother incorporation with cookie crumbs.
- Chilling the mixture before shaping helps prevent sticky hands and creates more compact, well-formed balls.
- When dipping in chocolate, use a fork to gently tap excess chocolate, creating a thin, even coating that doesn’t pool or look messy.
- Keep Oreo balls cold to maintain their structure and prevent chocolate from melting quickly at room temperature.
- For gluten-free version, substitute regular Oreos with gluten-free cookie alternatives like Glutino or NFGB brand.
- Experiment with different chocolate coatings like dark, milk, or white chocolate to customize flavor profiles.
- Store in an airtight container in the refrigerator for up to one week, separating layers with parchment paper to prevent sticking.
- Prep Time: 15 minutes
- Cook Time: 30 minutes
- Category: Desserts, Snacks
- Method: Mixing
- Cuisine: American
Nutrition
- Serving Size: 24
- Calories: 130
- Sugar: 10 g
- Sodium: 50 mg
- Fat: 7 g
- Saturated Fat: 4 g
- Unsaturated Fat: 3 g
- Trans Fat: 0 g
- Carbohydrates: 16 g
- Fiber: 0 g
- Protein: 2 g
- Cholesterol: 15 mg
Jenna Stewart
Head Chef & Recipe Innovator
Expertise
Farm-to-Table Cooking; Seasonal Menu Development; Visual Plating Techniques; Flavor Layering and Simple Prep Hacks.
Education
The Culinary Institute of America, Hyde Park, NY
Jenna Stewart is the inventive spirit behind many of our standout dishes at Pro of Delicious Creations. A proud graduate of The Culinary Institute of America, she built her skills mastering both classic recipes and fresh, modern twists.
Now, Jenna celebrates the beauty of seasonal, local ingredients, often sourced from her garden and nearby markets, to create recipes that are bursting with flavor yet easy to follow. When she’s not experimenting in the kitchen, Jenna loves exploring nature on hikes and discovering new treasures at local co-ops.