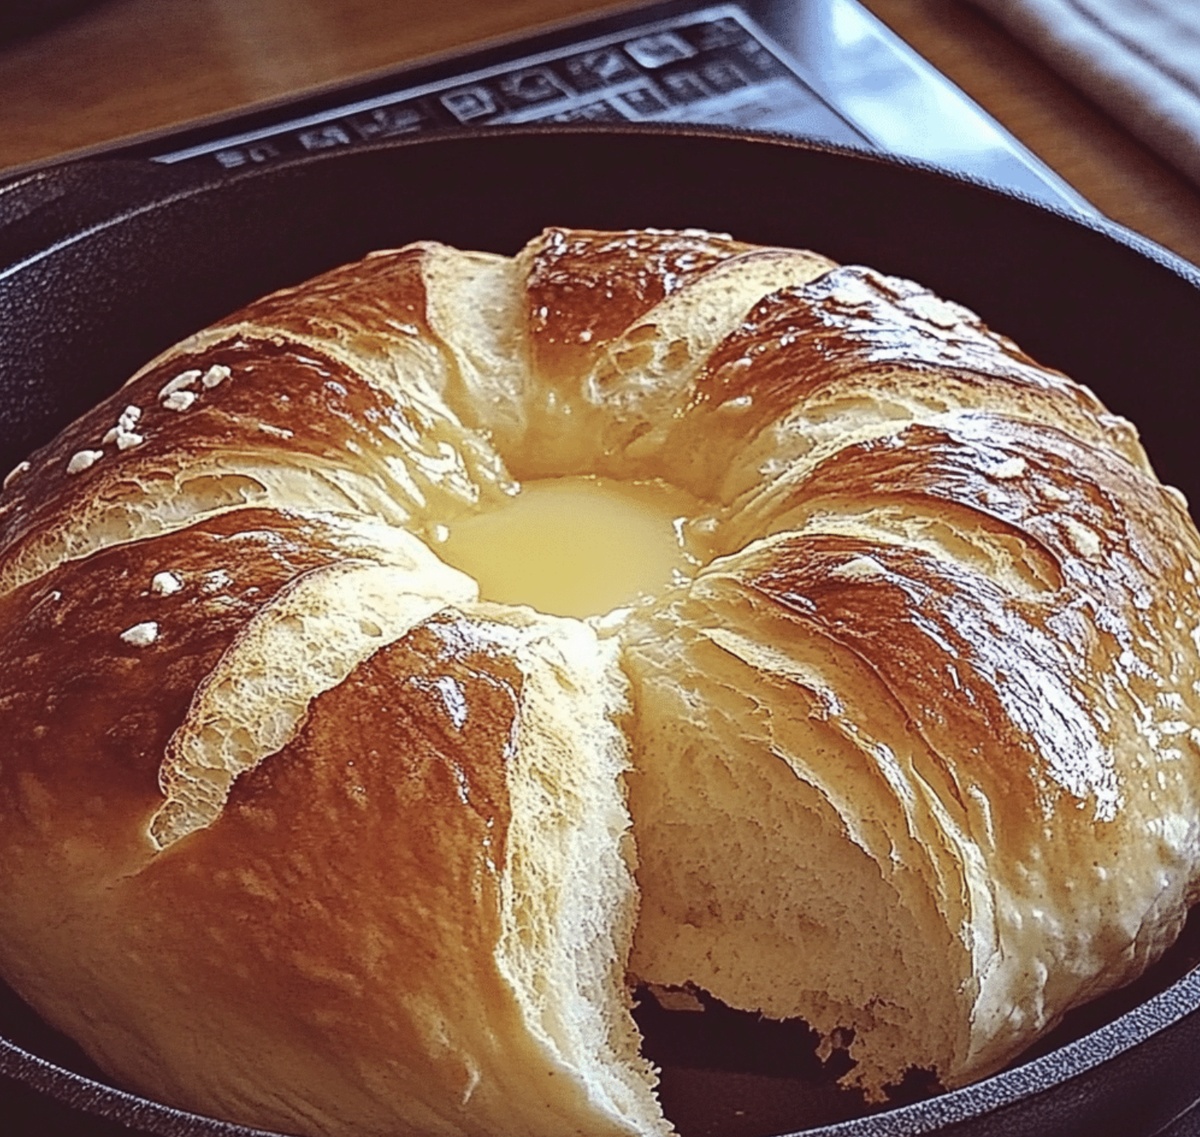
The No-Oven Stovetop Bread Recipe: Simple & Golden Perfection
Crafting homemade no-oven stovetop bread doesn’t require fancy equipment or culinary expertise.
Creating warm, golden loaves using just a simple skillet and basic ingredients.
Kitchen magic happens when you mix flour, yeast, and a pinch of creativity.
Traditional bread-making rules fade away as you explore this innovative cooking technique.
stovetop baking opens up delightful possibilities for anyone wanting fresh bread without turning on an oven.
Compact kitchens and summer heat won’t stop you from enjoying warm, fragrant bread anymore.
Let’s transform your cooking skills with this surprisingly easy method that promises delicious results every single time.
Why No-Oven Stovetop Bread Is A Clever Treat
No-Oven Stovetop Bread Ingredient Checklist
Dry Ingredients:Wet Ingredients:Yeast and Sweetener:Steps To Cook No-Oven Stovetop Bread Right
Step 1: Kickstart the Yeast Activation
In a cozy little bowl, combine warm water, a sprinkle of sugar, and yeast. Let this magical mixture sit and bubble for 5-10 minutes until it becomes a frothy wonderland.
Step 2: Create the Dough
Grab a spacious mixing bowl and combine flour and salt. If using instant yeast, add it directly. Pour in the yeast mixture (if using active dry), a splash of oil, and warm water. Stir until a shaggy dough forms. Transfer to a lightly floured surface and knead with love for 8-10 minutes. The dough should transform into a smooth, elastic ball that feels soft and supple.
Step 3: Let the Dough Rise
Nestle the dough into a lightly oiled bowl. Drape a damp cloth over it like a cozy blanket. Find a warm, draft-free spot in your kitchen and let the dough rest and grow for about an hour. It should double in size, looking puffy and promising.
Step 4: Shape the Loaf
Gently deflate the risen dough with a gentle punch. Shape it into a round or oval form that will comfortably fit your skillet or pot. This is your chance to get creative with the bread’s shape!
Step 5: Cook on the Stovetop
Select a nonstick skillet or heavy-bottomed pot with a snug-fitting lid. Warm it over low heat and lightly grease the surface. Carefully place your shaped dough into the skillet. Cover with the lid and let it cook slowly for 12-15 minutes. Flip the bread gently and cook the other side for 10-12 minutes. Look for a golden-brown exterior that promises a delicious interior.
Step 6: Cool and Enjoy
Transfer the bread to a wire rack and let it cool for a few minutes. This helps the interior set and makes slicing easier. Slice, serve, and savor your homemade stovetop bread!
No-Oven Stovetop Bread Tips For Success
Reheat And Store No-Oven Stovetop Bread With Ease
What To Serve With No-Oven Stovetop Bread
Tasty Twists On No-Oven Stovetop Bread
FAQ Guide For No-Oven Stovetop Bread
This method is perfect for those without an oven or during summer when you want to avoid heating up the kitchen. It’s a quick, easy alternative that still produces delicious, freshly made bread with a crispy crust and soft interior.
Unfortunately, yeast is crucial for bread’s rise and texture. Without it, you’ll end up with a dense, flat flatbread instead of a fluffy loaf. If you’re out of yeast, consider making quick breads or flatbreads that don’t require rising.
Check for foaming when you mix yeast with warm water and sugar. If it doesn’t become bubbly and foamy after 5-10 minutes, your yeast is likely dead and won’t work for bread making. Fresh yeast is key to getting a good rise and soft texture.
Ensure your water is warm (not hot) and your rising area is draft-free and slightly warm. Cold temperatures or using water that’s too hot can kill the yeast. A consistent temperature around 80-90°F helps the dough rise effectively.
Print
No-Oven Stovetop Bread Recipe
- Total Time: 1 hour 40 minutes
- Yield: 4 1x
Description
Rustic stovetop bread delivers warm, homemade comfort straight from your skillet with minimal effort. Quick and simple ingredients create deliciously crusty results you can savor without traditional baking methods.
Ingredients
Main Ingredients:
- 2 ½ cups (590 ml) all-purpose flour
- ¾ cup (180 ml) warm water
- 2 teaspoons (10 ml) instant yeast
Flavor Enhancers:
- 2 teaspoons (10 ml) sugar
- 1 teaspoon (5 ml) salt
Fat/Oil:
- 2 tablespoons (30 ml) vegetable oil or melted butter
Instructions
- Awaken the yeast microorganisms by whisking them with warm liquid and a touch of sweetener, allowing them to bloom and become frothy, indicating active fermentation.
- Create a pillowy dough foundation by combining flour and mineral salt in a spacious mixing vessel, then incorporate the lively yeast essence, aromatic oil, and tepid water, transforming the ingredients into a cohesive, malleable mass.
- Tenderly manipulate the dough on a flour-dusted surface, kneading with rhythmic motions until the texture becomes silky, smooth, and resilient, developing gluten networks that provide structural integrity.
- Nestle the dough into a lightly lubricated container, enveloping it with a moisture-laden cloth, and allow it to rest in a nurturing, warm environment where it will gradually expand and double in volume.
- Gently deflate the risen dough with a delicate punch, then mold it into an elegant circular or oval shape perfectly proportioned for your cooking vessel.
- Prepare a nonstick skillet or robust pot with a snug-fitting lid, applying a whisper of culinary lubricant to prevent sticking, then carefully position the dough inside.
- Employ low, controlled heat to coax the bread into golden transformation, covering with the lid to create a mini-oven environment, cooking one side for approximately 12-15 minutes.
- Delicately turn the bread, revealing its developing crust, and continue cooking the opposite side for an additional 10-12 minutes until a rich, appetizing bronze emerges.
- Transfer the freshly prepared bread to a cooling rack, allowing it to rest and settle its internal moisture before slicing into inviting segments ready for enjoyment.
Notes
- Ensure water temperature is lukewarm (around 110°F) to activate yeast properly without killing it.
- Use a kitchen thermometer for precise yeast activation and prevent potential bread failure.
- Knead dough thoroughly to develop gluten, creating a softer, more elastic bread texture.
- Choose a cast-iron skillet or heavy-bottomed pot for even heat distribution and consistent browning.
- Keep heat low and steady to prevent burning while allowing bread to cook through completely.
- Check bread’s doneness by tapping the bottom – a hollow sound indicates it’s fully cooked.
- For gluten-free option, substitute all-purpose flour with a blend of gluten-free flour and xanthan gum.
- Add herbs or seeds to the dough for extra flavor and nutritional boost.
- Brush finished bread with olive oil or melted butter for a softer, shinier crust.
- Store cooled bread in an airtight container to maintain freshness for 2-3 days.
- Prep Time: 15 minutes
- Cook Time: 25 minutes
- Category: Breakfast, Snacks
- Method: Frying
- Cuisine: American
Nutrition
- Serving Size: 4
- Calories: 190
- Sugar: 1g
- Sodium: 200mg
- Fat: 6g
- Saturated Fat: 1g
- Unsaturated Fat: 4g
- Trans Fat: 0g
- Carbohydrates: 30g
- Fiber: 1g
- Protein: 5g
- Cholesterol: 0mg
Jenna Stewart
Head Chef & Recipe Innovator
Expertise
Farm-to-Table Cooking; Seasonal Menu Development; Visual Plating Techniques; Flavor Layering and Simple Prep Hacks.
Education
The Culinary Institute of America, Hyde Park, NY
Jenna Stewart is the inventive spirit behind many of our standout dishes at Pro of Delicious Creations. A proud graduate of The Culinary Institute of America, she built her skills mastering both classic recipes and fresh, modern twists.
Now, Jenna celebrates the beauty of seasonal, local ingredients, often sourced from her garden and nearby markets, to create recipes that are bursting with flavor yet easy to follow. When she’s not experimenting in the kitchen, Jenna loves exploring nature on hikes and discovering new treasures at local co-ops.