
No-Bake Peanut Butter Balls Recipe: Heavenly Treats Made Simple
Need a quick sweet treat that combines creamy peanut butter with irresistible crunch?
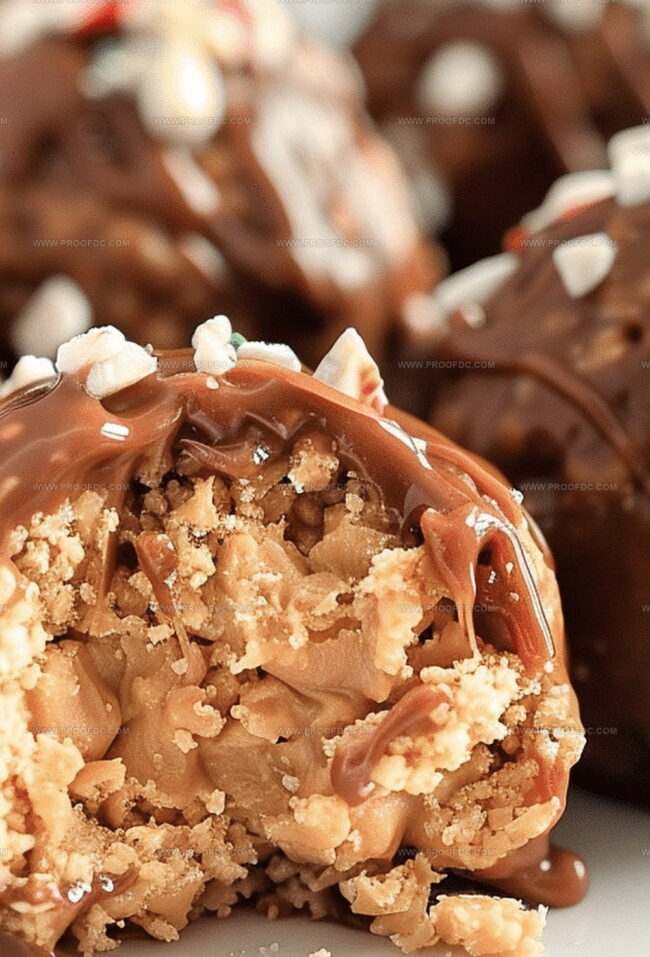
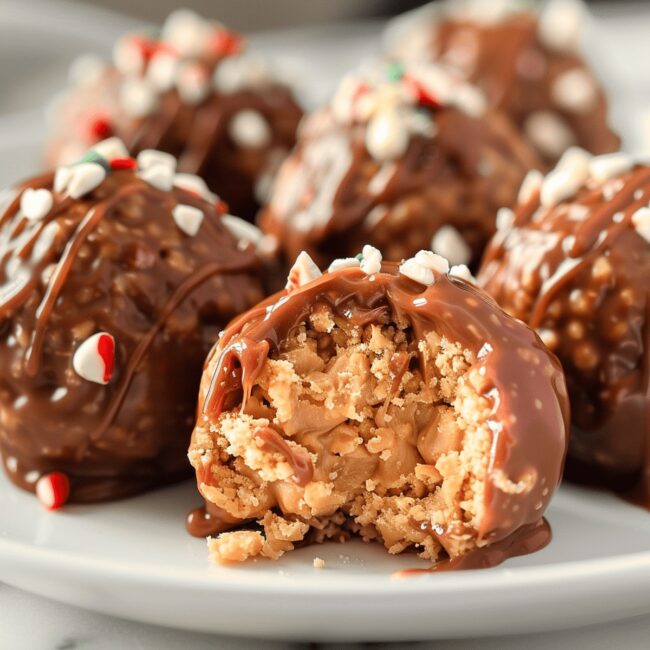
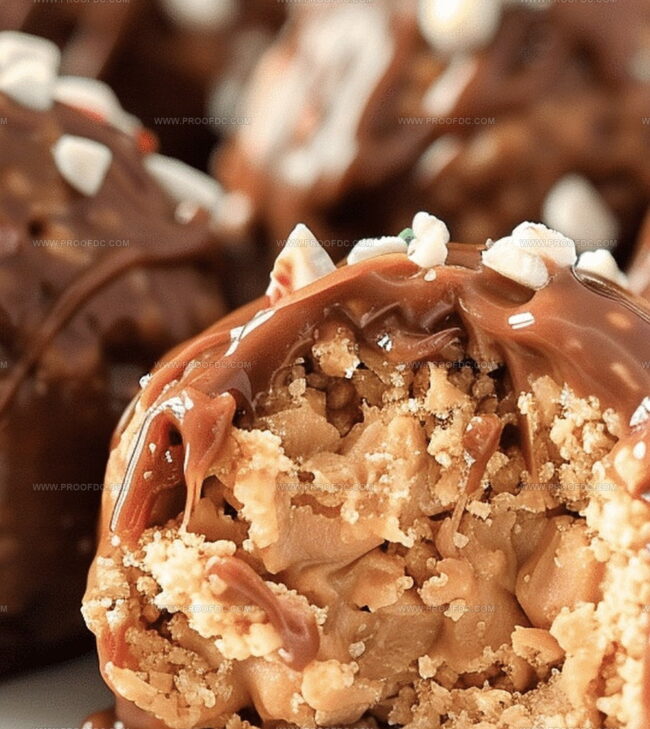
These no-bake peanut butter balls promise delightful satisfaction without firing up the oven.
Whipping up a delectable snack in minutes with just a few pantry staples.
Simple ingredients dance together, creating bite-sized morsels packed with rich, nutty goodness.
Kids and adults alike will adore the smooth texture and sweet-salty balance.
We mix, roll, and chill these little gems for an effortless dessert that disappears faster than you can say “delicious.” Each round delivers a perfect blend of comfort and excitement, making them an ideal companion for afternoon snacking or after-dinner indulgence.
Roll up your sleeves and let’s make magic happen in the kitchen!
Why No-Bake Peanut Butter Balls Are Easy, Quick, And Tasty
What You’ll Need For No-Bake Peanut Butter Balls
Base Ingredients:Binding and Crunch Ingredients:Coating Ingredients:How To Make No-Bake Peanut Butter Balls Fast
Step 1: Whip the Creamy Base
Grab a large mixing bowl and combine:Beat everything together until the mixture becomes smooth and consistent. Crush graham crackers or pretzels and fold them into the mixture. The texture should be firm enough to shape into balls. If the mixture feels too soft, add more crushed crackers or pop it in the refrigerator for a quick chill.
Step 2: Shape the Delightful Balls
Roll the mixture into small bite-sized spheres, about the size of a golf ball. Place each truffle on a parchment-lined baking sheet. Transfer the sheet to the refrigerator and let the balls firm up for about 30 minutes.
Step 3: Melt the Chocolate Coating
Select a microwave-safe bowl and combine:Microwave in short 20-second bursts, stirring between each interval, until the chocolate becomes silky and completely melted.
Step 4: Dunk and Decorate
Using a fork or toothpick, carefully dip each chilled peanut butter ball into the melted chocolate. Allow excess chocolate to drip off, then return the coated truffles to the parchment-lined sheet.
Step 5: Chill and Enjoy
Place the chocolate-covered truffles back in the refrigerator for 15-20 minutes until the chocolate sets completely. Store the finished truffles in an airtight container in the refrigerator for up to a week.
Tips For Smooth And Sweet No-Bake Peanut Butter Balls
How To Store No-Bake Peanut Butter Balls Without A Mess
What Goes Great With No-Bake Peanut Butter Balls
Yummy Variations Of No-Bake Peanut Butter Balls
FAQs About No-Bake Peanut Butter Balls
The crushed graham crackers or pretzels add fantastic texture and help bind the peanut butter mixture, making the balls hold together perfectly while giving a delicious crunch.
Regular creamy peanut butter works best. Natural peanut butter might be too runny and could make the mixture too soft to form balls, so stick with standard smooth peanut butter for best results.
Adding a small amount of coconut oil to the melted chocolate helps create a smooth, glossy coating that sets nicely and prevents cracking. Make sure to work quickly and keep the chocolate slightly warm while dipping.
If the mixture isn’t holding its shape, simply add a bit more crushed graham crackers or chill it in the refrigerator for 10-15 minutes to firm up before rolling into balls.
Print
No-Bake Peanut Butter Balls Recipe
- Total Time: 45 minutes
- Yield: 12 1x
Description
Irresistible no-bake peanut butter balls combine creamy richness with sweet chocolate coating for a quick dessert delight. Crunchy, smooth morsels deliver pure indulgence that will satisfy intense snack cravings in mere minutes.
Ingredients
Main Ingredients:
- 1 cup (240 grams / 8.5 ounces) creamy peanut butter
- 1 ½ cups (180 grams / 6.3 ounces) crushed graham crackers or crushed pretzels
- 1 ½ cups (270 grams / 9.5 ounces) semi-sweet or milk chocolate chips
Binding and Sweetening Ingredients:
- 1 cup (120 grams / 4.2 ounces) powdered sugar
- ¼ cup (60 grams / 2.1 ounces) unsalted butter, softened
Optional Coating Ingredient:
- 1 tablespoon coconut oil or shortening (for smoother coating)
Instructions
- Combine creamy peanut butter, softened butter, and powdered sugar in a spacious mixing bowl. Blend until the mixture achieves a silky, uniform consistency.
- Incorporate crushed graham crackers or pretzels into the peanut butter mixture. Mix thoroughly until the ingredients are completely integrated, creating a dense, moldable texture.
- Test the mixture’s firmness. If too soft, introduce additional crushed crackers or briefly chill in the refrigerator to enhance structural integrity.
- Carefully shape the mixture into compact, uniform spheres approximately one inch in diameter. Arrange the formed balls on a parchment-lined baking sheet.
- Transfer the baking sheet to the refrigerator and allow the peanut butter spheres to firm up for a minimum of 30 minutes.
- Prepare the chocolate coating by gently melting chocolate chips with coconut oil in a microwave-safe vessel. Execute this process in short intervals, stirring between each to prevent scorching.
- Employ a fork or toothpick to delicately immerse each peanut butter sphere into the molten chocolate. Permit excess chocolate to cascade off, ensuring an even, elegant coating.
- Return the chocolate-enrobed spheres to the parchment-lined sheet. Refrigerate for 15-20 minutes until the chocolate shell solidifies completely.
- Once set, transfer the confections to an airtight container and store in the refrigerator for optimal preservation and enjoyment.
Notes
- Experiment with different types of nut butter like almond or cashew for unique flavor variations and to accommodate nut allergies.
- Use gluten-free graham crackers or crushed rice cereal to make the recipe completely gluten-free and accessible for those with dietary restrictions.
- Chill the mixture for 15-20 minutes before rolling if the consistency feels too soft, ensuring easier ball formation and preventing sticky hands during preparation.
- For a healthier twist, swap milk chocolate with dark chocolate or use sugar-free chocolate chips to reduce overall sugar content and add antioxidant benefits.
- Prep Time: 15 minutes
- Cook Time: 30 minutes
- Category: Snacks, Desserts
- Method: Mixing
- Cuisine: American
Nutrition
- Serving Size: 12
- Calories: 229
- Sugar: 17g
- Sodium: 98mg
- Fat: 14g
- Saturated Fat: 5g
- Unsaturated Fat: 9g
- Trans Fat: 0g
- Carbohydrates: 24g
- Fiber: 1g
- Protein: 4g
- Cholesterol: 10mg
Jenna Stewart
Head Chef & Recipe Innovator
Expertise
Farm-to-Table Cooking; Seasonal Menu Development; Visual Plating Techniques; Flavor Layering and Simple Prep Hacks.
Education
The Culinary Institute of America, Hyde Park, NY
Jenna Stewart is the inventive spirit behind many of our standout dishes at Pro of Delicious Creations. A proud graduate of The Culinary Institute of America, she built her skills mastering both classic recipes and fresh, modern twists.
Now, Jenna celebrates the beauty of seasonal, local ingredients, often sourced from her garden and nearby markets, to create recipes that are bursting with flavor yet easy to follow. When she’s not experimenting in the kitchen, Jenna loves exploring nature on hikes and discovering new treasures at local co-ops.