
The Dreamy No-Bake Oreo Mud Pie Recipe for Chocolate Lovers
Yourself savoring a delectable no-bake Oreo mud pie that melts in your mouth with creamy decadence.
Chocolate lovers understand the pure bliss of this effortless dessert.
Some recipes require complex techniques, but this treat comes together like magic.
Rich layers of chocolatey goodness create a dessert that feels indulgent yet simple.
Smooth cream cheese and crushed oreos form the perfect partnership in this irresistible creation.
Each bite promises a delightful combination of crunchy cookie and silky filling.
Grab a fork and get ready to experience dessert paradise that will have everyone asking for seconds.
Why No-Bake Oreo Mud Pie Is A Chocolate Lover’s Dream
What Goes Into No-Bake Oreo Mud Pie
Crust Ingredients:Filling Ingredients:Topping Ingredients:How To Make No-Bake Oreo Mud Pie In No Time
Step 1: Craft The Oreo Crust
Grab your food processor or a sturdy ziplock bag. Crumble the Oreos into fine, delicate crumbs. Melt the butter and blend it thoroughly with the cookie pieces. Press this mixture firmly into your pie dish, creating a solid, delicious foundation. Pop it in the refrigerator to set while you work on the next magical layer.
Step 2: Whip Up Chocolate Pudding Filling
In a mixing bowl, combine the chocolate pudding mix with cold milk. Whisk until the mixture transforms into a smooth, velvety texture. Gently fold in the whipped cream, creating a cloud-like consistency. Sprinkle in some crushed Oreos for an extra crunch that will make taste buds dance:Step 3: Layer The Decadent Filling
Pour the luscious chocolate pudding over the chilled Oreo crust. Spread it evenly with a spatula, creating a perfectly smooth surface. Let it rest in the refrigerator, allowing the layers to meld and set.
Step 4: Create Dreamy Whipped Cream Topping
Whip the cream until it reaches heavenly peaks. Fold in powdered sugar and a hint of vanilla for an extra touch of sweetness:Gently spread this cloud-like topping over the chocolate layer.
Step 5: Add Stunning Finishing Touches
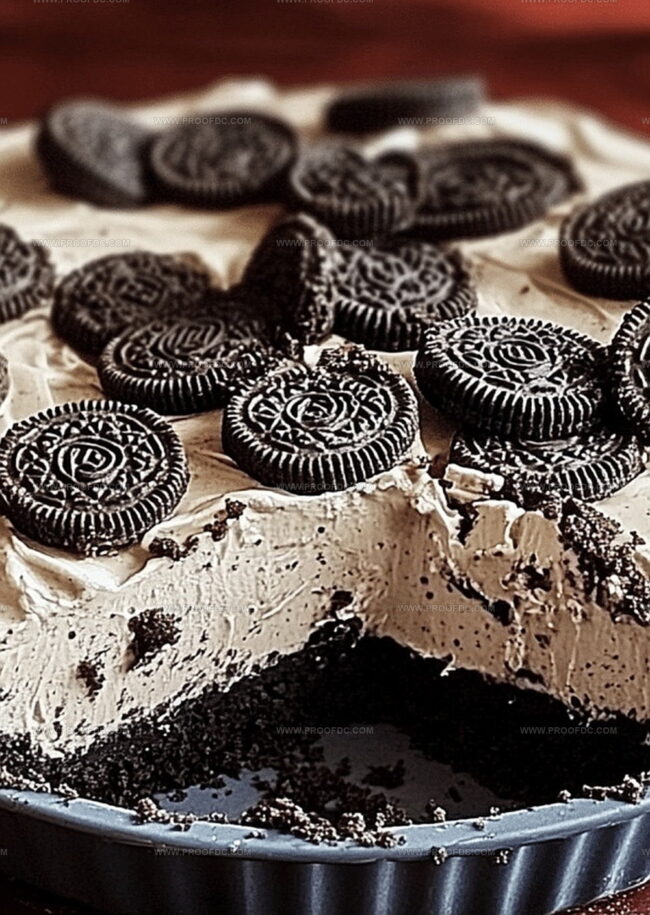
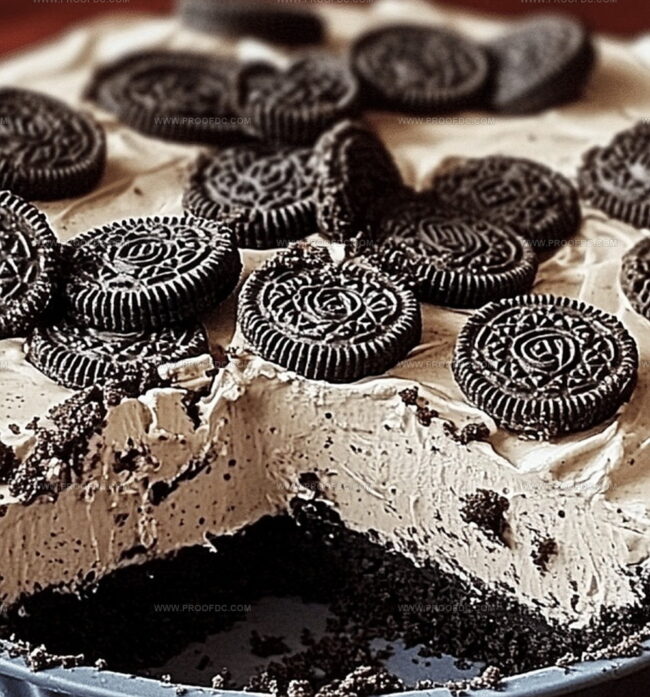
Drizzle rich chocolate sauce across the top. Sprinkle additional crushed Oreos or delicate chocolate shavings for a show-stopping presentation. Return the pie to the refrigerator and let it chill completely.
Step 6: Serve And Celebrate
Slice into this magnificent creation. Each bite promises a symphony of chocolate, cream, and crunchy Oreo goodness. Serve chilled and watch everyone’s eyes light up with pure dessert excitement!
Helpful Tips For No-Bake Oreo Mud Pie
How To Keep No-Bake Oreo Mud Pie Chilled And Tasty
Treats That Pair With No-Bake Oreo Mud Pie
Yummy Variations For No-Bake Oreo Mud Pie
No-Bake Oreo Mud Pie FAQs
This pie doesn’t require any oven time. Instead, it uses a chilled crust and pudding mixture that sets in the refrigerator, making it perfect for easy summer desserts or when you want to avoid using the oven.
Yes, instant chocolate pudding mix works perfectly. It helps thicken the filling quickly and provides a rich chocolate flavor that complements the Oreo cookies.
Absolutely! Kids love Oreo cookies and chocolate pudding. The simple preparation and sweet flavors make it a fun dessert that children can help make and will definitely enjoy eating.
You can prepare the entire pie up to 2 days in advance. Keep it covered in the refrigerator, and it will stay fresh and delicious. Just add the whipped cream topping and garnish right before serving to maintain the best texture.
Print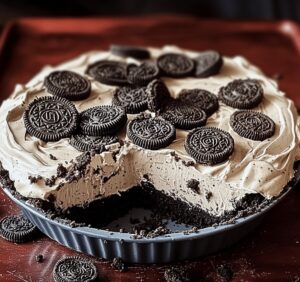
No-Bake Oreo Mud Pie Recipe
- Total Time: 2 hours 20 minutes
- Yield: 8 1x
Description
Creamy no-bake oreo mud pie delivers pure chocolate bliss with minimal effort. Cool summer desserts don’t get more delightful than this simple, crowd-pleasing treat packed with irresistible cookie crunch and silky smooth filling.
Ingredients
Main Ingredients (Crust and Filling):
- 24 Oreo cookies (whole, including the filling)
- 1 package (3.9 ounces / 110 grams) instant chocolate pudding mix
- 2 cups (475 milliliters) cold milk
- 5 tablespoons (75 grams) unsalted butter, melted
Cream and Additional Ingredients:
- ½ cup (120 milliliters) heavy cream, whipped
- 1 ½ cups (360 milliliters) whipped cream
- ½ cup (90 grams) crushed Oreos
Flavoring and Garnish:
- 2 tablespoons powdered sugar
- 1 teaspoon vanilla extract
- Chocolate sauce (optional)
- Extra crushed Oreos or chocolate shavings
Instructions
- Crush the Oreo cookies into fine crumbs using a food processor or by placing them in a sealed bag and rolling with a rolling pin. Combine the crumbs with melted butter, ensuring thorough mixing.
- Press the buttery crumb mixture firmly into the bottom of a 9-inch pie dish, creating a compact and even crust. Refrigerate for 15-20 minutes to solidify.
- In a mixing bowl, whisk chocolate pudding mix with cold milk until the mixture becomes smooth and begins to thicken. This should take approximately 2-3 minutes.
- Gently incorporate whipped cream into the pudding, folding carefully to maintain a light texture. Mix in additional crushed Oreo pieces to enhance the cookie crunch.
- Carefully spread the chocolate pudding mixture over the chilled Oreo crust, ensuring an even distribution using a spatula. Return to the refrigerator for 30 minutes to allow the filling to set.
- Prepare the whipped cream topping by beating heavy cream with powdered sugar and vanilla extract until stiff peaks form. This creates a light, airy texture.
- Delicately layer the whipped cream over the chocolate pudding, covering the entire surface with a smooth finish.
- Embellish the pie with a drizzle of chocolate sauce and a sprinkle of crushed Oreo cookies or chocolate shavings for visual appeal.
- Refrigerate the mud pie for a minimum of 2 hours to ensure complete setting and optimal flavor melding.
- Slice into generous portions and serve chilled, allowing guests to enjoy the decadent layers of cookie, chocolate, and cream.
Notes
- Customize the crust by experimenting with different flavored Oreo varieties like mint, peanut butter, or birthday cake to add unique twists to the classic mud pie.
- For a gluten-free version, swap regular Oreos with gluten-free chocolate sandwich cookies and ensure all other ingredients are certified gluten-free.
- Create a lighter version by using sugar-free pudding mix, low-fat whipped cream, and reducing the amount of butter in the crust for a more diet-friendly dessert.
- Enhance the texture by adding chopped nuts like almonds or pecans between layers or sprinkled on top for extra crunch and nutty flavor.
- Prep Time: 20 minutes
- Cook Time: 23 hours
- Category: Desserts, Snacks
- Method: Mixing
- Cuisine: American
Nutrition
- Serving Size: 8
- Calories: 420
- Sugar: 28 g
- Sodium: 160 mg
- Fat: 25 g
- Saturated Fat: 14 g
- Unsaturated Fat: 8 g
- Trans Fat: 0 g
- Carbohydrates: 45 g
- Fiber: 1 g
- Protein: 5 g
- Cholesterol: 50 mg
Jenna Stewart
Head Chef & Recipe Innovator
Expertise
Farm-to-Table Cooking; Seasonal Menu Development; Visual Plating Techniques; Flavor Layering and Simple Prep Hacks.
Education
The Culinary Institute of America, Hyde Park, NY
Jenna Stewart is the inventive spirit behind many of our standout dishes at Pro of Delicious Creations. A proud graduate of The Culinary Institute of America, she built her skills mastering both classic recipes and fresh, modern twists.
Now, Jenna celebrates the beauty of seasonal, local ingredients, often sourced from her garden and nearby markets, to create recipes that are bursting with flavor yet easy to follow. When she’s not experimenting in the kitchen, Jenna loves exploring nature on hikes and discovering new treasures at local co-ops.