Quick & Zesty No-Bake Mini Key Lime Pies Recipe for Summer Joy
Zesty and refreshing no-bake mini key lime pies spark instant summer memories for anyone craving a cool dessert.
These adorable treats combine tangy citrus with smooth cream in a perfect handheld package.
Small but mighty, each mini pie delivers incredible flavor without requiring complicated baking techniques.
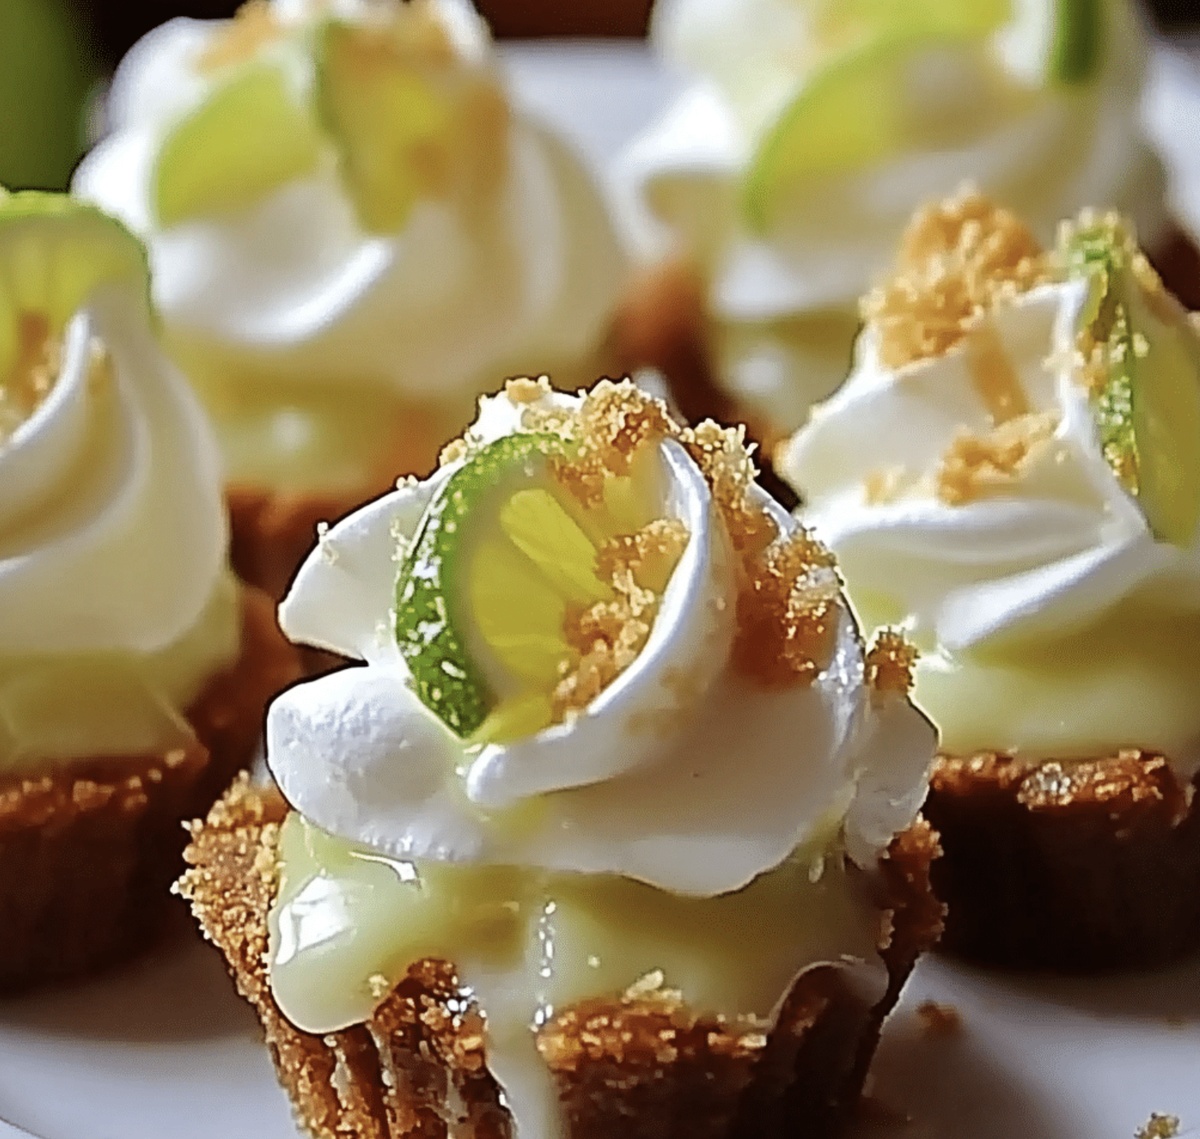
Creamy filling nestled in a crisp graham cracker crust creates a delightful texture contrast you’ll absolutely love.
Quick preparation means less time in the kitchen and more time enjoying delicious results.
Fresh lime zest adds brightness that makes these miniature desserts shine.
Rich yet light, these individual pies promise to become your new favorite sweet indulgence.
Grab a fork and get ready to savor every delectable bite!
What Makes No-Bake Mini Key Lime Pies Recipe A Treat
What You’ll Use For No-Bake Mini Key Lime Pies Recipe
Crust Ingredients:Filling Ingredients:Garnish Ingredients:Easy How-To For No-Bake Mini Key Lime Pies Recipe
Step 1: Create Crumbly Crust Base
Grab a mixing bowl and toss in graham cracker crumbs. Pour melted butter over the crumbs and sprinkle sugar. Use your fingers or a fork to blend everything until the mixture looks like damp beach sand. Press this tasty mixture firmly into mini tart pans or muffin tin cups lined with paper liners. Use the back of a spoon or a glass bottom to pack the crust super tight. Pop these into the refrigerator to chill and set for about 15 minutes.
Step 2: Whip Tangy Lime Filling
In a spacious mixing bowl, pour sweetened condensed milk. Zest fresh limes directly into the milk, then squeeze in their bright juice. Whisk everything together until the mixture becomes silky smooth.
In another bowl, grab heavy cream and powdered sugar. Beat these ingredients until they form stiff, cloud-like peaks. Gently fold half the whipped cream into the lime mixture to lighten it up. Then softly fold in the remaining cream, creating a dreamy, velvety filling.
Step 3: Build Delightful Pie Layers
Take your chilled crusts and carefully spoon the zesty lime filling into each one. Use a spatula to smooth the tops, creating a pristine surface. Slide these mini pies into the refrigerator and let them set for at least 2-3 hours.
Step 4: Add Gorgeous Finishing Touches
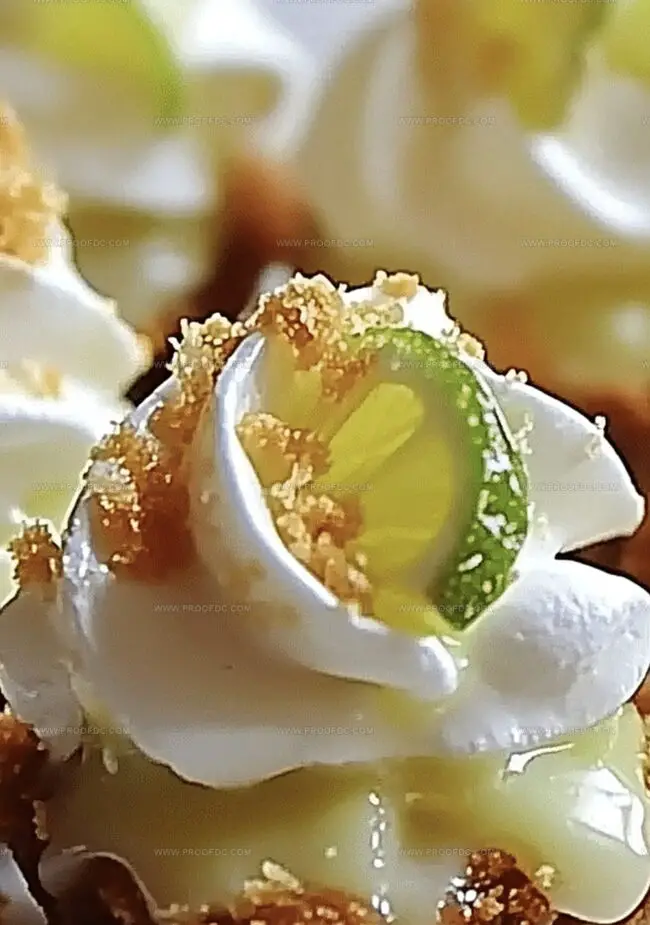
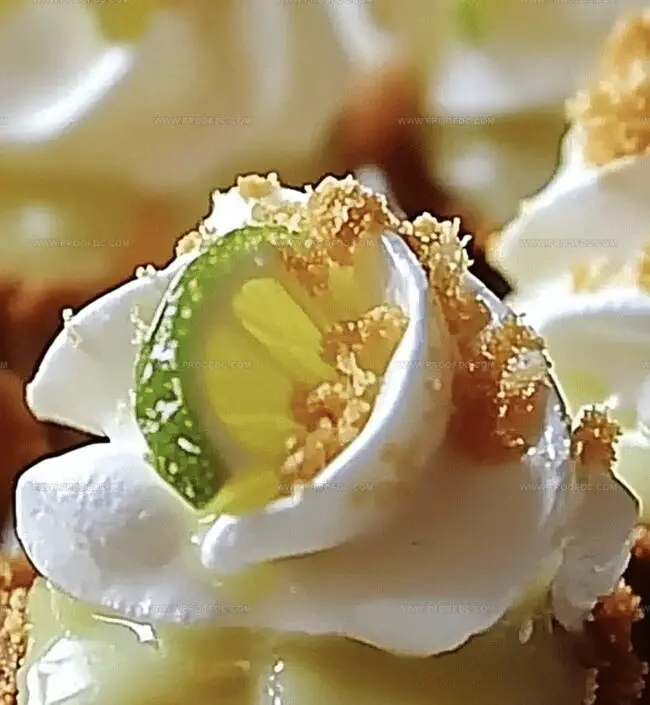
Before serving, crown each mini pie with a fluffy dollop of extra whipped cream. For an extra pop of flavor, garnish with a tiny lime slice or sprinkle of fresh lime zest. These adorable treats are ready to impress and delight!
Smart Moves When Making No-Bake Mini Key Lime Pies Recipe
How To Store And Reheat No-Bake Mini Key Lime Pies Recipe
What Goes Well With No-Bake Mini Key Lime Pies Recipe
Fun Options For No-Bake Mini Key Lime Pies Recipe
Most Asked Questions About No-Bake Mini Key Lime Pies Recipe
FAQs for No-Bake Mini Key Lime Pies:
The recipe doesn’t require any oven time. The crust is chilled to set, and the filling is prepared without baking, making it a quick and easy dessert that sets in the refrigerator.
Yes, absolutely! While key limes have a more intense flavor, regular Persian limes work perfectly fine and are easier to find in most grocery stores. Just use the same amount of juice and zest.
These no-bake mini pies will keep well in the refrigerator for 3-4 days when stored in an airtight container. Just make sure to keep them chilled to maintain their creamy texture and prevent spoiling.
Not as written. To make them gluten-free, simply replace the graham cracker crumbs with gluten-free graham crackers or use ground gluten-free cookies as a crust alternative.
Print
No-Bake Mini Key Lime Pies Recipe
- Total Time: 2 hours 20 minutes
- Yield: 12 1x
Description
Creamy no-bake mini key lime pies deliver a zesty tropical escape with graham cracker crusts and silky lime filling. Cool summer desserts never tasted more refreshing, inviting you to savor each tangy, sweet bite.
Ingredients
Main Ingredients:
- 1 ½ cups (180 g) graham cracker crumbs
- 1 can (14 oz/400 g) sweetened condensed milk
- ½ cup (120 ml) fresh key lime juice
- 1 cup (240 ml) heavy whipping cream
Sweeteners and Sugars:
- 2 tablespoons granulated sugar
- 2 tablespoons powdered sugar
Flavor and Garnish Ingredients:
- ⅓ cup (75 g) unsalted butter, melted
- 1 teaspoon lime zest
- Lime slices (optional)
- Whipped cream
Instructions
- Craft the foundation by blending graham cracker crumbs with melted butter and sugar until the mixture resembles coarse, damp sand.
- Firmly press the crumb mixture into mini tart pans or cupcake liners, ensuring an even, compact base that reaches up the sides.
- Refrigerate the prepared crusts for approximately 15 minutes to solidify their structure.
- In a spacious mixing bowl, whisk sweetened condensed milk with fresh lime juice and vibrant lime zest until the mixture becomes uniformly smooth.
- Using a separate bowl, whip heavy cream and powdered sugar until the cream develops stiff, voluminous peaks.
- Gently incorporate the whipped cream into the lime base, folding carefully to maintain the airy texture and prevent deflation.
- Carefully spoon the lime cream filling into the chilled crusts, smoothing the surface with delicate, even strokes.
- Allow the mini pies to rest in the refrigerator for a minimum of 2-3 hours, enabling the filling to set and flavors to meld.
- Before serving, embellish each petite pie with a graceful swirl of additional whipped cream, a delicate lime wedge, or a sprinkle of zesty lime zest.
- Serve chilled and enjoy these refreshing, creamy mini desserts.
Notes
- Crust Consistency Matters: Press the graham cracker mixture firmly to create a compact, sturdy base that holds together perfectly without crumbling.
- Zest for Maximum Flavor: Use fresh lime zest to intensify the citrusy punch and brighten the entire dessert’s taste profile.
- Cream Folding Technique: Incorporate whipped cream gently to maintain its airy texture, preventing deflation and ensuring a light, creamy filling.
- Make-Ahead Magic: These mini pies can be prepared up to 2 days in advance, making them ideal for stress-free entertaining and meal planning.
- Prep Time: 20 minutes
- Cook Time: 23 hours
- Category: Desserts, Snacks
- Method: Mixing
- Cuisine: American
Nutrition
- Serving Size: 12
- Calories: 278
- Sugar: 15 g
- Sodium: 83 mg
- Fat: 19 g
- Saturated Fat: 11 g
- Unsaturated Fat: 7 g
- Trans Fat: 0 g
- Carbohydrates: 27 g
- Fiber: 1 g
- Protein: 3 g
- Cholesterol: 58 mg
Jenna Stewart
Head Chef & Recipe Innovator
Expertise
Farm-to-Table Cooking; Seasonal Menu Development; Visual Plating Techniques; Flavor Layering and Simple Prep Hacks.
Education
The Culinary Institute of America, Hyde Park, NY
Jenna Stewart is the inventive spirit behind many of our standout dishes at Pro of Delicious Creations. A proud graduate of The Culinary Institute of America, she built her skills mastering both classic recipes and fresh, modern twists.
Now, Jenna celebrates the beauty of seasonal, local ingredients, often sourced from her garden and nearby markets, to create recipes that are bursting with flavor yet easy to follow. When she’s not experimenting in the kitchen, Jenna loves exploring nature on hikes and discovering new treasures at local co-ops.