Rich No-Bake Chocolate Candy Truffles Recipe: Sweet Decadence
Crafting decadent no-bake chocolate candy truffles that melt effortlessly on your tongue.
Sweet dreams become reality with these luxurious bite-sized delights.
chocolate lovers rejoice as simple ingredients blend into pure magic.
Minimal effort meets maximum indulgence in this irresistible treat.
Rich cocoa and creamy textures dance together without requiring an oven.
Smooth, velvety morsels promise an elegant dessert experience that impresses everyone.
You’ll fall in love with these delightful confections that feel like a gourmet indulgence.
Gather your ingredients and let’s create something spectacular that will make your taste buds sing.
Why Everyone Loves No-Bake Chocolate Candy Truffles
No-Bake Chocolate Candy Truffles Ingredient Guide
Base Ingredients:Flavor Enhancers:Coating Options:Additional Ingredients:How To Put Together No-Bake Chocolate Candy Truffles
Step 1: Craft Creamy Chocolate Base
Grab a heatproof bowl and chop dark chocolate into small pieces. Warm heavy cream in a saucepan until tiny bubbles appear around the edges. Pour steaming cream over chocolate and let it relax for a few moments. Stir gently until the mixture transforms into a silky, glossy pool. Add a splash of vanilla extract or your favorite liqueur, then sprinkle in a tiny pinch of salt. Mix everything until perfectly smooth and dreamy.
Step 2: Chill Chocolate Mixture
Cover the bowl with clingy plastic wrap. Slide the bowl into the refrigerator and let it cool down and set for 1-2 hours. The mixture should become firm enough to scoop easily.
Step 3: Roll Delightful Chocolate Balls
Grab a small cookie scoop or teaspoon. Scoop out portions of the chilled chocolate mixture and roll them between your palms into perfect little spheres. If the mixture feels too soft, pop it back in the refrigerator for a short while to firm up.
Step 4: Dress Up Your Truffles
Prepare your favorite coatings:Roll each truffle in your chosen coating, creating a delicious outer layer that adds texture and flavor.
Step 5: Set and Solidify
Place the coated truffles on a parchment-lined tray. Slide the tray into the refrigerator for 20-30 minutes to help them set and become firm.
Step 6: Serve and Enjoy
Bring out the truffles and serve them chilled or at room temperature. These decadent treats will keep in an airtight container in the refrigerator for up to two weeks – if they last that long!
Top Tips For No-Bake Chocolate Candy Truffles
How To Store And Reheat No-Bake Chocolate Candy Truffles
Good Matches For No-Bake Chocolate Candy Truffles
Tasty Variations Of No-Bake Chocolate Candy Truffles
Your FAQ On No-Bake Chocolate Candy Truffles
These no-bake chocolate truffles are incredibly rich and creamy, requiring minimal effort but delivering maximum flavor. They’re a delightful homemade treat that looks fancy but is surprisingly simple to prepare.
Absolutely! You can use dark, milk, or white chocolate based on your preference. Just ensure you’re using high-quality chocolate for the best flavor and texture.
Keep your hands cool and work quickly. If the ganache becomes too soft, pop it back in the refrigerator for 10-15 minutes to firm up. Cold hands and a chilled mixture make rolling much easier.
Try crushed pistachios, toasted coconut, crushed candy canes, finely chopped almonds, or even colorful sprinkles. Each coating adds a unique texture and flavor to your truffles.
Print
No-Bake Chocolate Candy Truffles Recipe
- Total Time: 2 hours 20 minutes
- Yield: 20 1x
Description
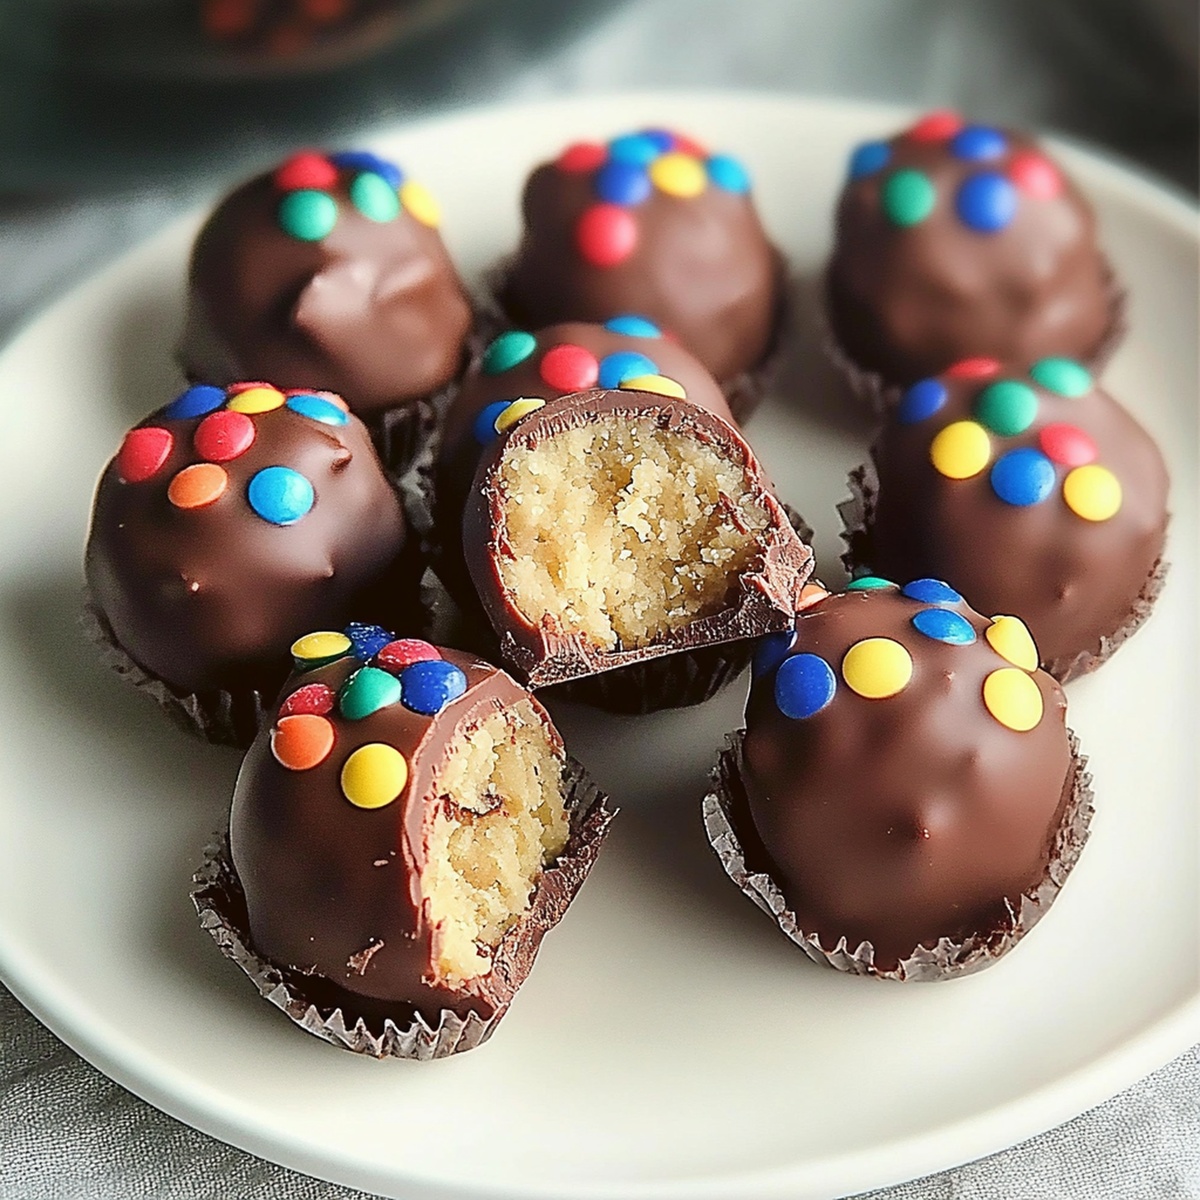
Silky smooth no-bake chocolate candy truffles offer a delightful escape into rich, indulgent flavors. Chocolate lovers will savor these elegant treats that blend creamy textures with luxurious cocoa goodness, inviting you to experience pure confectionery bliss.
Ingredients
Main Ingredients:
- 8 ounces (225 grams) semi-sweet or dark chocolate, finely chopped
- ½ cup (120 milliliters) heavy cream
Flavor Enhancers:
- 1 teaspoon vanilla extract (or your favorite liqueur, optional)
- 1 pinch salt
Coating and Decoration Options:
- Cocoa powder
- Powdered sugar
- Crushed nuts (hazelnuts, almonds, or pecans)
- Shredded coconut
- Sprinkles
- Melted chocolate (for dipping)
Instructions
- Craft a luxurious chocolate ganache by chopping the chocolate into fine fragments and placing them in a pristine ceramic bowl.
- Gently warm the cream in a saucepan until microscopic bubbles emerge along the edges, signaling it’s ready to embrace the chocolate.
- Cascade the heated cream over the chocolate fragments, allowing the mixture to rest undisturbed for several moments, enabling a smooth transformation.
- Whisk the ganache with delicate circular motions until a silky, uniform consistency develops, incorporating vanilla and a whisper of salt for depth.
- Shield the ganache with transparent film and nestle it in the refrigerator’s cool embrace for approximately 90 minutes, allowing it to firm and solidify.
- When the ganache reaches an ideal moldable texture, use a petite scoop to extract precise portions.
- Roll each portion between warm palms, creating delicate spherical truffles with precision and care.
- Select your preferred coating – whether velvety cocoa powder, powdery confectioner’s sugar, or crushed toasted nuts – and tenderly enrobe each truffle.
- Arrange the newly dressed truffles on a parchment-lined tray, then return them to the refrigerator for a brief chilling period.
- Serve these decadent morsels slightly chilled or at ambient temperature, storing any remaining treasures in a sealed container within the refrigerator’s sanctuary.
Notes
- Choose high-quality chocolate for a rich, decadent flavor that elevates the entire truffle experience.
- Keep hands cool and work quickly when rolling truffles to prevent melting, using disposable gloves if needed for a smoother finish.
- Experiment with different flavor additions like orange zest, espresso powder, or liqueurs to create unique variations that surprise and delight.
- For dietary modifications, substitute dairy cream with coconut cream for a vegan version, or use sugar-free chocolate for a low-carb alternative.
- Prep Time: 20 minutes
- Cook Time: 2 hours
- Category: Desserts, Snacks
- Method: Mixing
- Cuisine: American
Nutrition
- Serving Size: 20
- Calories: 150
- Sugar: 8 g
- Sodium: 30 mg
- Fat: 10 g
- Saturated Fat: 6 g
- Unsaturated Fat: 4 g
- Trans Fat: 0 g
- Carbohydrates: 15 g
- Fiber: 1 g
- Protein: 2 g
- Cholesterol: 20 mg
Jenna Stewart
Head Chef & Recipe Innovator
Expertise
Farm-to-Table Cooking; Seasonal Menu Development; Visual Plating Techniques; Flavor Layering and Simple Prep Hacks.
Education
The Culinary Institute of America, Hyde Park, NY
Jenna Stewart is the inventive spirit behind many of our standout dishes at Pro of Delicious Creations. A proud graduate of The Culinary Institute of America, she built her skills mastering both classic recipes and fresh, modern twists.
Now, Jenna celebrates the beauty of seasonal, local ingredients, often sourced from her garden and nearby markets, to create recipes that are bursting with flavor yet easy to follow. When she’s not experimenting in the kitchen, Jenna loves exploring nature on hikes and discovering new treasures at local co-ops.