
The Ultimate Nanaimo Bars Recipe: Sweet Canadian Bliss
These decadent Nanaimo bars capture the sweet essence of Canadian dessert magic, whisking you into a delightful world of creamy indulgence.
Every bite tells a story of culinary comfort from british columbia’s coastal regions.
Rich layers of chocolatey goodness melt seamlessly across your palate, creating an irresistible texture.
A dessert that combines silky custard, buttery crumbs, and smooth chocolate into one incredible treat.
Generations of home bakers have cherished this iconic recipe, passing down its delectable secrets.
Chocolate lovers and dessert enthusiasts will find themselves completely enchanted by these no-bake delights.
Grab a napkin and get ready to experience a true canadian classic that promises pure deliciousness.
Why Nanaimo Bars Are So Loved Across Canada
Ingredients Needed For Nanaimo Bars
Base Ingredients:Filling Ingredients:Chocolate Topping Ingredients:Steps To Make Nanaimo Bars Easily

Step 1: Create Chocolate Crumb Foundation
Grab a saucepan and melt together butter, sugar, and cocoa powder over gentle heat. Whisk in a beaten egg, stirring continuously until the mixture transforms into a rich, smooth consistency. Pull the pan off the heat and fold in:Press this delectable mixture firmly into a lined baking dish. Pop it in the refrigerator to chill while you prepare the next layer.
Step 2: Whip Up Creamy Custard Layer
In a mixing bowl, blend softened butter with powdered sugar, custard powder, and heavy cream. Beat until the mixture becomes light, fluffy, and irresistibly smooth. If needed, adjust the texture by adding a splash more cream. Spread this luscious custard evenly over the chilled chocolate base. Return to the refrigerator to set for about 20-30 minutes.
Step 3: Crown With Chocolate Glaze
Melt chocolate chips and butter together in a microwave-safe bowl. Zap in short bursts, stirring between each interval until silky and glossy. Pour the molten chocolate over the custard layer, creating an even, tempting topping. Slide back into the refrigerator and let it firm up completely for around an hour.
Step 4: Slice And Serve
Once fully set, lift the bars out using the parchment paper edges. Allow them to sit at room temperature briefly to soften just slightly. Slice into elegant squares and watch everyone’s eyes light up with excitement!
Tips To Get The Layers Right In Nanaimo Bars
Store Nanaimo Bars The Best Way
Tasty Matches With Nanaimo Bars
Twists You Can Try On Nanaimo Bars
Common Questions About Nanaimo Bars
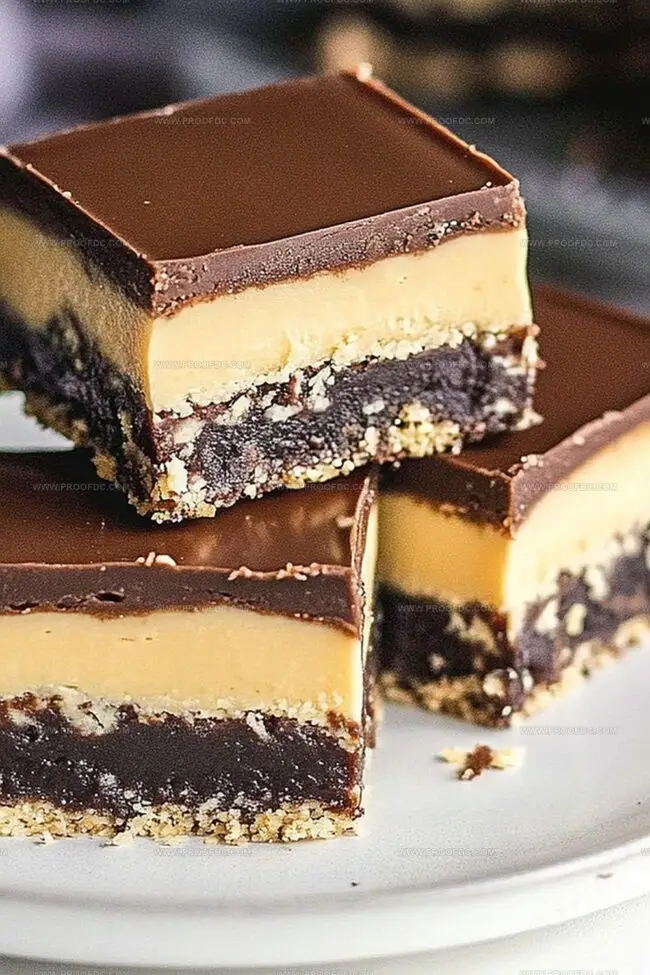
Nanaimo Bars are a no-bake Canadian dessert named after the city of Nanaimo in British Columbia. They feature three delicious layers: a chocolate-coconut base, a creamy custard middle, and a chocolate top layer that’s become a beloved Canadian treat.
Not at all! These bars are perfect for beginner bakers since they don’t require any actual baking. You’ll just need to mix ingredients and layer them, then chill in the refrigerator. The process is simple and anyone can master it with basic kitchen skills.
Yes, you can make some substitutions. For the base layer, you can swap graham cracker crumbs with digestive biscuits. The custard powder can be replaced with vanilla pudding mix. For nuts, feel free to use almonds or pecans instead of walnuts if you prefer.
Print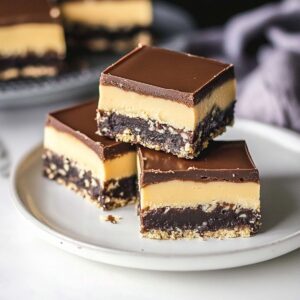
Nanaimo Bars Recipe
- Total Time: 2 hours
- Yield: 12 1x
Description
Creamy Canadian Nanaimo bars emerge as a sweet sensation from British Columbia’s culinary landscape. Layers of chocolate, custard, and coconut graham cracker base create an irresistible no-bake dessert you’ll crave with every delightful bite.
Ingredients
Crust Ingredients:
- 2 cups graham cracker crumbs
- 1 cup shredded coconut (sweetened or unsweetened)
- ½ cup chopped walnuts or pecans (optional)
- ½ cup (113 grams) unsalted butter (melted)
- ¼ cup (50 grams) granulated sugar
- ⅓ cup (33 grams) cocoa powder
- 1 large egg (beaten)
- 1 teaspoon vanilla extract
Filling Ingredients:
- ½ cup (113 grams) unsalted butter (softened)
- 2 cups (240 grams) powdered sugar
- 2 tablespoons custard powder (or instant vanilla pudding mix)
- 2 tablespoons heavy cream
Topping Ingredients:
- 1 cup semi-sweet chocolate chips
- 2 tablespoons (28 grams) unsalted butter
Instructions
- Craft the foundational layer by gently melting butter with cocoa and sugar in a saucepan, creating a silky base. Incorporate beaten egg, whisking continuously until the mixture develops a luxurious thickness.
- Fold in vanilla, graham cracker crumbs, coconut, and chopped nuts to create a rich, textured mixture. Press this decadent blend firmly into a parchment-lined baking dish, establishing a robust bottom layer.
- Whip butter with powdered sugar and custard powder until achieving a cloud-like consistency. Gradually introduce cream to create a smooth, velvety filling that will rest atop the first layer.
- Carefully spread the custard mixture across the chilled base, ensuring an even, elegant coating. Return to refrigerator to allow the layer to set and firm.
- Melt chocolate chips with butter, creating a glossy, smooth topping. Gently cascade the molten chocolate over the custard layer, tilting the dish to distribute evenly.
- Chill the entire dessert until the chocolate solidifies completely, allowing the distinct layers to unite into a harmonious treat.
- When ready to serve, lift the dessert from the pan using parchment edges. Allow to rest momentarily at room temperature, then slice into precise, tempting squares.
Notes
- Swap nuts with seeds like sunflower or pumpkin for nut-free versions, ensuring everyone can enjoy this delightful treat.
- Use gluten-free graham crackers or alternatives like almond flour cookies to create a celiac-friendly base that maintains the classic crumbly texture.
- Experiment with dairy-free butter substitutes and coconut cream to transform this dessert into a vegan-friendly option without compromising rich, decadent flavors.
- Chill ingredients and work surfaces beforehand to help layers set quickly and prevent potential melting, especially in warm kitchen environments.
- Prep Time: 30 minutes
- Cook Time: 1 hour 30 minutes
- Category: Desserts, Snacks
- Method: Mixing
- Cuisine: Canadian
Nutrition
- Serving Size: 12
- Calories: 365
- Sugar: 22 g
- Sodium: 80 mg
- Fat: 23 g
- Saturated Fat: 14 g
- Unsaturated Fat: 6 g
- Trans Fat: 0 g
- Carbohydrates: 36 g
- Fiber: 1 g
- Protein: 3 g
- Cholesterol: 35 mg
Jenna Stewart
Head Chef & Recipe Innovator
Expertise
Farm-to-Table Cooking; Seasonal Menu Development; Visual Plating Techniques; Flavor Layering and Simple Prep Hacks.
Education
The Culinary Institute of America, Hyde Park, NY
Jenna Stewart is the inventive spirit behind many of our standout dishes at Pro of Delicious Creations. A proud graduate of The Culinary Institute of America, she built her skills mastering both classic recipes and fresh, modern twists.
Now, Jenna celebrates the beauty of seasonal, local ingredients, often sourced from her garden and nearby markets, to create recipes that are bursting with flavor yet easy to follow. When she’s not experimenting in the kitchen, Jenna loves exploring nature on hikes and discovering new treasures at local co-ops.