
Dreamy Chocolate Lava Brownie Cookies Recipe for Sweet Fans
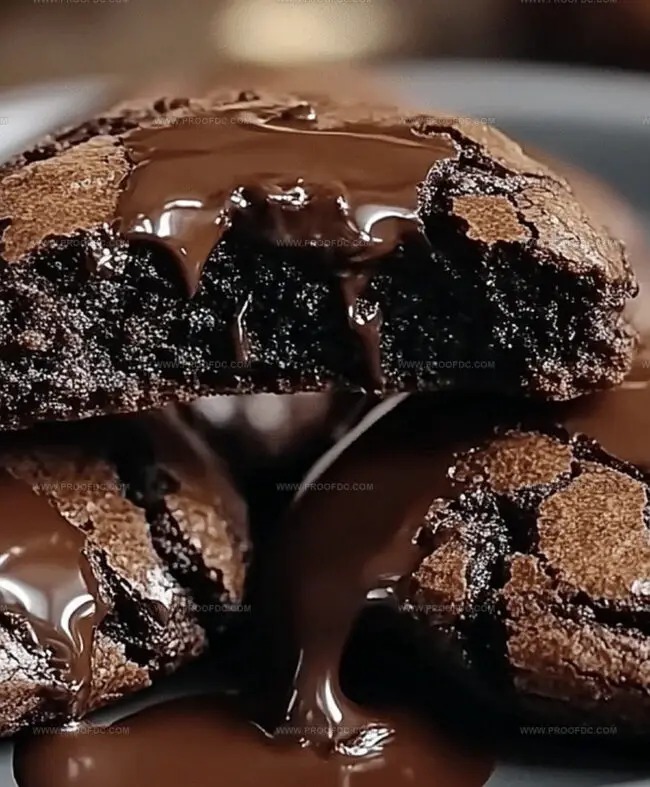
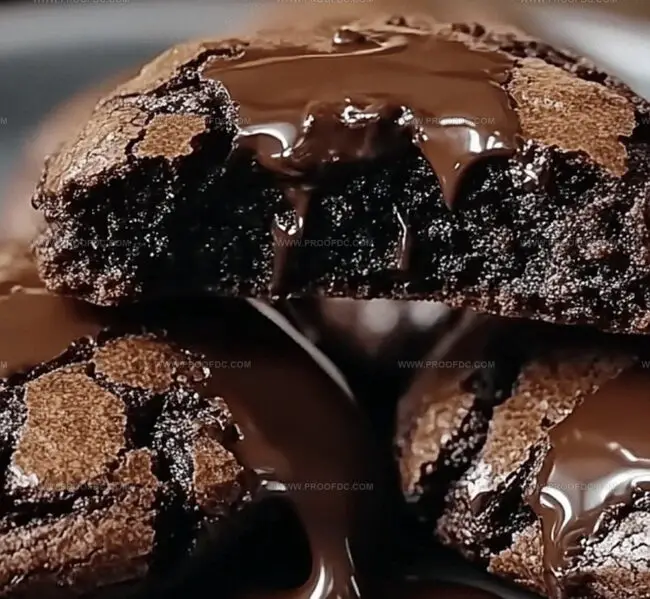
Chocolate lovers swoon over this decadent molten chocolate lava brownie cookies recipe that combines the best of both dessert worlds.
Rich, gooey centers burst through crisp cookie edges with irresistible chocolate intensity.
These sinful treats melt seamlessly between a classic brownie and a chocolate chip cookie, creating pure dessert magic.
Warm from the oven, each cookie promises an eruption of liquid chocolate that cascades across your plate.
Professional bakers and home cooks alike will adore this simple yet stunning recipe.
Quick to prepare and impossible to resist, these cookies elevate your baking game with minimal effort.
Prepare to indulge in a chocolate experience that will have everyone begging for seconds.
Quick Recipe Overview
All The Ingredients For Chocolate Lava Brownie Cookies
For Chocolate Base:For Dry Ingredients:For Sweet and Binding Elements:Baking Tools For Chocolate Lava Brownie Cookies
How To Make Chocolate Lava Brownie Cookies Soft And Gooey
Grab chocolate and butter in a microwave-safe bowl. Zap in quick bursts, stirring between each, until everything transforms into a silky, glossy pool. Let the mixture cool down slightly.
Grab a big mixing bowl and blend sugars, eggs, and vanilla until the mixture looks smooth and creamy like a delicious dream.
Pour the melted chocolate into the sugar mixture, stirring gently. In another bowl, mix flour, cocoa powder, baking powder, and salt. Slowly fold dry ingredients into wet mixture until just combined.
Wrap the dough in plastic and pop it in the refrigerator. Let it hang out and firm up for about an hour.
Heat the oven to 350F. Line baking sheets with parchment. Scoop dough, flatten slightly, and hide chocolate chips in the center. Wrap dough around chips to create little chocolate-filled orbs.
Place cookie balls on baking sheet, giving them space to spread. Bake for 10-12 minutes until edges look set and tops have delightful crackles. Centers should still look slightly gooey.
Let cookies rest on the baking sheet for 5 minutes. Transfer to a cooling rack. Serve warm for maximum chocolate explosion.
Tips To Perfect Chocolate Lava Brownie Cookies
Ways To Serve Chocolate Lava Brownie Cookies
Store Chocolate Lava Brownie Cookies For Later
Print
Molten Chocolate Lava Brownie Cookies Recipe
- Total Time: 1 hour 27 minutes
- Yield: 13 1x
Description
Indulgent chocolate lava brownie cookies blend classic brownie richness with gooey cookie magic. Molten chocolate centers create irresistible dessert perfection for chocolate enthusiasts eager to elevate their baking experience.
Ingredients
- 1 cup (170 g / 6 oz) semi-sweet chocolate chips
- ½ cup (90 g / 3.2 oz) semi-sweet or dark chocolate chips
- ½ cup (115 g / 4 oz) unsalted butter
- ¾ cup (150 g / 5.3 oz) granulated sugar
- ½ cup (100 g / 3.5 oz) brown sugar, packed
- 2 large eggs, room temperature
- 1 tsp vanilla extract
- 1 cup (125 g / 4.4 oz) all-purpose flour
- ¼ cup (25 g / 0.9 oz) unsweetened cocoa powder
- ½ tsp baking powder
- ¼ tsp salt
Instructions
- Chocolate Melting: Gently melt chocolate chips and butter in a microwave-safe bowl, stirring at 20-second intervals until smooth and glossy. Let the mixture cool slightly.
- Sugar Fusion: Whisk granulated sugar, brown sugar, eggs, and vanilla extract in a large mixing bowl until the mixture becomes silky and creamy.
- Dough Composition: Gradually blend the melted chocolate into the sugar mixture. In a separate bowl, sift together flour, cocoa powder, baking powder, and salt. Delicately fold dry ingredients into wet mixture until just combined.
- Flavor Maturation: Wrap the dough in plastic and refrigerate for at least one hour to develop optimal texture and taste.
- Oven Preparation and Cookie Shaping: Preheat oven to 350F. Line baking sheets with parchment paper. Scoop dough, creating a small cavity for hidden chocolate chips. Encase chips completely, forming uniform spherical mounds.
- Baking Process: Arrange cookie balls on prepared sheets with ample spacing. Bake for 10-12 minutes, watching for crackled edges and slightly underdone centers that indicate a perfect lava-like consistency.
- Serving Suggestion: Let cookies rest briefly on the baking sheet, then transfer to a cooling rack. Serve immediately to experience the molten chocolate core at its most decadent moment.
Notes
- Chocolate Melting Technique: Use low, steady microwave heat and stir frequently to prevent chocolate from burning or seizing, ensuring a smooth, glossy texture.
- Dough Resting Strategy: Refrigerate dough for at least one hour to intensify flavors, improve cookie structure, and create a more concentrated chocolate experience.
- Precise Baking Window: Watch cookies carefully during the 10-12 minute baking time; slight underbaking is crucial for achieving the signature molten lava center.
- Gluten-Free Adaptation: Substitute all-purpose flour with gluten-free flour blend or almond flour to make the recipe suitable for those with wheat sensitivities.
- Prep Time: 15 minutes (+1 hour chilling)
- Cook Time: 12 minutes
- Category: Desserts, Snacks
- Method: Baking
- Cuisine: American
Nutrition
- Serving Size: 13
- Calories: 235
- Sugar: 19 g
- Sodium: 55 mg
- Fat: 12 g
- Saturated Fat: 7 g
- Unsaturated Fat: 5 g
- Trans Fat: 0 g
- Carbohydrates: 30 g
- Fiber: 1 g
- Protein: 3 g
- Cholesterol: 40 mg
Marcus Foley
Food Critic & Kitchen Coach
Expertise
Recipe Testing and Troubleshooting; Time-Saving Kitchen Hacks; Global Flavor Exploration; Engaging Food Writing and Honest Reviews.
Education
Institute of Culinary Education (ICE), New York, NY
Marcus Foley, based in Atlanta, GA, is a friendly food expert who makes cooking fun and simple.
With hands-on training from the Institute of Culinary Education and years of tasting everything from street food to fine dining, he shares easy kitchen hacks, global flavor ideas, and step-by-step recipes that turn kitchen mishaps into delicious surprises.