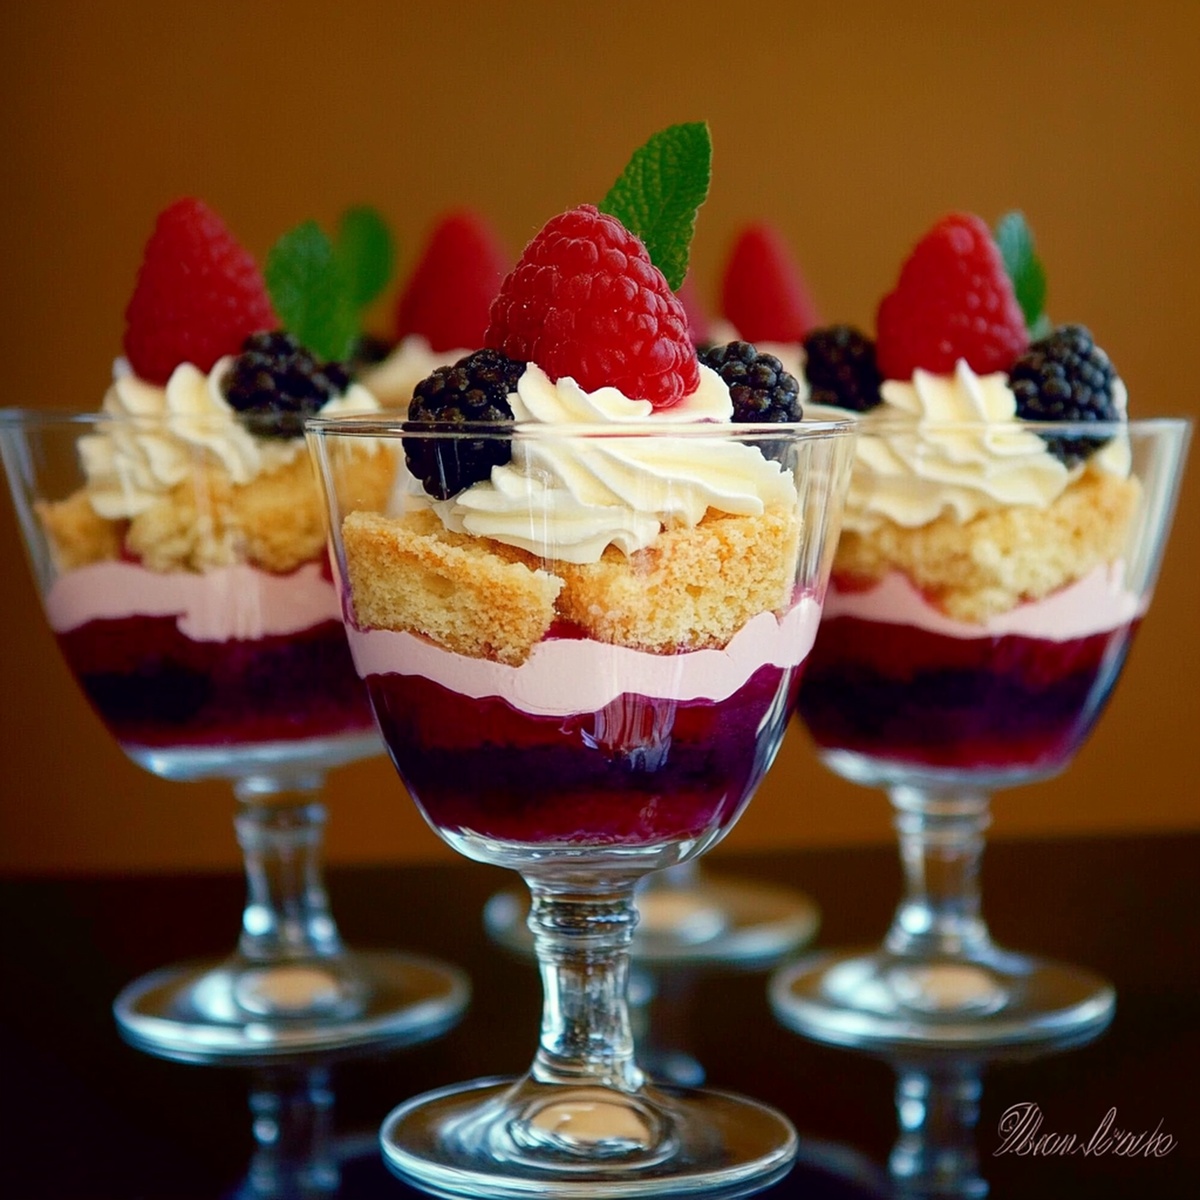
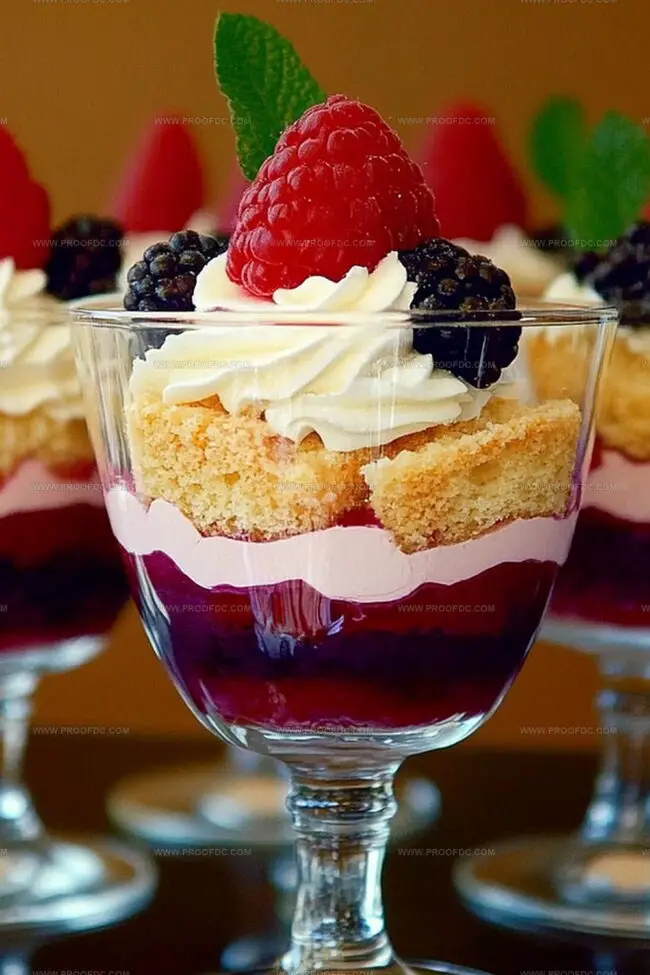
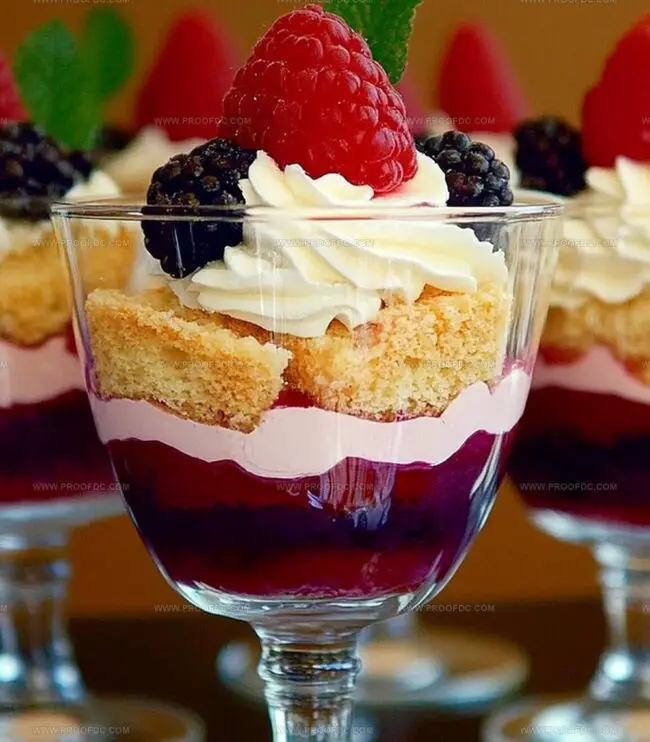
Mini Trifles Recipe: Whip Up Sweet Layers of Joy in a Flash
Ever wondered how a delightful mini trifles recipe could turn an ordinary dessert into a spectacular treat?
These petite layered delicacies pack incredible flavor in every single bite.
Small glass cups become magical canvases for creamy textures and vibrant colors.
The magic happens when pudding, cake, and fruit dance together in perfect harmony.
Each spoonful promises a delectable journey through rich and smooth ingredients.
Serving these gorgeous little desserts that sparkle with elegance and charm.
You’ll impress everyone at the table with these miniature masterpieces that look like they came straight from a professional pastry kitchen.
Ready to create something extraordinary that will make mouths water?
What Makes Mini Trifles So Special
Ingredients List for Mini Trifles
Cake Base:Fruit and Sweetener:Garnish and Finishing:Step-by-Step for Mini Trifles
Step 1: Prepare Cake Cubes
Grab your favorite sponge cake or pound cake and slice it into small, bite-sized cubes. The uniform pieces will ensure each spoonful has the perfect cake-to-cream ratio. Work carefully to create neat, approximately one-inch cubes that will look stunning in your serving glasses.
Step 2: Warm Fruit Preserves
Gently heat your chosen fruit preserves or jam in a small saucepan or microwave. Warming the preserves helps them become more fluid and easier to drizzle smoothly over the cake layers. Stir occasionally to prevent burning and achieve a silky, spreadable consistency.
Step 3: Layer Cake Base
Select clear glass serving dishes or small mason jars to showcase your beautiful layers. Start by placing a generous layer of cake cubes at the bottom of each container. Press the cubes lightly to create a stable foundation for your trifle.
Step 4: Add Fruit Preserves
Drizzle the warmed fruit preserves evenly over the cake cubes. Choose flavors like raspberry, strawberry, or mixed berry to add a vibrant burst of sweetness and color. The preserves will seep into the cake, creating a moist and flavorful base.
Step 5: Create Creamy Layer
Prepare a luscious cream layer using:Whip the ingredients together until smooth and peaks form. Carefully spoon the creamy mixture over the preserved cake cubes, ensuring an even distribution.
Step 6: Garnish and Decorate
Top your mini trifles with additional garnishes such as:Arrange the decorations artfully to create an Instagram-worthy dessert that’s as beautiful as it is delicious.
Step 7: Chill and Serve
Refrigerate the mini trifles for at least one hour before serving. This allows the flavors to meld together and the layers to set. When ready to enjoy, serve chilled and watch your guests’ eyes light up with delight.
Helpful Mini Trifles Tips
Mini Trifles Storage and Reheating Tips
What to Pair with Mini Trifles
Mini Trifles Variations to Try
Mini Trifles Questions Answered
Absolutely! Pound cake, sponge cake, or even leftover birthday cake work perfectly. The key is using a cake that can hold its shape when cubed.
Layer carefully and don’t oversoak the cake pieces. Add a thin layer of syrup or liqueur, just enough to add moisture without turning the cake into mush.
Yes! You can prepare these individual desserts up to 24 hours in advance. Keep them refrigerated and add any crunchy toppings just before serving to maintain their texture.
Definitely. You can use gluten-free cake, dairy-free whipped cream, and adjust ingredients to suit various dietary needs while maintaining the delicious layered dessert concept.
Print
Mini Trifles Recipe
- Total Time: 1 hour 15 minutes
- Yield: 6 1x
Description
Sweet layers of creamy mini trifles dance with luscious textures and rich flavors, promising a delightful dessert experience. Guests will savor each spoonful of these elegant little treats that blend classic ingredients into a memorable culinary celebration.
Ingredients
Main Ingredients:
- 1 pound cake or sponge cake, cubed
- 2 cups (480 ml) custard or vanilla pudding
- 1 ½ cups (225 g) fresh fruit
Cream and Topping:
- 1 cup (240 ml) whipped cream or whipped topping
- Additional whipped cream (for garnish)
Flavor Enhancers and Garnishes:
- ¼ cup (60 ml) fruit preserves or jam (optional)
- Fresh fruit (for garnish)
- Shaved chocolate, nuts, or sprinkles (optional)
Instructions
- Transform the cake into delicate, uniform cubes, ensuring each piece is roughly the same size for consistent texture and presentation.
- Gently heat the fruit preserves or jam in a small saucepan or microwave, stirring occasionally to achieve a smooth, pourable consistency that will easily cascade over the cake pieces.
- Artfully arrange the cake cubes at the base of individual serving glasses or dessert cups, creating a solid foundation for the layered treat.
- Drizzle the warmed preserves evenly across the cake cubes, allowing the liquid to seep into the small spaces and enhance the overall flavor profile.
- Carefully spoon or pipe the creamy custard or pudding over the preserved cake layer, maintaining a gentle touch to preserve the delicate structure.
- Add a generous dollop of whipped cream on top of the custard, creating a light and airy crown for the mini trifles.
- Garnish with fresh berries, chocolate shavings, or a sprinkle of crushed nuts to provide a decorative and textural contrast to the smooth layers beneath.
- Chill the assembled trifles in the refrigerator for at least 30 minutes to allow the flavors to meld and the dessert to set properly before serving.
Notes
- Choose a dense cake like pound cake or sponge cake for better structural integrity in your mini trifles.
- Warm fruit preserves gently in the microwave or on stovetop to create a smooth, easy-to-drizzle consistency without burning.
- Cut cake pieces uniformly to ensure each trifle looks neat and layers stack evenly in individual serving glasses.
- Chill trifles for at least an hour before serving to allow flavors to meld and set properly, creating a more cohesive dessert experience.
- Prep Time: 15 minutes
- Cook Time: 1 hour
- Category: Desserts, Snacks
- Method: Mixing
- Cuisine: British
Nutrition
- Serving Size: 6
- Calories: 250
- Sugar: 20 g
- Sodium: 150 mg
- Fat: 10 g
- Saturated Fat: 5 g
- Unsaturated Fat: 4 g
- Trans Fat: 0 g
- Carbohydrates: 35 g
- Fiber: 2 g
- Protein: 3 g
- Cholesterol: 30 mg
Jenna Stewart
Head Chef & Recipe Innovator
Expertise
Farm-to-Table Cooking; Seasonal Menu Development; Visual Plating Techniques; Flavor Layering and Simple Prep Hacks.
Education
The Culinary Institute of America, Hyde Park, NY
Jenna Stewart is the inventive spirit behind many of our standout dishes at Pro of Delicious Creations. A proud graduate of The Culinary Institute of America, she built her skills mastering both classic recipes and fresh, modern twists.
Now, Jenna celebrates the beauty of seasonal, local ingredients, often sourced from her garden and nearby markets, to create recipes that are bursting with flavor yet easy to follow. When she’s not experimenting in the kitchen, Jenna loves exploring nature on hikes and discovering new treasures at local co-ops.