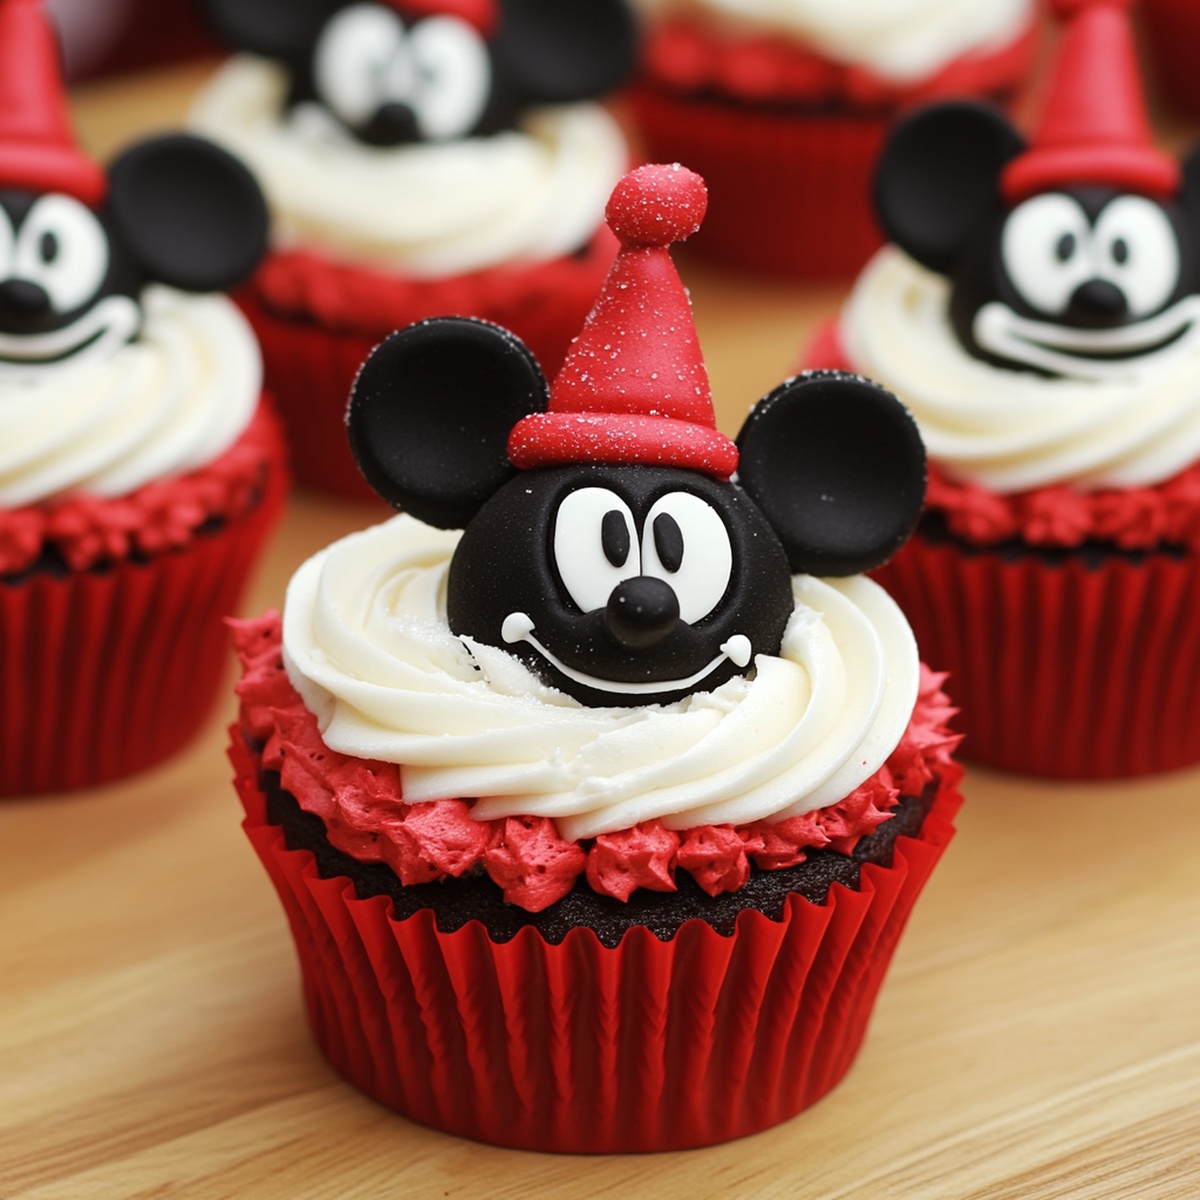
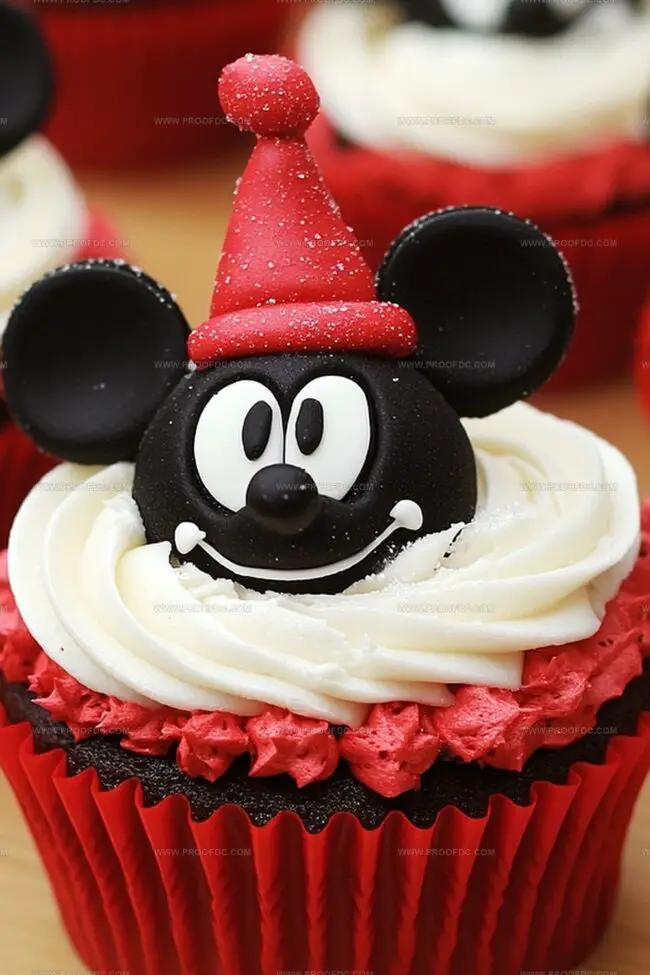
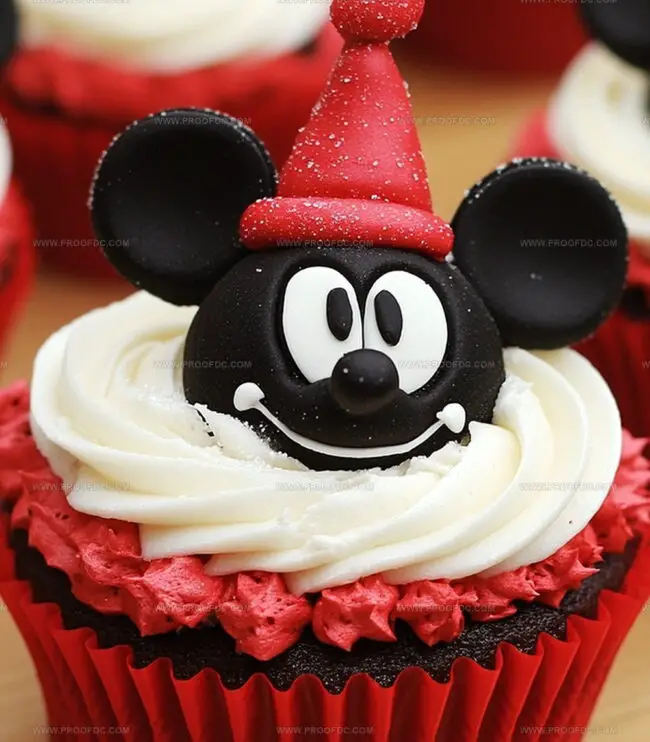
Jolly Mickey Mouse Christmas Cupcakes Recipe for Holiday Fun
Holiday baking gets whimsical with these adorable Mickey Mouse Christmas cupcakes that sparkle with festive cheer.
Walt disney magic meets seasonal sweetness in every delightful bite.
Festive decorations turn simple desserts into playful masterpieces that children and adults adore.
Soft vanilla cake topped with cheerful Mouse ears crafted from perfectly placed frosting.
Colorful sprinkles and creative icing techniques make these treats stand out at any celebration.
Chocolate and vanilla combinations create delicious memories you’ll treasure.
Baking these cupcakes promises magical moments that bring joy to your kitchen.
Why Mickey Mouse Christmas Cupcakes Bring Holiday Magic
What You’ll Need For Mickey Mouse Christmas Cupcakes
Cake Base Ingredients:Wet Cake Ingredients:Frosting and Decoration Ingredients:Baking Essentials:How To Make Mickey Mouse Christmas Cupcakes Step By Step
Step 1: Mixing Dry Ingredients
Grab a medium bowl and whisk together flour, baking powder, baking soda, and salt until perfectly blended. Set this magical mixture aside for the next exciting step.
Step 2: Creaming Butter and Sugar
In a large bowl, cream butter and sugar together until the mixture becomes light, fluffy, and looks like a winter wonderland. Add eggs one by one, mixing thoroughly after each addition. Stir in vanilla extract to bring a delightful aroma to your cupcake creation.
Step 3: Combining Wet and Dry Ingredients
Gently fold the dry ingredients into the butter mixture, alternating with milk and sour cream. Start and end with dry ingredients. Mix carefully to keep the batter smooth and avoid overmixing.
Step 4: Baking Cupcake Base
Preheat the oven to 350°F (175°C). Line a muffin tin with festive holiday cupcake liners. Fill each liner about three-quarters full with the prepared batter. Slide the tin into the oven and bake for 18-20 minutes. Check doneness by inserting a toothpick – it should come out clean.
Step 5: Cooling Cupcake Base
Remove cupcakes from the oven and let them cool completely on a wire rack. Patience is key to perfect frosting!
Step 6: Preparing Buttercream Frosting
In a large bowl, beat butter until smooth and creamy. Gradually add:Whip the mixture until it becomes light and fluffy. Divide the frosting into two separate bowls.
Step 7: Coloring Frosting
Add red gel food coloring to one bowl and green to the other. Mix until you achieve vibrant holiday colors.
Step 8: Decorating Mickey Mouse Cupcakes
Use a piping bag with a star or round tip to create festive swirls of red and green frosting on each cupcake. Place two mini Oreos on top to create Mickey Mouse ears. Sprinkle with holiday-themed sprinkles and edible glitter for extra magic.
Step 9: Serving and Enjoying
Arrange your adorable Mickey Mouse Christmas Cupcakes on a festive platter. Watch as family and friends marvel at your delightful holiday treats!
Tips To Nail Mickey Mouse Christmas Cupcakes
How To Store And Reheat Mickey Mouse Christmas Cupcakes
Drinks And Snacks To Pair With Mickey Mouse Christmas Cupcakes
Fun Decorating Ideas For Mickey Mouse Christmas Cupcakes
FAQs About Mickey Mouse Christmas Cupcakes
These Mickey Mouse Christmas Cupcakes blend Disney magic with holiday cheer by using festive red and green frosting and adorable Mickey Mouse ear decorations made from mini Oreos, creating a fun and whimsical dessert perfect for holiday parties and Disney fans.
Absolutely! You can bake the cupcakes 1-2 days in advance and store them in an airtight container. Frost them the day you plan to serve for the freshest look and taste. The mini Oreo ears can be added just before serving to keep them crisp.
Not at all! Even beginner bakers can create these cupcakes. Use a simple star or round piping tip to create festive swirls, and the mini Oreo ears are super easy to place. The holiday sprinkles and edible glitter help cover any small decorating imperfections.
While gel food coloring provides the most vibrant colors, you can use liquid food coloring. Just be aware that liquid colors might slightly change the frosting’s consistency, so add them gradually and adjust with powdered sugar or cream as needed.
Print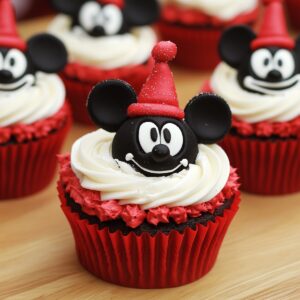
Mickey Mouse Christmas Cupcakes Recipe
- Total Time: 40 minutes
- Yield: 24 1x
Description
Disney magic sparkles through Mickey Mouse Christmas cupcakes, delighting families with festive cheer. Chocolate cake bases adorned with cheerful Santa hat frosting and Mickey-shaped sprinkles promise delightful holiday sweetness you’ll savor with pure joy.
Ingredients
Main Ingredients (Flour and Sugars):
- 1 ½ cups (350 ml) all-purpose flour
- ¾ cup (150 g) granulated sugar
Leavening Agents:
- 1 teaspoon baking powder
- ½ teaspoon baking soda
- ¼ teaspoon salt
Wet Ingredients and Additions:
- ½ cup (113 g) unsalted butter, softened
- 2 large eggs
- ½ cup (120 ml) milk
- ¼ cup (60 ml) sour cream
- 1 teaspoon vanilla extract
Frosting Ingredients:
- 1 cup (226 g) unsalted butter, softened
- 3 cups (360 g) powdered sugar
- 2–3 tablespoons heavy cream or milk
- 1 teaspoon vanilla extract
- Red and green gel food coloring
Decoration Ingredients:
- Mini Oreo cookies (for Mickey ears)
- Holiday sprinkles
- Edible glitter (optional)
Instructions
- Prepare the cupcake batter by combining dry ingredients in a medium mixing vessel. In a separate large bowl, whisk butter and sugar until achieving a creamy, aerated texture. Incorporate eggs individually, ensuring thorough blending after each addition. Infuse vanilla extract for enhanced flavor.
- Gently fold dry ingredients into the butter mixture, alternating with milk and sour cream. Maintain a delicate mixing technique to preserve the batter’s light consistency. Distribute batter evenly into festive cupcake liners, filling approximately three-quarters full.
- Position the muffin tin in a preheated oven at 350F (175C). Bake for 18-20 minutes, monitoring for a golden surface and checking doneness with a clean toothpick inserted into the center. Allow cupcakes to cool completely on a wire rack.
- Create frosting by whipping butter until smooth and glossy. Gradually integrate powdered sugar, mixing until achieving a uniform texture. Enhance with vanilla extract and heavy cream, whisking until the frosting becomes fluffy and pipeable.
- Divide frosting into separate bowls and tint using gel food coloring – one batch red and another green – to create a festive color palette.
- Decorate cooled cupcakes by piping colored frosting using a decorative star or round tip. Strategically place mini Oreos to represent Mickey Mouse ears on each cupcake.
- Embellish with holiday sprinkles and edible glitter for a whimsical, magical finishing touch. Arrange on a decorative platter for a delightful presentation.
Notes
- Measure ingredients precisely to ensure consistent cupcake texture and prevent dry or dense results.
- Room temperature ingredients blend smoother, creating a more even and lighter cake batter.
- Avoid overmixing the batter to prevent tough, rubbery cupcakes by stopping when ingredients are just combined.
- Use gel food coloring for vibrant colors without changing frosting consistency, unlike liquid food coloring.
- Check cupcakes early to prevent overbaking, which can lead to dry desserts – start testing at 16 minutes.
- Create dairy-free version by substituting butter with coconut oil and milk with almond milk for similar texture.
- Store decorated cupcakes in an airtight container at room temperature for up to 3 days to maintain freshness.
- Freeze unfrosted cupcakes wrapped tightly for up to 2 weeks, thawing at room temperature before decorating.
- Prep Time: 20 minutes
- Cook Time: 20 minutes
- Category: Desserts
- Method: Baking
- Cuisine: American
Nutrition
- Serving Size: 24
- Calories: 360
- Sugar: 30 g
- Sodium: 210 mg
- Fat: 18 g
- Saturated Fat: 10 g
- Unsaturated Fat: 8 g
- Trans Fat: 0 g
- Carbohydrates: 44 g
- Fiber: 1 g
- Protein: 3 g
- Cholesterol: 50 mg
Jenna Stewart
Head Chef & Recipe Innovator
Expertise
Farm-to-Table Cooking; Seasonal Menu Development; Visual Plating Techniques; Flavor Layering and Simple Prep Hacks.
Education
The Culinary Institute of America, Hyde Park, NY
Jenna Stewart is the inventive spirit behind many of our standout dishes at Pro of Delicious Creations. A proud graduate of The Culinary Institute of America, she built her skills mastering both classic recipes and fresh, modern twists.
Now, Jenna celebrates the beauty of seasonal, local ingredients, often sourced from her garden and nearby markets, to create recipes that are bursting with flavor yet easy to follow. When she’s not experimenting in the kitchen, Jenna loves exploring nature on hikes and discovering new treasures at local co-ops.