
The Cutest Melted Snowman Biscuits Recipe for Winter Baking Fun
Who doesn’t love whimsical winter treats that spark instant smiles?
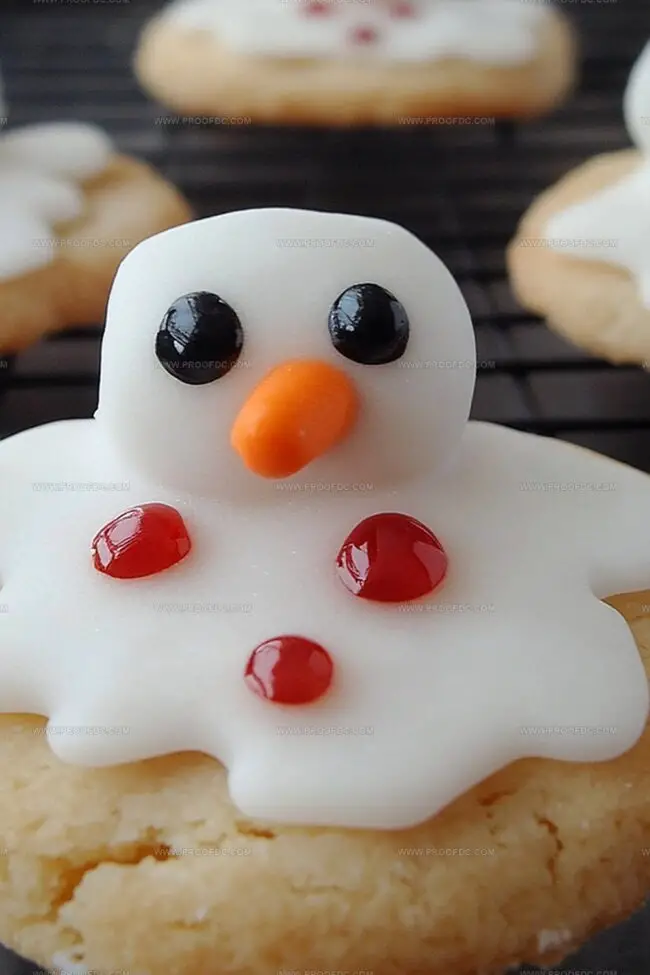
These melted snowman biscuits capture childhood magic with playful charm.
Soft, sweet cookies designed to look like adorable snowmen surrendering to warm temperatures.
Delicate details transform simple ingredients into edible art that delights both small and grown-up guests.
Sugary decorations and clever shaping make these treats stand out from standard holiday sweets.
Each biscuit tells a tiny story of a snowman sweet surrender.
You’ll be amazed how quickly these charming confections come together in your kitchen.
Grab some basic ingredients and let your creativity melt into delicious fun!
Why Melted Snowman Biscuits Are So Playful
Ingredients Needed For Melted Snowman Biscuits
Baking Base:Main Decorative Elements:Decorative Details:Optional Decorative Accents:How To Make Melted Snowman Biscuits Easily
Step 1: Whip Up Magical Icing
In a mixing bowl, combine powdered sugar and milk. Stir gently until the mixture transforms into a silky, smooth consistency. Adjust the liquid carefully, adding tiny droplets of milk until the icing flows like a gentle winter stream but remains thick enough to cling to your cookies.
Step 2: Create Delightful Melting Magic
Arrange your favorite sugar cookies on a parchment-lined baking sheet. Drizzle the prepared icing over each cookie, allowing it to cascade softly down the sides. Let the icing create an organic, melted appearance that mimics a snowman gently surrendering to warmth.
Step 3: Add Puffy Snowman Heads
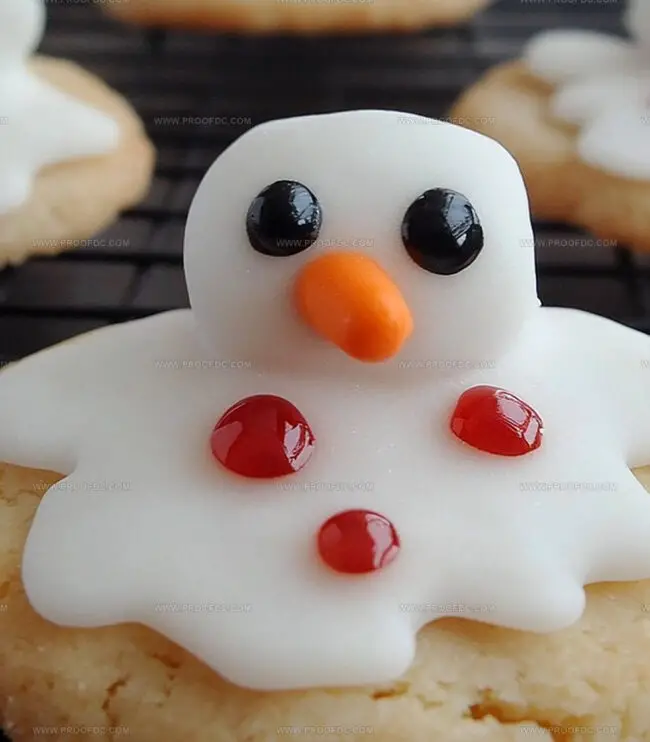
Warm marshmallows briefly in the microwave to make them wonderfully pliable. Carefully position a marshmallow on the upper portion of each iced cookie, creating the illusion of a snowman’s head slowly dissolving.
Step 4: Bring Snowmen to Life
Grab your decorating tools:Draw expressive eyes and a playful smile using the black icing. Craft a charming carrot nose with the orange icing. Sprinkle tiny candies as buttons or scarf embellishments, giving each snowman unique personality.
Step 5: Let the Magic Set
Allow your creative snowmen cookies to rest at room temperature. Give the icing 20-30 minutes to harden, transforming your edible artwork into delightful winter treats ready to charm everyone at the dessert table.
Tip: Work on a cool surface to help the icing set more quickly and maintain the melted snowman effect.
Smart Tips For Melted Snowman Biscuits
Keep Melted Snowman Biscuits Soft And Fun
Serve Melted Snowman Biscuits With These Treats
Cute Twists On Melted Snowman Biscuits
FAQs For Melted Snowman Biscuits
Softening marshmallows for just a few seconds makes them more pliable and easier to place on the biscuit without breaking or tearing.
Absolutely! Sugar cookies, shortbread, or plain butter cookies work perfectly for creating these adorable melted snowman treats.
Add powdered sugar gradually if the icing seems too thin, or mix in small amounts of milk if it’s too thick. The goal is a consistency that drips slightly but doesn’t completely run off the biscuit.
No worries! You can use a small piping bag, toothpick, or even carefully apply decoration with a small spoon to create the snowman’s facial features and details.
Print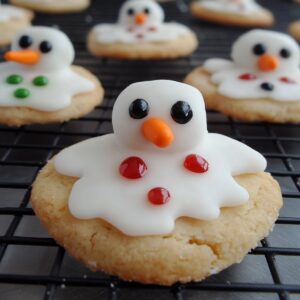
Melted Snowman Biscuits Recipe
- Total Time: 30 minutes
- Yield: 12 1x
Description
Whimsical Melted Snowman Biscuits enchant winter celebrations with playful charm. Sweet cookie bases adorned with marshmallow snowmen promise delightful dessert magic you’ll eagerly share at holiday gatherings.
Ingredients
Main Ingredients:
- 12 round biscuits or cookies (store-bought or homemade)
- 12 large marshmallows
- 1 cup powdered sugar
Decorative Ingredients:
- 2–3 tablespoons milk (for icing)
- Orange gel icing pen
- Black gel icing pen
- Assorted candies (mini M&Ms, sprinkles, or licorice for buttons and scarves)
Instructions
- Craft a smooth, pourable icing by whisking powdered sugar with milk until achieving a silky, fluid texture that cascades gently over the surface.
- Arrange biscuits on a parchment-lined surface, strategically positioning them for optimal decorative potential.
- Gently drape the prepared icing across each biscuit, allowing delicate rivulets to drift elegantly down the edges, mimicking a melting snowman’s fluid motion.
- Warm marshmallows briefly in the microwave to render them pliant, then delicately perch each one atop the iced biscuit as a whimsical snowman head.
- Transform the marshmallow into a character using precise black icing strokes for expressive eyes and a playful mouth, creating personality with minimal details.
- Implement an orange icing accent to craft a charming carrot nose, nestled centrally on the marshmallow surface.
- Embellish the melted design with miniature candies or sprinkles, strategically placing them to represent buttons or a playful scarf element.
- Allow the artistic creation to rest and solidify, permitting the icing to set completely for approximately 20-30 minutes before presenting these delightful winter-themed treats.
Notes
- Control icing consistency by adding milk gradually, ensuring a smooth, pourable texture that creates the perfect “melted” effect without being too runny.
- Soften marshmallows carefully in the microwave for just a few seconds to prevent melting completely, maintaining their shape as the snowman’s head.
- Prepare decorating tools like icing pens and small candies in advance, working quickly before the icing sets to add cute details and personality to each snowman biscuit.
- Experiment with different biscuit bases like shortbread or sugar cookies, and try alternative decorations such as chocolate chips or colored sprinkles to make each snowman unique.
- Prep Time: 15 minutes
- Cook Time: 15 minutes
- Category: Breakfast, Snacks, Desserts
- Method: Mixing
- Cuisine: American
Nutrition
- Serving Size: 12
- Calories: 150
- Sugar: 12 g
- Sodium: 120 mg
- Fat: 5 g
- Saturated Fat: 2 g
- Unsaturated Fat: 2 g
- Trans Fat: 0 g
- Carbohydrates: 22 g
- Fiber: 0 g
- Protein: 1 g
- Cholesterol: 0 mg
Jenna Stewart
Head Chef & Recipe Innovator
Expertise
Farm-to-Table Cooking; Seasonal Menu Development; Visual Plating Techniques; Flavor Layering and Simple Prep Hacks.
Education
The Culinary Institute of America, Hyde Park, NY
Jenna Stewart is the inventive spirit behind many of our standout dishes at Pro of Delicious Creations. A proud graduate of The Culinary Institute of America, she built her skills mastering both classic recipes and fresh, modern twists.
Now, Jenna celebrates the beauty of seasonal, local ingredients, often sourced from her garden and nearby markets, to create recipes that are bursting with flavor yet easy to follow. When she’s not experimenting in the kitchen, Jenna loves exploring nature on hikes and discovering new treasures at local co-ops.