
Grandmother’s Cherished Martha Washington Candy Recipe
Sweet memories of grandma’s kitchen dance through my mind whenever I think about this Martha Washington candy creation.
Clusters of sugary goodness beckon with their irresistible charm.
Homemade treats like these connect generations through shared culinary traditions.
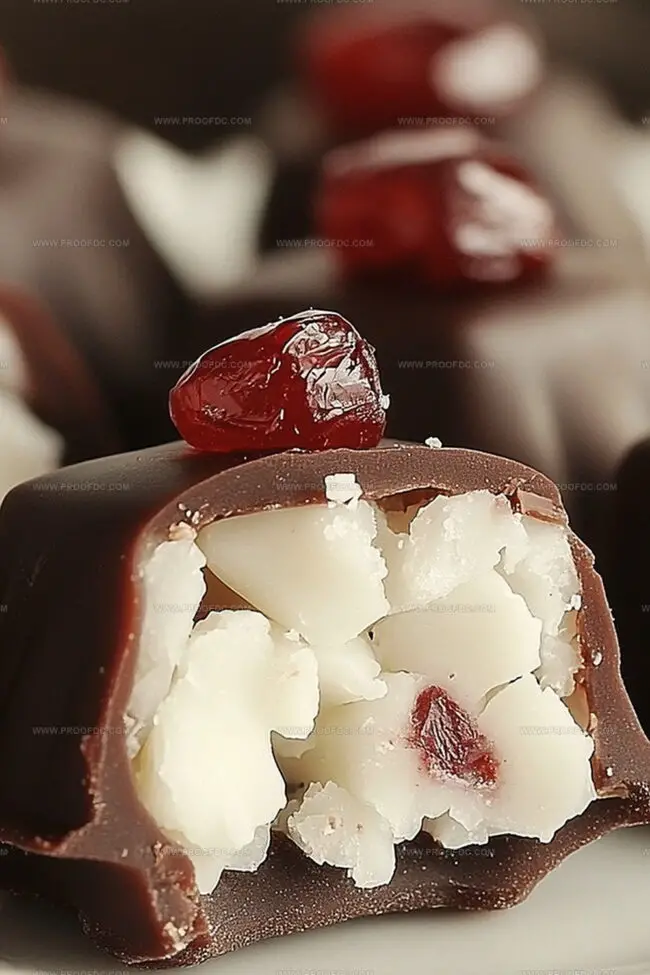
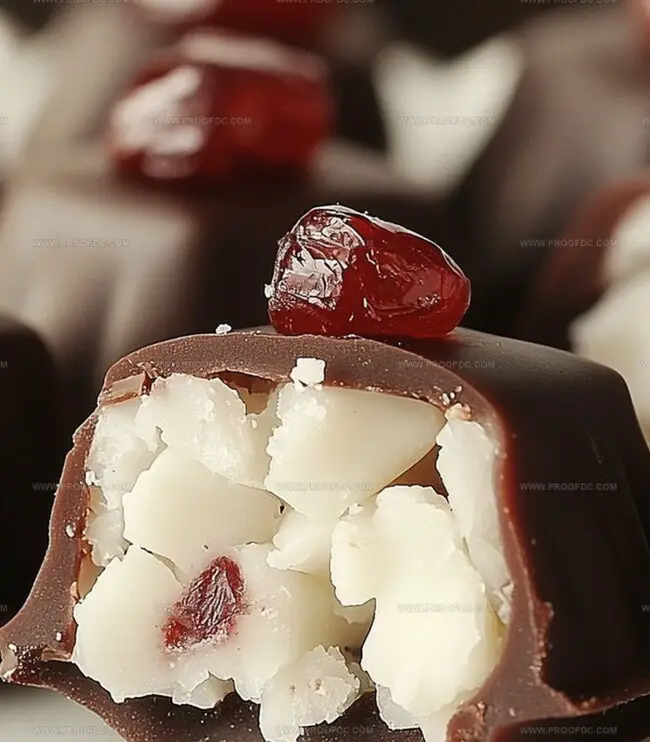
Chocolate and coconut mingle in a delightful symphony of flavors that whisper comfort.
Unwrapping a piece and feeling instant nostalgia wash over you.
Simple ingredients come together to craft something truly magical.
Each bite promises a little piece of edible happiness that you’ll want to savor slowly.
Let’s transform humble pantry staples into a delectable confection that will become your new favorite sweet indulgence.
What Makes Martha Washington Candy Special
Everything Needed For Martha Washington Candy
Main Ingredients:
Candy Filling Base:Filling Mix-Ins:Coating Ingredients:How To Make Martha Washington Candy Easily
Step 1: Blend Filling Ingredients
In a spacious mixing bowl, cream together softened butter and sweetened condensed milk until silky smooth. Stir in vanilla extract. Gradually incorporate powdered sugar, mixing until the mixture transforms into a dense, tacky dough. Gently fold in:Ensure ingredients are evenly distributed throughout the mixture.
Step 2: Create Candy Balls
Scoop small portions of the filling and roll into compact spheres. Arrange these delightful orbs on a parchment-lined baking sheet. Chill in the refrigerator or freezer for approximately one hour until they become completely firm.
Step 3: Craft Chocolate Coating
Melt chocolate chips using one of two methods:
Option 1 – Microwave Method:Option 2 – Double Boiler Method:Step 4: Enrobe Candies in Chocolate
Retrieve chilled candy balls. Using a fork or specialized candy dipper, submerge each ball completely in melted chocolate. Allow excess chocolate to drip off. Carefully place chocolate-covered treats back onto the parchment-lined baking sheet.
Step 5: Set and Store
Allow chocolatey treats to set at room temperature. For faster results, place in refrigerator. Once chocolate hardens completely, transfer candies to an airtight container. These delectable treats will maintain their quality for several days when stored properly.
Martha Washington Candy Tips To Know
Best Way To Keep Martha Washington Candy Fresh
Pair Martha Washington Candy With These
Twist Your Martha Washington Candy Recipe
Martha Washington Candy Questions Explained
These candies are a classic homemade treat that combines rich, creamy coconut-pecan filling with a smooth chocolate coating. They’re named after Martha Washington and have been a beloved holiday confection for generations.
Not at all! While they require a few steps, the process is straightforward. The most important parts are chilling the filling and carefully dipping the balls in chocolate. Even beginner bakers can successfully make these delightful candies.
Yes! You can swap pecans for other nuts like walnuts or almonds. If you don’t like coconut, you can reduce the amount or omit it entirely. For the chocolate coating, you can use milk, dark, or white chocolate depending on your preference.
When stored in an airtight container in the refrigerator, Martha Washington Candies can last up to two weeks. They’re perfect for making ahead of time for holiday gifting or special occasions.
Print
Martha Washington Candy Recipe
- Total Time: 1 hour 30 minutes
- Yield: 36 1x
Description
Sweet Martha Washington candies offer a delightful taste of Southern confectionery nostalgia. Creamy coconut centers and rich chocolate coating create an irresistible treat you’ll savor with pure indulgence.
Ingredients
Main Ingredients:
- 2 lbs (900 g) powdered sugar, sifted
- 2 cups (160 g) sweetened shredded coconut
- 1 ½ cups (180 g) chopped pecans
Wet Ingredients:
- 1 cup (225 g) unsalted butter, softened
- 1 can (14 ounces) sweetened condensed milk
- 2 teaspoons vanilla extract
Coating Ingredients:
- 24 ounces (680 g) semi-sweet or milk chocolate chips
- 2 tablespoons vegetable shortening (optional, for a smoother coating)
Instructions
- Craft a velvety foundation by whisking softened butter and sweetened condensed milk into a luxurious, uniform mixture. Infuse the blend with vanilla extract’s aromatic essence.
- Gradually incorporate powdered sugar, stirring methodically until the composition transforms into a dense, malleable consistency. Gently fold shredded coconut and chopped pecans throughout the mixture, ensuring even distribution.
- Delicately sculpt the mixture into petite, uniform spheres using a tablespoon as your guide. Arrange these delicate orbs on a parchment-lined tray, creating a neat arrangement.
- Chill the nascent candies in the refrigerator or freezer, allowing them to firm and solidify for approximately one hour, enhancing their structural integrity.
- Melt chocolate chips with vegetable shortening using a microwave or double boiler technique, stirring intermittently to achieve a glossy, smooth texture.
- Carefully immerse each chilled sphere into the molten chocolate, utilizing a fork or specialized candy dipper. Ensure complete coverage, allowing excess chocolate to gracefully cascade back into the bowl.
- Meticulously place chocolate-enrobed candies onto the parchment-lined surface, maintaining a precise, uniform appearance.
- Allow the chocolate coating to set naturally at room temperature or expedite the process by refrigerating. Once hardened, transfer the completed confections to an airtight storage container, preserving their exquisite texture and flavor.
Notes
- Soften butter completely at room temperature to ensure a smooth, lump-free filling that blends effortlessly with other ingredients.
- Use a stand mixer or hand mixer for easier and more consistent mixing of the candy filling, preventing arm fatigue during preparation.
- Control the sweetness by adjusting powdered sugar gradually – start with less and add more to achieve desired consistency and taste.
- Chill the candy balls thoroughly before chocolate coating to prevent them from falling apart during dipping and help chocolate adhere better.
- Choose high-quality chocolate with at least 60% cocoa content for a richer, more decadent coating that complements the sweet filling.
- Create texture variations by toasting pecans before chopping to enhance their nutty flavor and add a delightful crunch to the candy.
- Store candies in a cool, dry place or refrigerate to maintain their shape and prevent chocolate from melting, extending their shelf life.
- Prep Time: 30 minutes
- Cook Time: 1 hour
- Category: Desserts, Snacks
- Method: Mixing
- Cuisine: American
Nutrition
- Serving Size: 36
- Calories: 161
- Sugar: 24 g
- Sodium: 25 mg
- Fat: 7 g
- Saturated Fat: 4 g
- Unsaturated Fat: 3 g
- Trans Fat: 0 g
- Carbohydrates: 23 g
- Fiber: 1 g
- Protein: 2 g
- Cholesterol: 10 mg
Jenna Stewart
Head Chef & Recipe Innovator
Expertise
Farm-to-Table Cooking; Seasonal Menu Development; Visual Plating Techniques; Flavor Layering and Simple Prep Hacks.
Education
The Culinary Institute of America, Hyde Park, NY
Jenna Stewart is the inventive spirit behind many of our standout dishes at Pro of Delicious Creations. A proud graduate of The Culinary Institute of America, she built her skills mastering both classic recipes and fresh, modern twists.
Now, Jenna celebrates the beauty of seasonal, local ingredients, often sourced from her garden and nearby markets, to create recipes that are bursting with flavor yet easy to follow. When she’s not experimenting in the kitchen, Jenna loves exploring nature on hikes and discovering new treasures at local co-ops.