
Swirly Red Velvet Marble Cupcakes Recipe: Dreamy Treats for All
Swirling colors and decadent flavors dance together in these delightful red velvet marble cupcakes that promise to steal the show at any gathering.
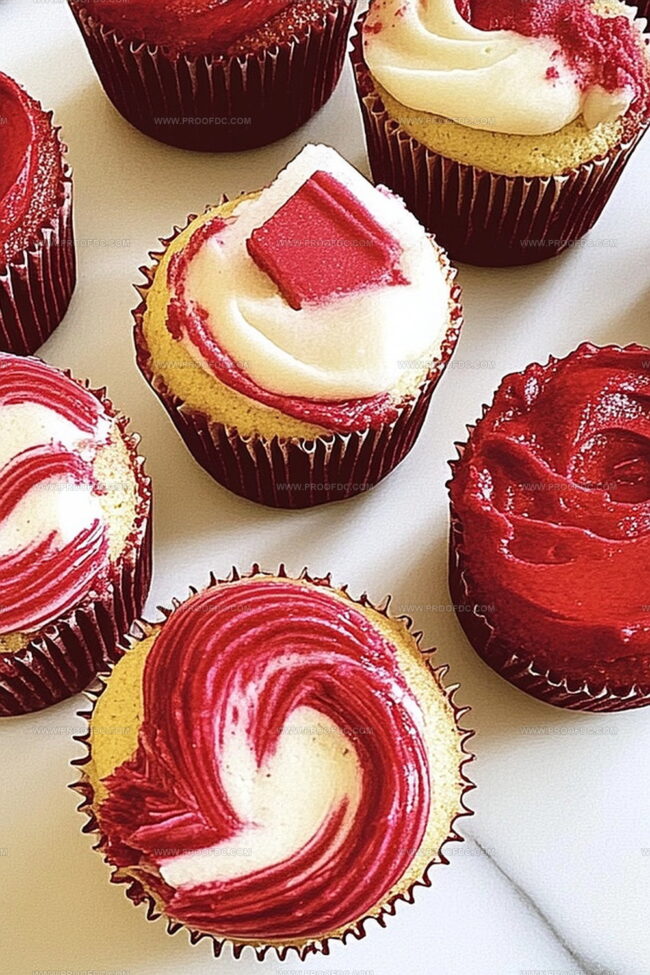
Rich cocoa threads through vibrant red cake batter, creating a mesmerizing marbled effect that catches every eye.
The contrast between deep crimson and chocolate brown makes these cupcakes a visual stunner with incredible taste.
Soft, velvety texture melts in your mouth with each delectable bite.
Each cupcake brings a perfect balance of sweetness and subtle chocolate undertones.
Cream cheese frosting adds a luxurious finish that complements the cake’s complex flavor profile.
These stunning treats will become your new go-to dessert for special occasions and spontaneous sweet cravings.
Quick Recipe Overview
What’s In Red Velvet Marble Cupcakes
For Base Ingredients:For Wet and Binding Ingredients:For Color and Chocolate Components:Tools To Make Red Velvet Marble Cupcakes
Bake Red Velvet Marble Cupcakes Step By Step

Crank your oven to a toasty 350F. Grab a muffin tin and dress it up with cute paper liners, creating a cozy home for your soon-to-be cupcake masterpiece.
Grab your mixing bowl and whisk together flour, leavening agents, and a pinch of salt. This dry mix will be the foundation of your cupcake adventure.
Whip softened butter and sugar until they transform into a cloud-like, fluffy dream. This is where the magic begins to take shape.
Introduce eggs and vanilla, letting them dance into the buttery mixture. Gently fold in buttermilk and dry ingredients, creating a smooth, silky batter that whispers sweet promises.
Scoop out a small portion of batter and sprinkle in cocoa and vibrant red food coloring. Watch as your plain batter becomes a bold, crimson sensation.
Dollop the plain and red batters into cupcake liners, creating a canvas of colors. Grab a toothpick and draw gentle swirls, turning each cupcake into a unique work of art.
Slide the tin into the oven and let the cupcakes bake for about 20 minutes. They’re ready when a toothpick comes out clean, signaling cupcake perfection.
Whip cream cheese and butter into a dreamy, clouds of frosting. Fold in powdered sugar and vanilla, creating a luscious topping that will make taste buds dance.
Once cooled, crown your cupcakes with the creamy frosting. Sprinkle with festive decorations if the mood strikes, turning each cupcake into a celebration.
Helpful Tips For Red Velvet Marble Cupcakes
How To Serve Red Velvet Marble Cupcakes
Storing Red Velvet Marble Cupcakes Made Easy
Keep cupcakes in an airtight container at room temperature for 2-3 days, ensuring freshness and soft texture.
Print
Luscious Red Velvet Marble Cupcakes Recipe
- Total Time: 40 minutes
- Yield: 11 1x
Description
Red velvet marble cupcakes offer a delightful twist on classic desserts. Rich cocoa and cream cheese frosting create a perfect harmony of flavors that chocolate and red velvet enthusiasts will adore.
Ingredients
- 1 ¼ cups (160 g) all-purpose flour
- ¾ cup (150 g) granulated sugar
- ½ cup (120 ml) buttermilk, room temperature
- ½ cup (115 g) unsalted butter, softened
- 4 oz (115 g) cream cheese, softened
- 1 large egg, room temperature
- 1 tbsp unsweetened cocoa powder
- 1 tsp red food coloring (gel recommended)
- 1 tsp vanilla extract
- ½ tsp baking powder
- ¼ tsp baking soda
- ¼ tsp salt
- 1 ½ cups (190 g) powdered sugar
- ½ tsp vanilla extract
Instructions
- Preheat Oven: Calibrate oven to 350F (175C) and arrange cupcake liners in a 12-cup muffin tin.
- Dry Ingredient Fusion: Whisk flour, baking powder, baking soda, and salt in a medium bowl until uniformly blended.
- Butter Transformation: Cream butter and sugar using an electric mixer until achieving a cloud-like, ethereal consistency.
- Liquid Integration: Blend egg and vanilla extract into the butter mixture, then gently fold in buttermilk and dry ingredients to create a silky, homogeneous batter.
- Color Separation: Divide batter, introducing cocoa powder and red food coloring to a portion, creating a vibrant red velvet variant.
- Marbling Technique: Fill cupcake liners halfway with plain batter, strategically adding red velvet batter on top. Use a toothpick to swirl batters, generating an elegant marble effect without excessive manipulation.
- Baking Process: Slide muffin tin into preheated oven, baking 18-22 minutes until a toothpick inserted emerges pristine.
- Cooling Strategy: Rest cupcakes in pan for 5 minutes, then transfer to a wire rack for complete temperature equilibration.
- Frosting Creation: Whip cream cheese and butter until luxuriously smooth, gradually incorporating powdered sugar and vanilla extract until achieving a pillowy, light consistency.
- Final Presentation: Once cupcakes are thoroughly cooled, ornament with cream cheese frosting, optionally garnishing with sprinkles or red velvet crumbs for visual appeal.
Notes
- Perfect Marbling Technique: Avoid overmixing when creating the marble effect; use a gentle toothpick swirl to maintain distinct color separation and prevent muddying the beautiful red and white patterns.
- Moisture Control: Use room temperature ingredients, especially buttermilk and eggs, to ensure a tender, moist cupcake texture that doesn’t become dense or dry during baking.
- Food Coloring Pro Tip: Start with a small amount of red food coloring and gradually add more to achieve the desired vibrant red velvet shade without compromising the batter’s consistency.
- Frosting Stability: Ensure cream cheese and butter are at room temperature for smooth blending, and avoid overbeating to prevent the frosting from becoming too runny or losing its creamy texture.
- Prep Time: 20 minutes
- Cook Time: 20 minutes
- Category: Desserts, Snacks
- Method: Baking
- Cuisine: American
Nutrition
- Serving Size: 11
- Calories: 220
- Sugar: 23 g
- Sodium: 180 mg
- Fat: 10 g
- Saturated Fat: 6 g
- Unsaturated Fat: 4 g
- Trans Fat: 0 g
- Carbohydrates: 31 g
- Fiber: 0.5 g
- Protein: 2 g
- Cholesterol: 40 mg
Marcus Foley
Food Critic & Kitchen Coach
Expertise
Recipe Testing and Troubleshooting; Time-Saving Kitchen Hacks; Global Flavor Exploration; Engaging Food Writing and Honest Reviews.
Education
Institute of Culinary Education (ICE), New York, NY
Marcus Foley, based in Atlanta, GA, is a friendly food expert who makes cooking fun and simple.
With hands-on training from the Institute of Culinary Education and years of tasting everything from street food to fine dining, he shares easy kitchen hacks, global flavor ideas, and step-by-step recipes that turn kitchen mishaps into delicious surprises.