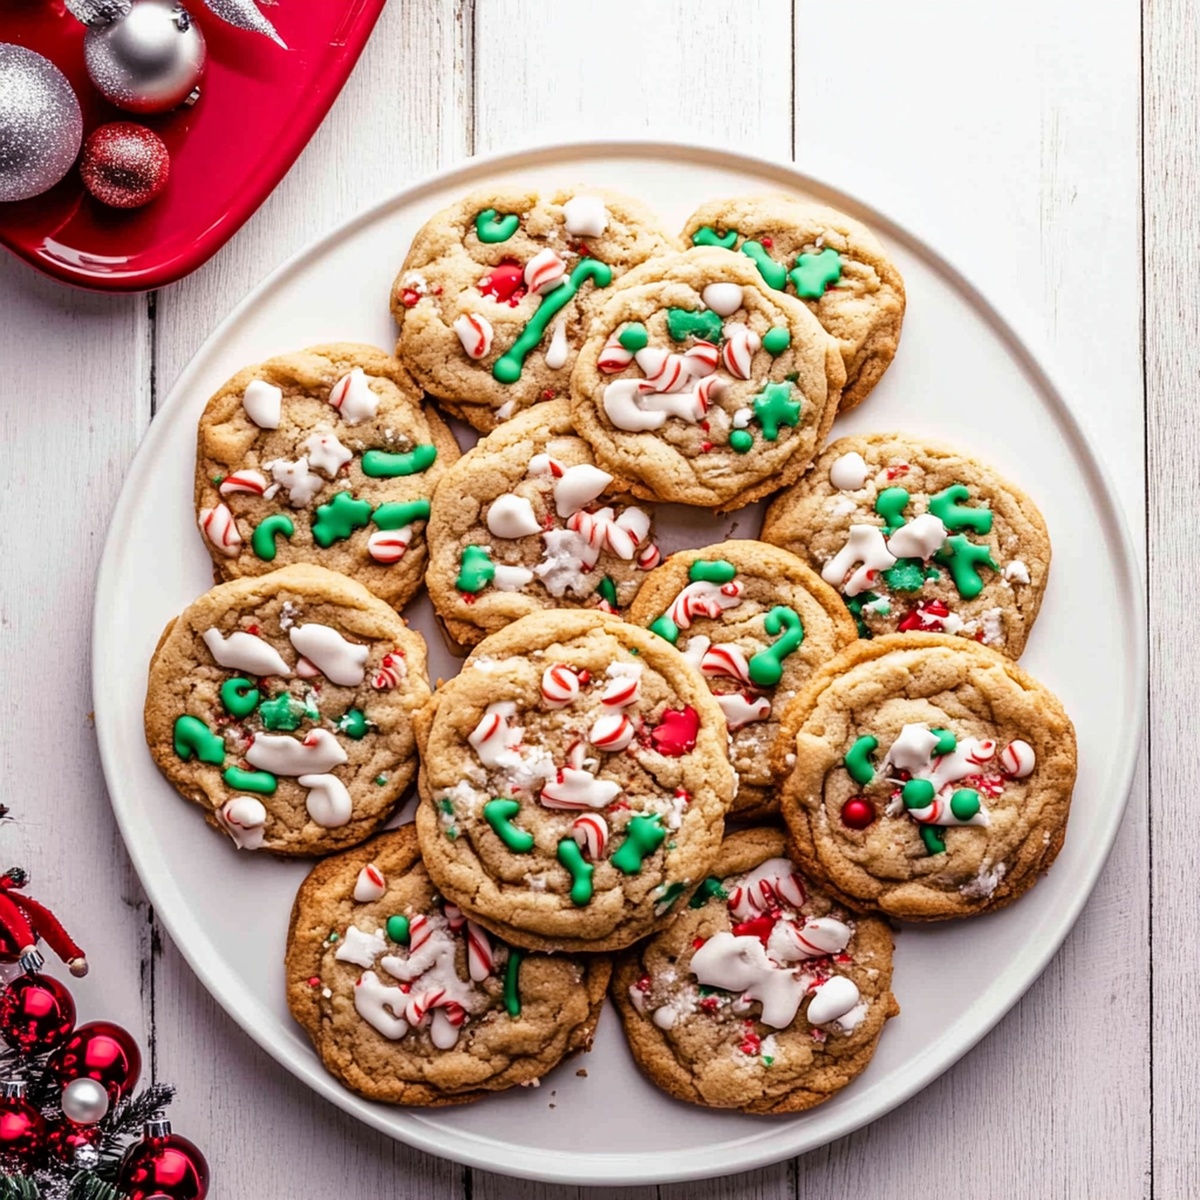
The Jolly Christmas Kitchen Sink Cookies Recipe for All to Enjoy
These mouthwatering Christmas kitchen sink cookies pack a delightful punch of unexpected flavors.
A treat that combines every delicious ingredient scattered across your pantry shelves.
Crisp edges meet soft centers in a magical blend of sweet and salty sensations.
Colorful chocolate chips dance alongside crunchy nuts and surprise mix-ins that make each bite an adventure.
Memories of holiday baking will flood back as you mix these playful cookies together.
Small hands can help sprinkle extra goodies into the dough, creating a fun family moment.
Bake these and watch everyone’s eyes light up with pure cookie excitement.
Why Christmas Kitchen Sink Cookies Are So Fun
Everything That Goes Into Christmas Kitchen Sink Cookies
Dry Ingredients:Wet Ingredients:Mix-Ins and Extras:How To Bake Christmas Kitchen Sink Cookies Step By Step

Step 1: Warm Up The Oven
Preheat the oven to 350 degrees Fahrenheit. Cover baking sheets with parchment paper or silicone mats, creating a smooth surface for your delightful cookies.
Step 2: Create Cookie Base
In a spacious mixing bowl, blend:Whip until the mixture looks fluffy and light. Add eggs one at a time, stirring thoroughly after each addition. Pour in vanilla extract for extra warmth.
In another bowl, combine:Slowly merge dry ingredients with wet ingredients, mixing gently until perfectly combined.
Step 3: Toss In Exciting Extras
Carefully fold in a playful mix of goodies:Step 4: Shape Delicious Rounds
Scoop cookie dough using a spoon, creating small balls. Place these tasty spheres on prepared baking sheets, leaving space between each cookie.
Step 5: Bake To Perfection
Slide cookies into the heated oven. Bake for 10-12 minutes until edges turn golden and centers look slightly soft. Remove and let cookies rest on baking sheets for 5 minutes.
Step 6: Cool And Enjoy
Transfer cookies to a wire rack. Let them cool completely. Serve with a cold glass of milk or steaming hot cocoa for a festive treat that celebrates holiday cheer.
Tips To Get Christmas Kitchen Sink Cookies Right
How To Store And Keep Christmas Kitchen Sink Cookies
Perfect Pairings For Christmas Kitchen Sink Cookies
Switch Up Christmas Kitchen Sink Cookies With These
Christmas Kitchen Sink Cookies FAQs
These cookies are packed with an incredible variety of mix-ins like chocolate chips, pretzels, dried cranberries, and sprinkles, creating a fun explosion of flavors and textures in every single bite.
Not at all! They’re super easy and beginner-friendly. You just need to cream the butter and sugars, mix in eggs and dry ingredients, then fold in all the delicious mix-ins. Anyone can make these delightful cookies.
Absolutely! The beauty of Kitchen Sink Cookies is that you can swap out ingredients based on your preferences. Don’t like pecans?
Skip them. Want more chocolate?
Add extra chips. These cookies are all about personal creativity.
The name comes from the idea that they have so many ingredients, it’s like you’ve thrown everything but the kitchen sink into the recipe. It’s a playful way of describing how many different mix-ins are included in these awesome cookies.
Print
Christmas Kitchen Sink Cookies Recipe
- Total Time: 30 minutes
- Yield: 24 1x
Description
Holiday cheer sparkles in these Christmas kitchen sink cookies, packed with festive mix-ins and sweet surprises. Chocolate chips, sprinkles, and seasonal candies dance together, creating a delightful treat you’ll want to share with loved ones.
Ingredients
Main Ingredients:
- 1 cup (230 g) unsalted butter, softened
- 2 large eggs
- 2 ¼ cups (280 g) all-purpose flour
- 1 cup (200 g) brown sugar
- ½ cup (100 g) granulated sugar
Chocolate and Mix-Ins:
- ½ cup (85 g) chocolate chips
- ½ cup (85 g) white chocolate chips
- ½ cup (50 g) dried cranberries
- ½ cup (50 g) crushed pretzels
- ¼ cup holiday sprinkles
- ¼ cup chopped pecans (optional)
Seasoning and Leavening:
- 2 teaspoons vanilla extract
- 1 teaspoon baking soda
- ½ teaspoon salt
Instructions
- Prepare the baking environment by warming the oven to 350F (175C) and lining baking sheets with parchment paper or silicone mats for optimal cookie performance.
- Create a luxurious base by whipping butter, brown sugar, and granulated sugar until the mixture transforms into a light, airy texture, approximately 2-3 minutes of vigorous mixing.
- Incorporate eggs one at a time, gently blending after each addition, then infuse with vanilla extract to enhance the aromatic profile of the dough.
- In a separate vessel, meticulously combine flour, baking soda, and salt, ensuring even distribution of dry ingredients.
- Gradually merge the dry mixture into the creamy base, stirring with precision until ingredients are just harmoniously integrated.
- Elevate the cookie’s complexity by gently folding in an adventurous medley of chocolate chips, white chocolate chips, dried cranberries, crushed pretzels, colorful sprinkles, and crunchy pecans.
- Craft uniform cookie portions by scooping approximately 2 tablespoons of dough, rolling into perfect spheres that promise consistent baking.
- Strategically position dough balls on prepared sheets, allowing sufficient space between each for graceful expansion during baking.
- Slide the laden baking sheets into the preheated oven, allowing 10-12 minutes of transformative heat to create golden edges and tantalizingly soft centers.
- Allow cookies to rest momentarily on baking sheets, giving them 5 minutes to stabilize before transferring to a cooling rack for complete temperature adjustment.
- Serve these indulgent treats at room temperature or slightly warm, ideally accompanied by a complementary beverage like milk or hot cocoa.
Notes
- Customize mix-ins by swapping ingredients to match dietary needs or personal preferences, like using gluten-free pretzels or dairy-free chocolate chips.
- Chill the dough for 30 minutes before baking to prevent excessive spreading and create thicker, chewier cookies with more defined edges.
- Use a cookie scoop for uniform size and consistent baking, ensuring each cookie looks professionally crafted and bakes evenly.
- Store cookies in an airtight container at room temperature for up to 5 days, separating layers with parchment paper to maintain texture and prevent sticking.
- Prep Time: 15 minutes
- Cook Time: 15 minutes
- Category: Desserts, Snacks
- Method: Baking
- Cuisine: American
Nutrition
- Serving Size: 24
- Calories: 210
- Sugar: 10 g
- Sodium: 100 mg
- Fat: 10 g
- Saturated Fat: 6 g
- Unsaturated Fat: 4 g
- Trans Fat: 0 g
- Carbohydrates: 30 g
- Fiber: 1 g
- Protein: 2 g
- Cholesterol: 40 mg
Jenna Stewart
Head Chef & Recipe Innovator
Expertise
Farm-to-Table Cooking; Seasonal Menu Development; Visual Plating Techniques; Flavor Layering and Simple Prep Hacks.
Education
The Culinary Institute of America, Hyde Park, NY
Jenna Stewart is the inventive spirit behind many of our standout dishes at Pro of Delicious Creations. A proud graduate of The Culinary Institute of America, she built her skills mastering both classic recipes and fresh, modern twists.
Now, Jenna celebrates the beauty of seasonal, local ingredients, often sourced from her garden and nearby markets, to create recipes that are bursting with flavor yet easy to follow. When she’s not experimenting in the kitchen, Jenna loves exploring nature on hikes and discovering new treasures at local co-ops.