Creamy Reeses Cheese Ball: A Sweet Peanut Delight Recipe
Creamy, rich, and impossibly addictive, this reeses cheese ball takes dessert dips to a whole new level of decadence.
Sweet and salty lovers will instantly fall in love with this irresistible treat.
Chocolate and peanut butter create a magical combination that delights every taste bud.
The simple ingredients come together in minutes, making this dessert a crowd-pleasing winner for gatherings and parties.
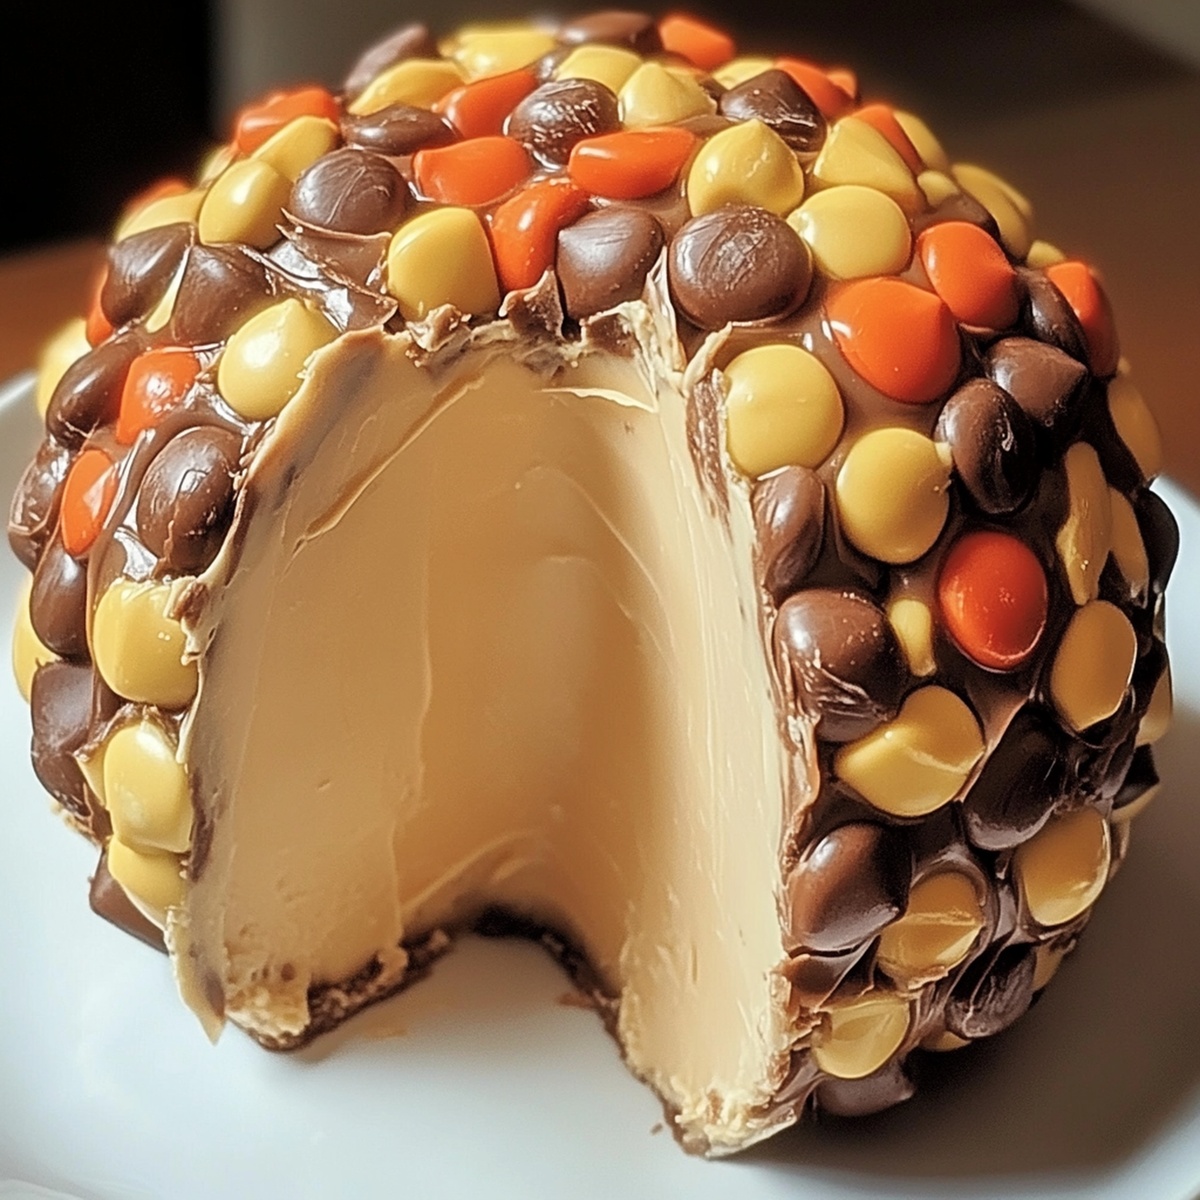
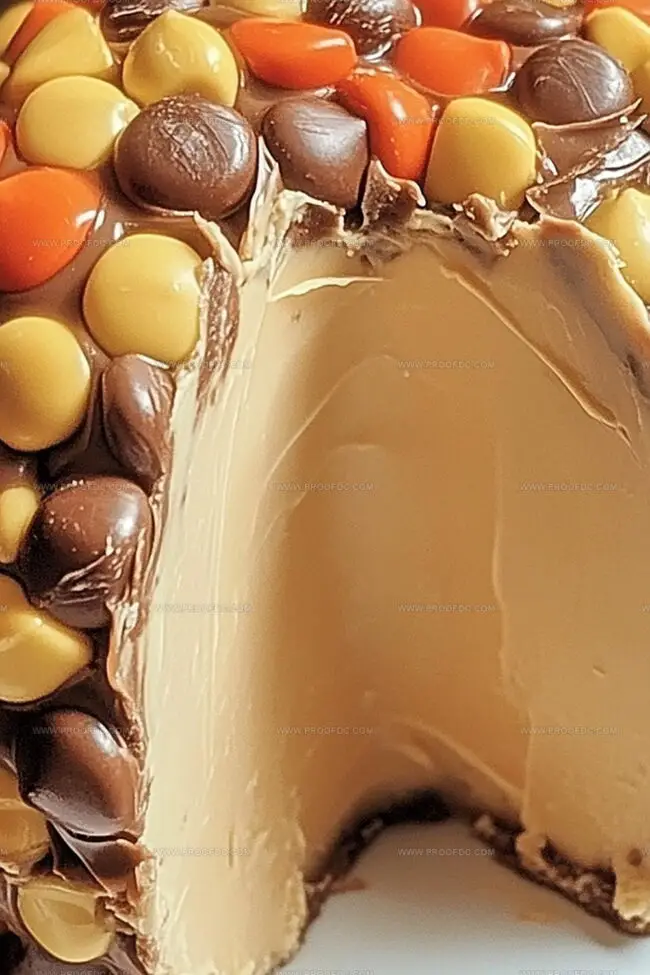
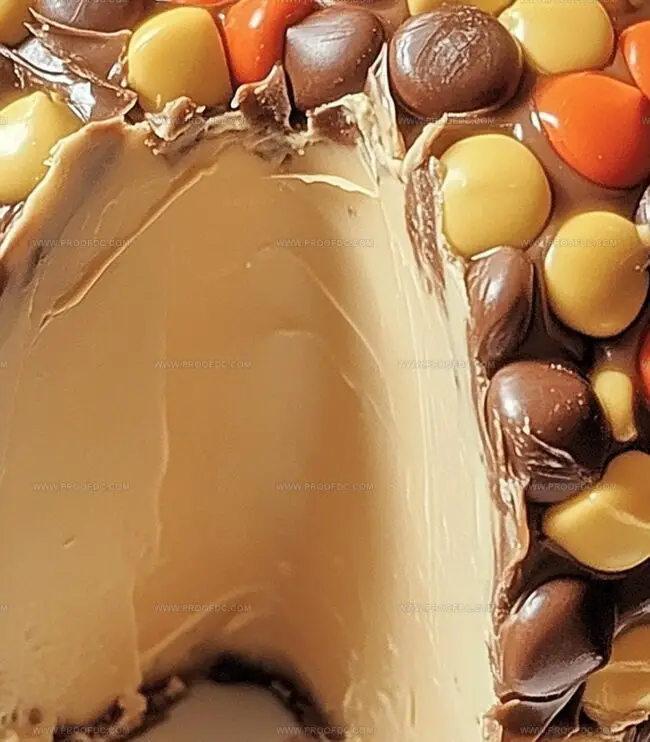
Smooth cream cheese blends seamlessly with chopped reeses candies, creating a luxurious texture that begs to be scooped up with graham crackers or pretzels.
Serve this showstopping appetizer and watch as everyone eagerly dives in for more.
Your guests won’t be able to resist this irresistible sweet and savory sensation.
Quick Recipe Overview
Ingredients In Reeses Cheese Ball Peanut Butter Bliss
For Base Ingredients:For Mix-In Ingredients:For Coating Ingredients:For Serving Suggestions:Items Needed For Reeses Cheese Ball Peanut Butter Bliss
Making Reeses Cheese Ball Peanut Butter Bliss
Grab a mixing bowl and blend cream cheese, peanut butter, powdered sugar, brown sugar, and vanilla until silky smooth. Gently fold in mini chocolate chips and crumbled Reeses peanut butter cups for an extra burst of flavor.
Spread out plastic wrap and transfer the delectable mixture to the center. Carefully wrap and mold into a perfect sphere. Tuck the ball into the refrigerator for a couple of hours until it firms up and becomes wonderfully compact.
After chilling, unwrap the cheese ball and roll it generously in a delightful mixture of crushed Reeses, mini chocolate chips, and chopped peanuts. This creates an irresistible outer layer that’ll make mouths water.
Place your masterpiece on a serving plate surrounded by graham crackers, pretzels, vanilla wafers, or crisp apple slices. Watch as friends and family dive into this sweet and savory treat that combines the best of dessert and appetizer worlds.
Tips For Reeses Cheese Ball Peanut Butter Bliss
Serve Reeses Cheese Ball Peanut Butter Bliss Right
How To Keep Reeses Cheese Ball Peanut Butter Bliss Fresh
Print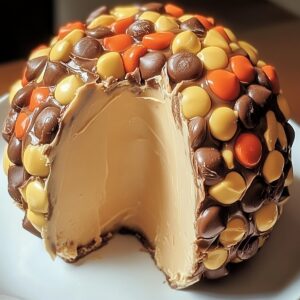
Indulgent Reeses Cheese Ball
- Total Time: 2 hours 10 minutes
- Yield: 9 1x
Description
Reeses cheese ball emerges as a creamy dessert delight blending chocolate and peanut butter. Chocolate chips and crushed candies provide irresistible crunch for party guests who crave sweet indulgence.
Ingredients
- 1 package (8 oz / 226 g) cream cheese (softened)
- ½ cup creamy peanut butter
- ½ cup powdered sugar
- ¼ cup brown sugar
- ½ tsp vanilla extract
- ½ cup mini chocolate chips
- ¼ cup mini chocolate chips
- ½ cup crushed Reeses peanut butter cups
- ½ cup crushed Reeses peanut butter cups
- ¼ cup chopped peanuts (optional)
- Graham crackers
- Pretzels
- Vanilla wafers
- Apple slices
Instructions
- Blend Mixture: In a spacious mixing bowl, whip cream cheese and peanut butter until velvety smooth, gradually incorporating powdered sugar, brown sugar, and vanilla extract to create a luscious, uniform base.
- Fold Inclusions: Gently fold mini chocolate chips and crumbled Reeses peanut butter cups throughout the creamy mixture, ensuring even distribution of delectable morsels.
- Shape and Chill: Lay out plastic wrap, transfer the mixture to its center, and mold into a perfectly rounded sphere. Wrap tightly and refrigerate for two hours to solidify and intensify flavors.
- Create Coating: Pulverize additional Reeses peanut butter cups, mini chocolate chips, and chopped peanuts in a shallow dish, creating a crunchy, textured exterior coating.
- Finish and Serve: Unwrap the chilled cheese ball, delicately roll through the prepared coating for complete coverage, then transfer to a decorative platter. Accompany with graham crackers, pretzels, vanilla wafers, and crisp apple slices for an indulgent, interactive dessert experience.
Notes
- Chill Thoroughly: Refrigerate the cheese ball for at least 2 hours to ensure a firm, sliceable texture that holds its shape perfectly when served.
- Blend Evenly: Use room temperature cream cheese and mix ingredients thoroughly to prevent lumps and create a smooth, consistent base for optimal flavor distribution.
- Coating Technique: Roll the cheese ball gently in the coating mixture, using light pressure to help the toppings adhere without breaking the delicate cheese surface.
- Dietary Modifications: Swap regular cream cheese for low-fat or dairy-free alternatives, and use sugar-free chocolate chips for a lighter, more diet-friendly version of the dessert.
- Prep Time: 10 minutes
- Cook Time: 2 hours
- Category: Snacks, Desserts
- Method: Mixing
- Cuisine: American
Nutrition
- Serving Size: 9
- Calories: 320
- Sugar: 24 g
- Sodium: 150 mg
- Fat: 20 g
- Saturated Fat: 8 g
- Unsaturated Fat: 10 g
- Trans Fat: 0 g
- Carbohydrates: 30 g
- Fiber: 1 g
- Protein: 6 g
- Cholesterol: 30 mg
Marcus Foley
Food Critic & Kitchen Coach
Expertise
Recipe Testing and Troubleshooting; Time-Saving Kitchen Hacks; Global Flavor Exploration; Engaging Food Writing and Honest Reviews.
Education
Institute of Culinary Education (ICE), New York, NY
Marcus Foley, based in Atlanta, GA, is a friendly food expert who makes cooking fun and simple.
With hands-on training from the Institute of Culinary Education and years of tasting everything from street food to fine dining, he shares easy kitchen hacks, global flavor ideas, and step-by-step recipes that turn kitchen mishaps into delicious surprises.