
Crispy Homemade Indian Frybread Recipe: A Classic Delight
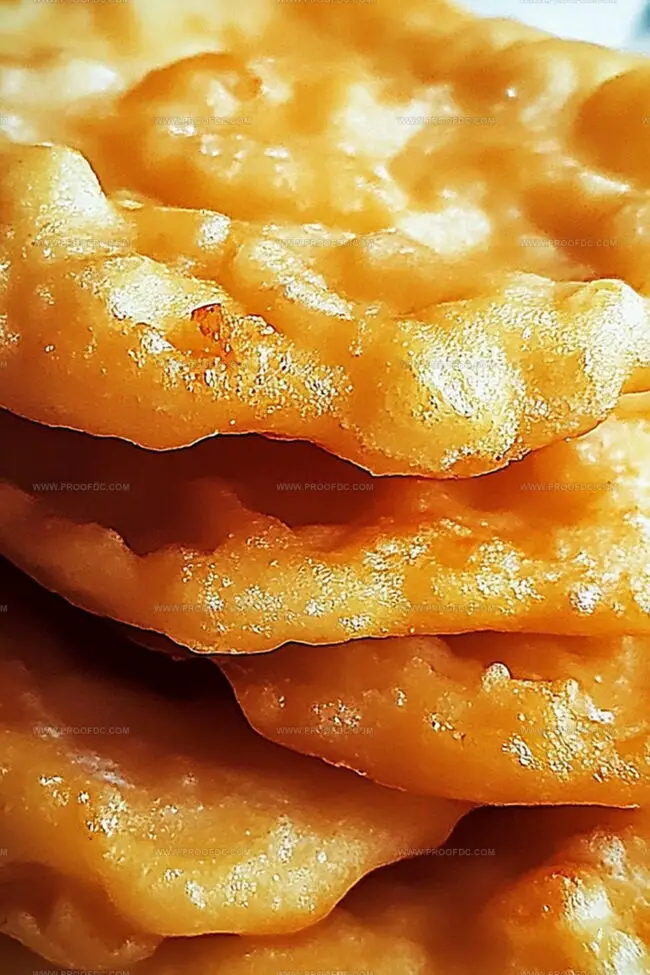
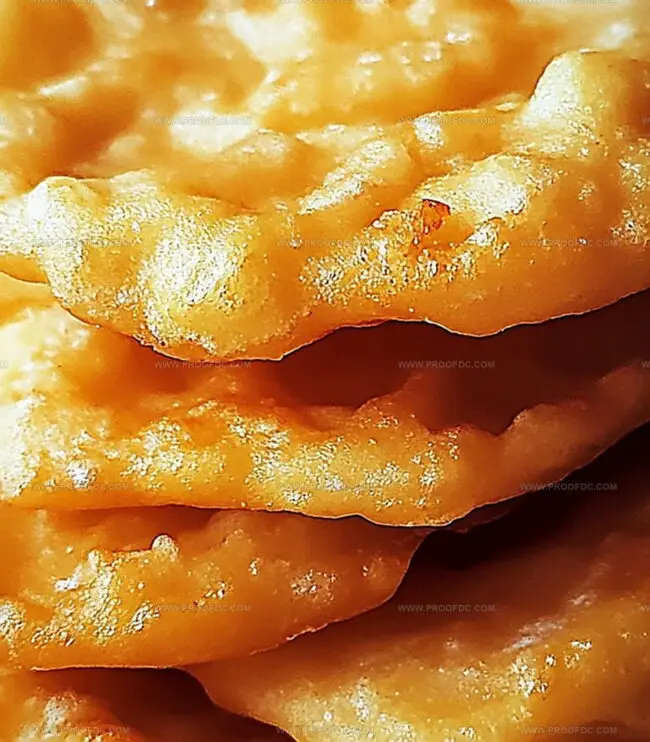
Crispy golden brown Indian frybread has been a staple in southwestern kitchens for generations.
Native american communities cherish this simple yet delectable dish passed down through countless family gatherings.
Soft dough stretched thin and fried to perfection creates a magical canvas for sweet or savory toppings.
Each piece tells a story of cultural resilience and culinary creativity.
The ingredients are surprisingly straightforward, requiring just a few pantry staples you likely already own.
Pulling apart a warm piece of frybread, steam rising and edges perfectly crisped.
You’ll want to gather everyone around the table and share this delightful treat that connects tradition with pure deliciousness.
What Makes Indian Frybread So Tasty
What’s Needed To Make Indian Frybread
Dry Ingredients:Liquid Ingredients:Preparation Ingredient:Easy Instructions For Indian Frybread
Step 1: Mixing Dry Ingredients
In a spacious mixing bowl, blend flour, baking powder, and salt thoroughly. Use a whisk to ensure all dry ingredients are evenly distributed, creating a perfect base for your frybread.
Step 2: Creating Soft Dough
Slowly introduce warm liquid to the dry mixture. Use a fork or your hands to incorporate the liquid, gently working it into the flour until a soft, pliable dough emerges. The key is patience and gentle mixing.
Step 3: Kneading to Perfection
Transfer the dough to a lightly floured surface. Knead the dough with tender, rhythmic motions for 2-3 minutes. The goal is to create a smooth, elastic texture that will result in light and airy frybread.
Step 4: Resting the Dough
Drape a clean kitchen towel over the dough and let it rest quietly for 30 minutes. This crucial resting period allows the gluten to relax and the flavors to develop, setting the stage for delicious frybread.
Step 5: Preparing to Fry
Heat oil in a deep skillet or heavy-bottomed pan. Pinch off small portions of the rested dough and gently stretch them into thin, rustic circles. The irregular shape adds to the traditional charm of authentic frybread.
Step 6: Frying to Golden Perfection
Carefully lower the stretched dough into hot oil. Fry each piece until it turns a rich, golden brown on both sides. The bread should puff up and develop a crispy exterior with a soft, tender interior.
Step 7: Serving and Enjoying
Drain the fried bread on paper towels to remove excess oil. Serve immediately while warm, either as a standalone treat or as a base for traditional Native American toppings like honey, powdered sugar, or savory meat and bean mixtures.
Smart Tips For Indian Frybread
How To Store And Reheat Indian Frybread The Right Way
Foods That Pair Well With Indian Frybread
Simple Variations For Indian Frybread
Questions About Indian Frybread Answered
Indian frybread is unique because it’s deep-fried instead of baked, creating a crispy exterior and soft interior. It originated from Native American tribes during a time of limited food resources and has become a beloved cultural food.
No special equipment is needed, just a deep pan or skillet for frying, a mixing bowl, and basic kitchen tools like a fork and measuring cups. A deep-fry thermometer helps maintain the right oil temperature, but isn’t absolutely necessary.
While delicious, frybread is typically high in calories and fat due to deep-frying. It’s more of a treat or special occasion food rather than an everyday meal. Enjoy it in moderation as part of a balanced diet.
Absolutely! This recipe is straightforward and requires minimal cooking skills. The key is maintaining the right oil temperature and handling the dough gently. With a little practice, anyone can create delicious frybread at home.
Print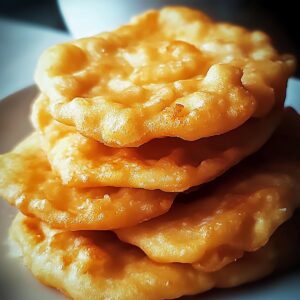
Indian Frybread Recipe
- Total Time: 1 hour 5 minutes
- Yield: 4 1x
Description
Hearty Navajo-style Indian Frybread brings rustic southwestern comfort to dinner tables with its golden, crispy exterior and pillowy center. Warm bread invites families to gather, sharing cultural heritage and simple culinary joy that connects generations.
Ingredients
Main Dry Ingredients:
- 2 cups (250 g) all-purpose flour
- 1 tablespoon baking powder
- ½ teaspoon salt
Liquid Ingredients:
- ¾ cup (180 ml) warm water or milk
- Vegetable oil, for frying
Optional Sweet Toppings:
- Honey
- Powdered sugar
- Cinnamon sugar
Optional Savory Toppings:
- Cooked ground beef or shredded chicken
- Lettuce
- Tomatoes
- Cheese
- Salsa
- Sour cream
Instructions
- Combine dry ingredients in a spacious mixing vessel, creating a powdery foundation for the traditional bread.
- Introduce warm liquid gradually, using fingertips to coax the mixture into a cohesive, pliable mass that feels soft and yielding.
- Transfer the nascent dough onto a lightly dusted work surface, gently manipulating it with rhythmic, folding movements to develop a smooth, elastic texture.
- Drape a pristine cloth over the dough, allowing it to relax and develop depth of flavor during a tranquil 30-minute resting period.
- After the repose, divide the dough into manageable portions, gently stretching each piece into rustic, irregular shapes.
- Heat oil in a deep skillet until it shimmers with anticipation, creating a golden, bubbling environment for frying.
- Carefully slide each stretched dough piece into the sizzling oil, watching it transform into a puffy, golden-brown delicacy with crisp edges and a tender interior.
- Remove the frybread using tongs, allowing excess oil to drain on absorbent paper towels before serving hot and fresh.
Notes
- Hydration matters for achieving the perfect soft and fluffy texture, so add warm liquid gradually and adjust consistency as needed.
- Rest the dough for at least 30 minutes to allow gluten to relax, creating more tender frybread with a lighter crumb.
- For a healthier twist, substitute half whole wheat flour to boost nutritional value without compromising the traditional taste.
- Keep oil temperature between 350-375°F when frying to ensure golden-brown exterior and prevent greasy, soggy results.
- Prep Time: 30 minutes
- Cook Time: 20 minutes
- Category: Snacks, Appetizer
- Method: Mixing
- Cuisine: American
Nutrition
- Serving Size: 4
- Calories: 190
- Sugar: 0 g
- Sodium: 125 mg
- Fat: 8 g
- Saturated Fat: 1 g
- Unsaturated Fat: 7 g
- Trans Fat: 0 g
- Carbohydrates: 27 g
- Fiber: 1 g
- Protein: 4 g
- Cholesterol: 0 mg
Jenna Stewart
Head Chef & Recipe Innovator
Expertise
Farm-to-Table Cooking; Seasonal Menu Development; Visual Plating Techniques; Flavor Layering and Simple Prep Hacks.
Education
The Culinary Institute of America, Hyde Park, NY
Jenna Stewart is the inventive spirit behind many of our standout dishes at Pro of Delicious Creations. A proud graduate of The Culinary Institute of America, she built her skills mastering both classic recipes and fresh, modern twists.
Now, Jenna celebrates the beauty of seasonal, local ingredients, often sourced from her garden and nearby markets, to create recipes that are bursting with flavor yet easy to follow. When she’s not experimenting in the kitchen, Jenna loves exploring nature on hikes and discovering new treasures at local co-ops.