The Best Homemade Snickerdoodle Cheesecake Bars Recipe Ever
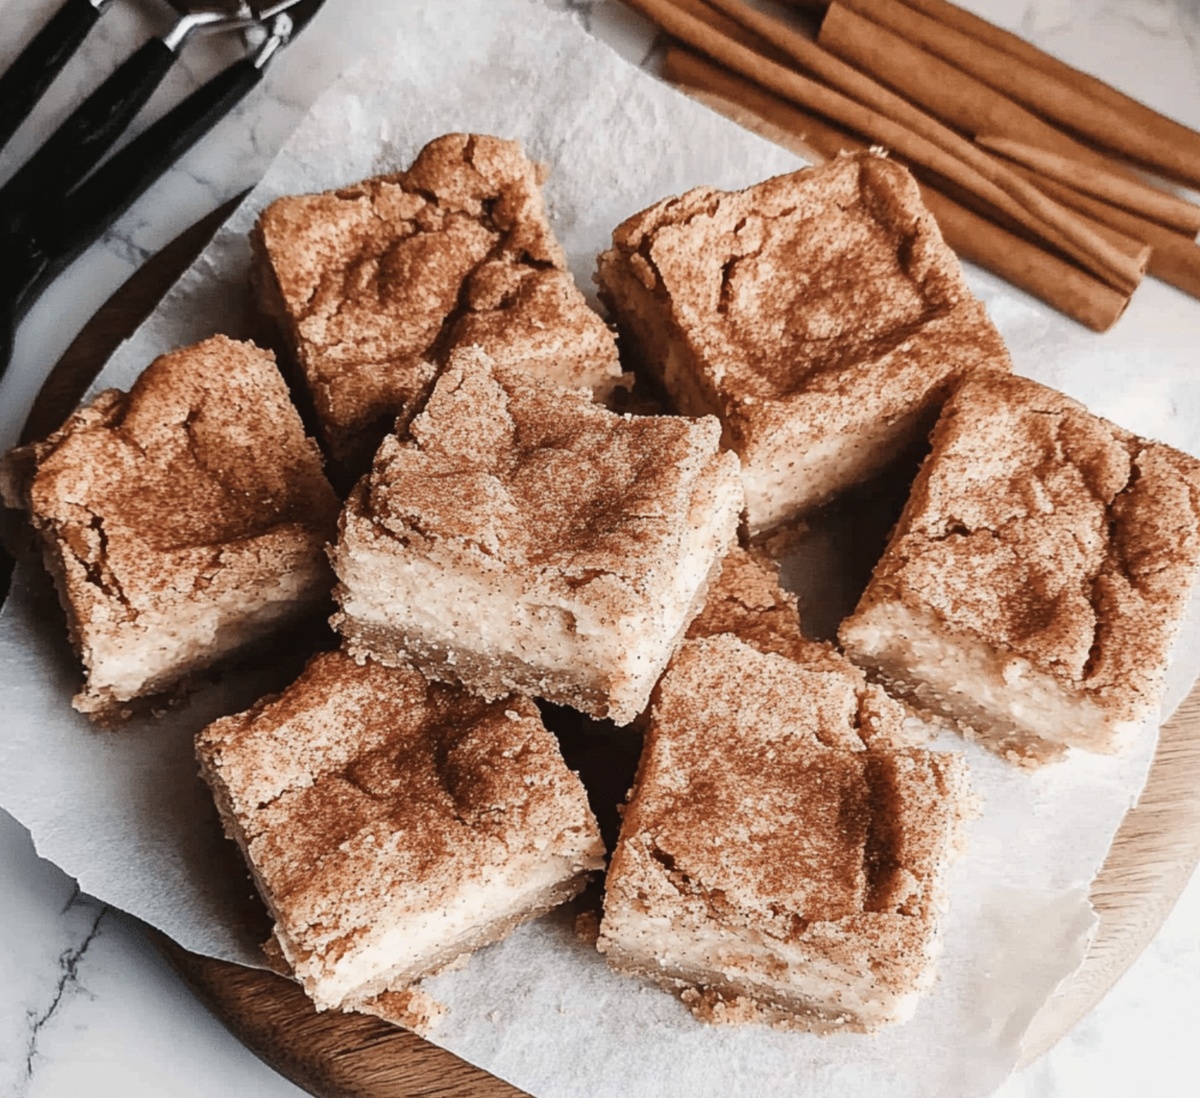
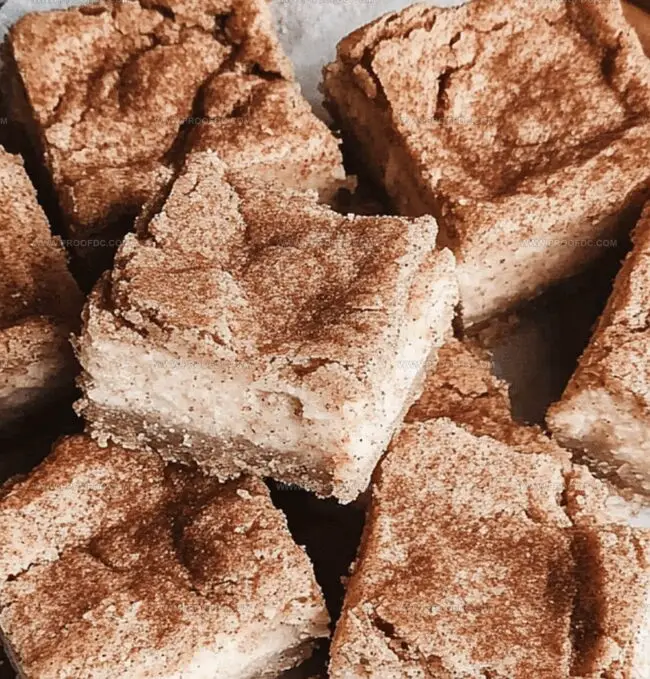
Sinking your teeth into a decadent homemade snickerdoodle cheesecake bars that blend creamy richness with classic cinnamon warmth.
The magic starts with a buttery graham cracker base that cradles a silky smooth cheesecake filling.
Soft cinnamon swirls dance across the surface, promising a delightful treat that melts in your mouth.
Every bite whispers comfort and indulgence, transforming an ordinary dessert into something extraordinary.
Sweet hints of vanilla and warm spices create a symphony of flavors that will leave you craving more.
This recipe combines the best of two beloved desserts in one irresistible square.
Grab a fork and let the deliciousness begin – these bars are about to become your new obsession.
Reasons To Enjoy Homemade Snickerdoodle Cheesecake Bars

What Goes In Homemade Snickerdoodle Cheesecake Bars
Base Ingredients:Flour and Dry Ingredients:Cheesecake Layer Ingredients:Topping Ingredients:How To Prepare Homemade Snickerdoodle Cheesecake Bars
Step 1: Warm Up the Oven
Crank your oven to a toasty 350F (175C). Grab a 9×13-inch baking pan and line it with parchment paper, making sure some paper hangs over the edges for easy bar lifting later.
Step 2: Create the Crunchy Crust
In a big mixing bowl, whip together:Blend until the mixture looks light and puffy. Toss in the egg and vanilla, mixing until everything looks super smooth. In another bowl, whisk:Slowly add the dry ingredients to the wet stuff, stirring until a soft dough forms. Press this delicious dough evenly across the bottom of your prepared pan.
Step 3: Whip Up the Creamy Cheesecake Layer
Grab a medium bowl and beat:Blend until silky smooth. Add eggs one by one, mixing thoroughly after each addition. Pour this dreamy mixture over the crust, spreading it out evenly.
Step 4: Sprinkle the Magical Cinnamon Dust
Mix together:Shower this sweet-spicy mixture all over the cheesecake layer.
Step 5: Bake to Perfection
Slide the pan into the oven and bake for 30-35 minutes. You’ll know it’s done when the center looks set and doesn’t wiggle when you nudge the pan.
Step 6: Cool Down and Chill Out
Pull the pan from the oven and let the bars cool completely at room temperature. Pop the pan in the refrigerator and let it chill for at least 2 hours (or overnight if you can wait that long).
Step 7: Slice and Serve
Use the parchment paper handles to lift the bars out of the pan. Slice into squares and serve these delectable treats straight from the fridge.
Smart Tricks For Homemade Snickerdoodle Cheesecake Bars
How To Keep Homemade Snickerdoodle Cheesecake Bars Fresh
What Tastes Great With Homemade Snickerdoodle Cheesecake Bars
Easy Twists For Homemade Snickerdoodle Cheesecake Bars
Answers To FAQs On Homemade Snickerdoodle Cheesecake Bars
These bars combine the classic cinnamon-sugar flavor of snickerdoodle cookies with the creamy richness of cheesecake, creating a decadent dessert that’s both familiar and unique.
While you can use low-fat cream cheese, full-fat cream cheese will give you the best texture and richest flavor for the cheesecake layer.
The cheesecake layer should look set but still slightly soft in the center. When you gently shake the pan, it shouldn’t have a liquid-like wobble. A slight jiggle is okay, but it shouldn’t look wet.
Yes! Parchment paper makes removing the bars from the pan much easier and ensures they come out clean and intact without sticking to the pan.
Print
Homemade Snickerdoodle Cheesecake Bars Recipe
- Total Time: 2 hours 50 minutes
- Yield: 12 1x
Description
Irresistible snickerdoodle cheesecake bars blend classic cinnamon-sugar magic with creamy cheesecake decadence. Sweet layers melt together, creating a delightful dessert sure to charm anyone seeking comfort and indulgence.
Ingredients
Homemade Snickerdoodle Cheesecake Bars
Crust Ingredients:
- 1 ½ cups (190 g) all-purpose flour
- ½ cup (115 g) unsalted butter, softened
- ½ cup (100 g) granulated sugar
- ¼ cup (50 g) brown sugar
- 1 large egg
- ½ teaspoon baking powder
- ¼ teaspoon salt
- 1 teaspoon vanilla extract
Cheesecake Layer Ingredients:
- 16 ounces (450 g) cream cheese, softened
- ½ cup (100 g) granulated sugar
- 2 large eggs
- 1 teaspoon vanilla extract
Topping Ingredients:
- 2 tablespoons granulated sugar
- 1 teaspoon ground cinnamon
Instructions
- Prepare the baking surface by lining a 9×13-inch pan with parchment paper, ensuring overhanging edges for easy extraction.
- Create the foundational cookie layer by thoroughly blending softened butter with both sugars until achieving a light, airy consistency. Incorporate egg and vanilla extract, mixing until completely integrated.
- Sift flour, baking powder, and salt in a separate vessel. Gradually fold dry ingredients into the butter mixture, gently combining until a cohesive dough emerges.
- Firmly press the cookie dough into the prepared pan, establishing an even, compact base for the cheesecake layer.
- Whip cream cheese until silky smooth, gradually introducing sugar and vanilla extract. Carefully fold in eggs one at a time, ensuring each is fully incorporated before adding the next.
- Gently cascade the creamy cheesecake mixture over the cookie foundation, spreading evenly to create a uniform layer.
- Combine ground cinnamon and granulated sugar in a small bowl, then delicately dust the mixture across the cheesecake surface.
- Transfer the pan to a preheated 350°F oven, baking for 30-35 minutes until the center stabilizes and loses its liquid wobble.
- Extract from oven and allow complete cooling at room temperature, which helps set the delicate texture.
- Refrigerate for a minimum of two hours, permitting the bars to firm and develop enhanced flavor complexity.
- Utilize parchment paper handles to lift the entire dessert from the pan, then slice into elegant squares.
- Serve chilled, presenting a decadent fusion of cinnamon-kissed cookie and luxurious cheesecake.
Notes
- Butter temperature matters significantly for creating a perfectly smooth and creamy cheesecake layer, so ensure cream cheese and butter are at room temperature before mixing.
- Avoid overmixing the cheesecake batter to prevent air bubbles and cracking, which can compromise the smooth texture of your dessert.
- Create a water bath by placing the baking pan in a larger pan filled with hot water to help prevent cracks and ensure even baking of the cheesecake layer.
- Experiment with spice variations by adding nutmeg or cardamom to the cinnamon-sugar topping for a unique flavor twist that elevates the classic snickerdoodle profile.
- Prep Time: 15 minutes
- Cook Time: 35 minutes
- Category: Desserts, Snacks
- Method: Baking
- Cuisine: American
Nutrition
- Serving Size: 12
- Calories: 250
- Sugar: 18 g
- Sodium: 180 mg
- Fat: 15 g
- Saturated Fat: 9 g
- Unsaturated Fat: 4 g
- Trans Fat: 0 g
- Carbohydrates: 28 g
- Fiber: 0 g
- Protein: 4 g
- Cholesterol: 50 mg
Jenna Stewart
Head Chef & Recipe Innovator
Expertise
Farm-to-Table Cooking; Seasonal Menu Development; Visual Plating Techniques; Flavor Layering and Simple Prep Hacks.
Education
The Culinary Institute of America, Hyde Park, NY
Jenna Stewart is the inventive spirit behind many of our standout dishes at Pro of Delicious Creations. A proud graduate of The Culinary Institute of America, she built her skills mastering both classic recipes and fresh, modern twists.
Now, Jenna celebrates the beauty of seasonal, local ingredients, often sourced from her garden and nearby markets, to create recipes that are bursting with flavor yet easy to follow. When she’s not experimenting in the kitchen, Jenna loves exploring nature on hikes and discovering new treasures at local co-ops.