
Dreamy Homemade Peppermint Patties Recipe: Frosty Sweet Joy
Crafting these delightful homemade peppermint patties takes minimal effort and delivers maximum satisfaction.
Sweet chocolate and cool mint create a magical combination that instantly refreshes your palate.
Anyone can master this simple treat with just a few ingredients from the pantry.
Memories of classic candy store favorites dance through each delicate bite.
Surprising loved ones with a batch of these melt-in-your-mouth delights crafted right in your kitchen.
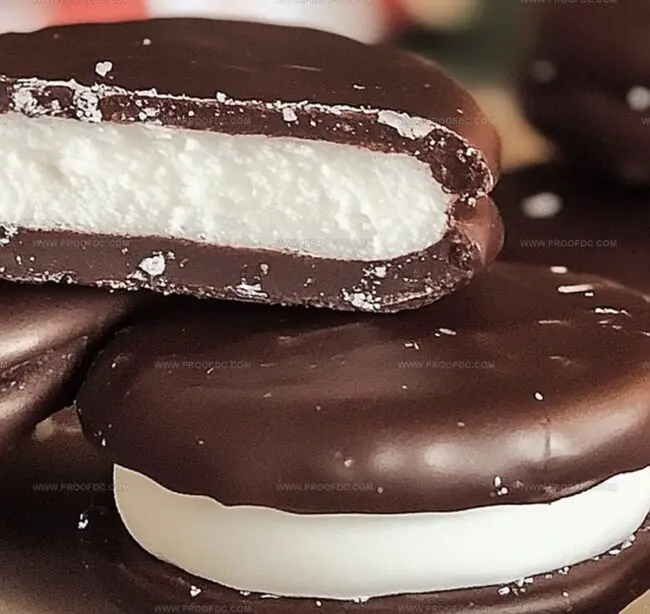
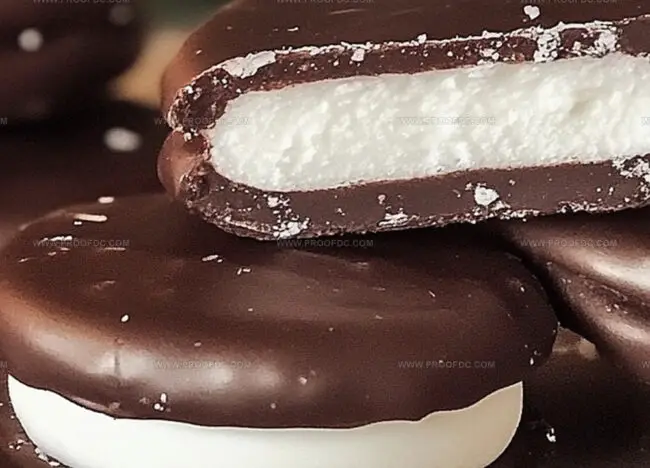
Rich dark chocolate enrobes a creamy peppermint center that feels luxurious yet surprisingly easy to prepare.
Whipping up these irresistible patties might become your new favorite weekend baking adventure.
Why Homemade Peppermint Patties Beat Store Versions
What Goes into Homemade Peppermint Patties
Filling Ingredients:Chocolate Coating Ingredients:Preparation Surface:How to Make Homemade Peppermint Patties in No Time
Step 1: Whip Up the Creamy Filling
Create a delightful peppermint mixture by blending these ingredients:Mix everything until you have a smooth, silky dough that feels like a winter dream. If the mixture seems too sticky, sprinkle in extra powdered sugar until it becomes manageable.
Step 2: Shape Delicious Discs
Roll the minty dough into adorable bite-sized balls, each about the size of a quarter. Gently press them into perfect circular shapes. Arrange these tasty discs on a parchment-covered tray. Pop the tray into the freezer for a quick 20-30 minute chill session to help them firm up.
Step 3: Melt Chocolate Magic
Prepare your chocolate coating using:Melt these together in a microwave-safe bowl, stirring every 30 seconds until they transform into a glossy, smooth liquid. For chocolate purists, a double boiler works wonderfully too.
Step 4: Create Chocolate-Covered Wonders
Grab each frozen peppermint disc and give it a luxurious chocolate bath. Use a fork to dip and coat completely, letting excess chocolate drip away. Carefully place each chocolate-covered treasure back onto the parchment-lined tray.
Step 5: Chill and Set
Slide the chocolate-coated patties into the refrigerator. Let them rest and set for 20-30 minutes until the chocolate becomes crisp and shiny.
Step 6: Indulge and Preserve
Dive into your homemade peppermint patties right away or store them in an airtight container in the refrigerator. They’ll stay fresh and delicious for up to two weeks – if they last that long!
Pro Tip: These minty treats make incredible gifts or party desserts. Watch everyone’s eyes light up when you reveal you made them from scratch!
Tricks for Shiny and Smooth Peppermint Patties
How to Keep Peppermint Patties Minty Fresh
What Goes Great with Homemade Peppermint Patties
Ways to Flavor Homemade Peppermint Patties Differently
Homemade Peppermint Patties FAQ
These homemade patties are fresher, have a more intense peppermint flavor, and contain high-quality ingredients you control. You can adjust the sweetness and mint level to your exact preference.
Peppermint extract is key to the classic flavor, but you could experiment with other extracts like spearmint or use pure mint oil. Just start with a small amount and adjust to taste, as mint extracts can be quite strong.
Freezing helps the filling hold its shape and prevents it from melting when dipped in warm chocolate. It also makes the coating process smoother and ensures a cleaner, more professional-looking final product.
Dark or semi-sweet chocolate chips work wonderfully, but you can also use milk chocolate if you prefer a sweeter coating. The addition of coconut oil helps create a smooth, glossy finish that hardens quickly.
Print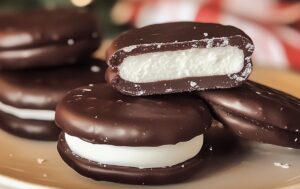
Homemade Peppermint Patties Recipe
- Total Time: 1 hour 20 minutes
- Yield: 20 1x
Description
Creamy “Homemade Peppermint Patties” delight chocolate lovers with their cool mint center and rich chocolate coating. Cool winter nights welcome these simple yet irresistible treats that satisfy sweet cravings in one perfect bite.
Ingredients
Filling Ingredients:
- 2 ½ cups (300 grams) powdered sugar
- 2 tablespoons (28 grams) unsalted butter
- 2 tablespoons (30 milliliters) heavy cream
- 1 ½ teaspoons peppermint extract
- ¼ teaspoon vanilla extract
- 1/8 teaspoon salt
Coating Ingredients:
- 1 ½ cups (255 grams) semi-sweet chocolate chips
- 1 tablespoon (15 milliliters) coconut oil or vegetable shortening
Instructions
- Craft a silky, aromatic filling by vigorously blending powdered sugar, butter, cream, peppermint extract, vanilla extract, and salt until a cohesive, smooth dough emerges. Adjust consistency with additional powdered sugar if needed to prevent excessive stickiness.
- Carefully shape the mixture into compact, uniform spheres approximately one inch in diameter. Delicately flatten each ball into elegant disc shapes, ensuring consistent thickness. Arrange the patties on a parchment-lined tray and transfer to the freezer for a 20-30 minute chilling period to solidify their structure.
- Prepare the chocolate coating by gently melting chocolate chips with coconut oil. Utilize either microwave technique with intermittent stirring or employ a traditional double boiler method, creating a glossy, seamless chocolate mixture.
- Strategically immerse each frozen peppermint disc into the molten chocolate, using a fork to ensure complete, even coverage. Delicately remove excess chocolate by gentle tapping, then position the coated patties back onto the parchment surface.
- Allow the chocolate-enrobed patties to set by placing them in the refrigerator. Permit 20-30 minutes for the chocolate to completely solidify and develop a pristine, glossy finish.
- Serve the peppermint patties immediately for optimal taste and texture. For extended enjoyment, store the confections in a sealed container within the refrigerator, maintaining freshness for up to two weeks.
Notes
- Chill the filling before shaping to prevent sticky hands and ensure clean, smooth patty edges.
- Use extra-fine powdered sugar for a silkier, more refined texture that melts beautifully in your mouth.
- Consider adding a pinch of green food coloring for a festive holiday look without affecting the delicate flavor profile.
- Experiment with dark, milk, or white chocolate coatings to customize the patties and match different taste preferences.
- Prep Time: 30 minutes
- Cook Time: 50 minutes
- Category: Desserts, Snacks
- Method: Mixing
- Cuisine: American
Nutrition
- Serving Size: 20
- Calories: 108
- Sugar: 19 g
- Sodium: 24 mg
- Fat: 5 g
- Saturated Fat: 3 g
- Unsaturated Fat: 2 g
- Trans Fat: 0 g
- Carbohydrates: 15 g
- Fiber: 0 g
- Protein: 1 g
- Cholesterol: 3 mg
Jenna Stewart
Head Chef & Recipe Innovator
Expertise
Farm-to-Table Cooking; Seasonal Menu Development; Visual Plating Techniques; Flavor Layering and Simple Prep Hacks.
Education
The Culinary Institute of America, Hyde Park, NY
Jenna Stewart is the inventive spirit behind many of our standout dishes at Pro of Delicious Creations. A proud graduate of The Culinary Institute of America, she built her skills mastering both classic recipes and fresh, modern twists.
Now, Jenna celebrates the beauty of seasonal, local ingredients, often sourced from her garden and nearby markets, to create recipes that are bursting with flavor yet easy to follow. When she’s not experimenting in the kitchen, Jenna loves exploring nature on hikes and discovering new treasures at local co-ops.