
Festive Easter Dirt Cake Casserole Recipe: Spring’s Sweetest Treat
Sweet memories of childhood blend perfectly with this easter dirt cake casserole that brings nostalgic dessert magic to life.
Layers of creamy pudding, crushed cookies, and playful decorations create a whimsical treat everyone adores.
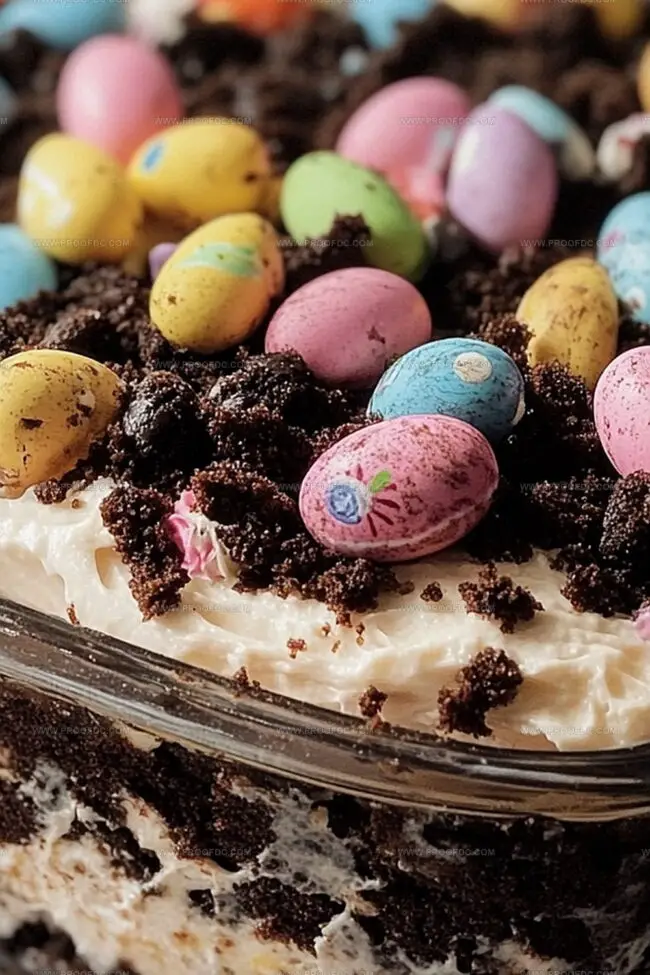
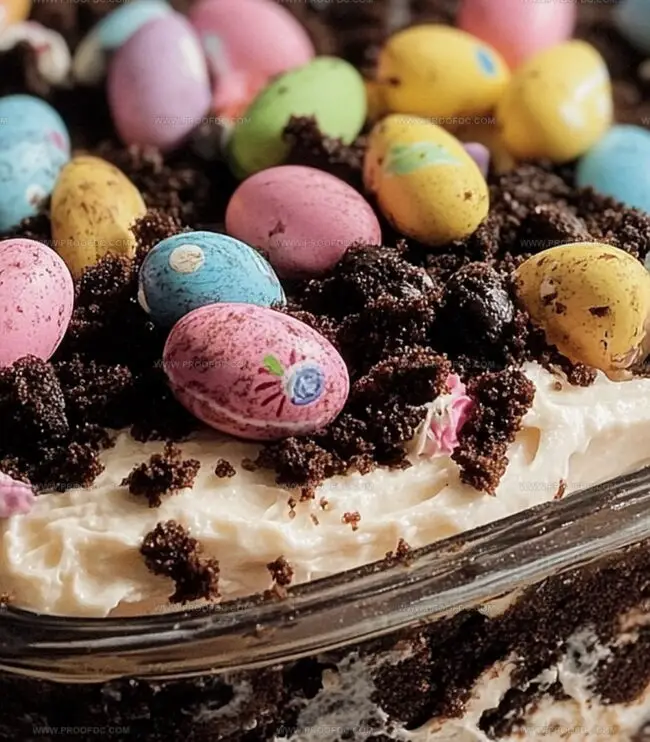
Chocolate crumbs mimic rich soil while gummy worms peek through the delightful surface.
Oreo cookies crush into fine “dirt” that makes this dessert irresistibly fun for kids and adults alike.
Each spoonful delivers a delightful mix of textures and sweet flavors that dance across your palate.
The simple ingredients transform an ordinary dessert into an extraordinary experience.
You’ll fall in love with this delightful Easter dessert that promises to become a cherished family tradition.
Quick Recipe Overview
Gather These Ingredients For Easter Dirt Cake Casserole
For Creamy Base:For Dirt and Crunch:For Decorative Elements:Tools That Help Build Easter Dirt Cake Casserole Easily
Steps To Create Easter Dirt Cake Casserole
Blend cream cheese with sweet powdered sugar until silky smooth. Whip pudding mix with milk until thick and dreamy, then gently fold together with whipped topping for a luscious base.
Crush chocolate sandwich cookies into fine, sandy particles using a food processor or by smashing in a sealed bag. This will create the signature “dirt” layer.
Start building your edible scene by spreading pudding mixture across the bottom of a baking dish. Sprinkle cookie crumbs generously, creating delightful layers. Repeat until you’ve used all your mixtures, finishing with a cookie crumb top.
Transform plain coconut into vibrant green grass by mixing with a touch of food coloring. Scatter this magical green topping across the cookie surface.
Transform your dessert into a whimsical Easter scene. Nestle chocolate eggs, marshmallow Peeps, and tiny chocolate bunnies across the green coconut landscape.
Refrigerate for a couple of hours to let flavors meld and textures settle. Serve with a big spoon and watch smiles bloom.
Flavor Swaps For Easter Dirt Cake Casserole
Ways To Present Easter Dirt Cake Casserole Fun And Festive
Tips To Keep Easter Dirt Cake Casserole Fresh
Print
Heavenly Easter Dirt Cake Casserole Recipe
- Total Time: 2 hours 20 minutes
- Yield: 11 1x
Description
Sinful Easter dirt cake combines childhood nostalgia with playful dessert design. Chocolate crumbles and creamy layers create a whimsical treat you’ll crave at springtime gatherings.
Ingredients
- 1 package (8 oz / 226 g) cream cheese, softened
- ½ cup (113 g) unsalted butter, softened
- 3 cups (720 ml) cold milk
- 2 packages (3.4 oz / 96 g each) instant vanilla pudding mix
- 1 package (14 oz / 397 g) chocolate sandwich cookies (e.g., oreos), crushed
- 1 cup (120 g) powdered sugar
- 1 container (8 oz / 226 g) whipped topping (e.g., cool whip), thawed
- 1 cup (80 g) shredded coconut
- green food coloring
- easter candies (e.g., chocolate eggs, jellybeans, peeps)
- miniature chocolate bunnies (optional)
Instructions
- Creamy Base Creation: Whip cream cheese, softened butter, and powdered sugar into a silky, uniform mixture using an electric mixer until smooth and well-combined.
- Pudding Preparation: Whisk pudding mix with cold milk until it transforms into a thick, luxurious cream, then gently fold into the cream cheese blend along with whipped topping to create a light, airy texture.
- Cookie Transformation: Pulverize chocolate sandwich cookies into fine crumbs using a food processor or by crushing in a sealed plastic bag with a rolling pin.
- Layering Foundation: In a 9×13-inch dish, construct alternating layers by spreading pudding mixture evenly and generously sprinkling cookie crumbs, ensuring complete coverage with the final layer being cookie crumbs.
- Grass Garnish: Tint shredded coconut with green food coloring, tossing until achieving a uniform, bright green color that mimics a springtime landscape.
- Festive Decoration: Artfully arrange Easter treats like chocolate eggs, colorful Peeps, and miniature chocolate bunnies across the green coconut surface.
- Chilling and Serving: Refrigerate for at least two hours to allow layers to meld, then serve chilled, scooping to reveal the playful, layered dessert masterpiece.
Notes
- Crumb Crushing Technique: Use a rolling pin or food processor to create fine, even cookie crumbs for a consistent texture and smooth layering.
- Chilling is Crucial: Allow at least two hours of refrigeration to help layers set properly and enhance the dessert’s creamy, rich flavor profile.
- Color Blending Hack: Mix green food coloring thoroughly with coconut by shaking in a sealed bag to achieve uniform, vibrant “grass” decoration.
- Texture Balance Tip: Fold whipped topping gently to maintain light, airy consistency without deflating the mixture’s delicate structure.
- Prep Time: 20 minutes
- Cook Time: 2 hours
- Category: Desserts
- Method: Mixing
- Cuisine: American
Nutrition
- Serving Size: 11
- Calories: 320
- Sugar: 23 g
- Sodium: 200 mg
- Fat: 18 g
- Saturated Fat: 10 g
- Unsaturated Fat: 8 g
- Trans Fat: 0 g
- Carbohydrates: 37 g
- Fiber: 1 g
- Protein: 3 g
- Cholesterol: 30 mg
Marcus Foley
Food Critic & Kitchen Coach
Expertise
Recipe Testing and Troubleshooting; Time-Saving Kitchen Hacks; Global Flavor Exploration; Engaging Food Writing and Honest Reviews.
Education
Institute of Culinary Education (ICE), New York, NY
Marcus Foley, based in Atlanta, GA, is a friendly food expert who makes cooking fun and simple.
With hands-on training from the Institute of Culinary Education and years of tasting everything from street food to fine dining, he shares easy kitchen hacks, global flavor ideas, and step-by-step recipes that turn kitchen mishaps into delicious surprises.