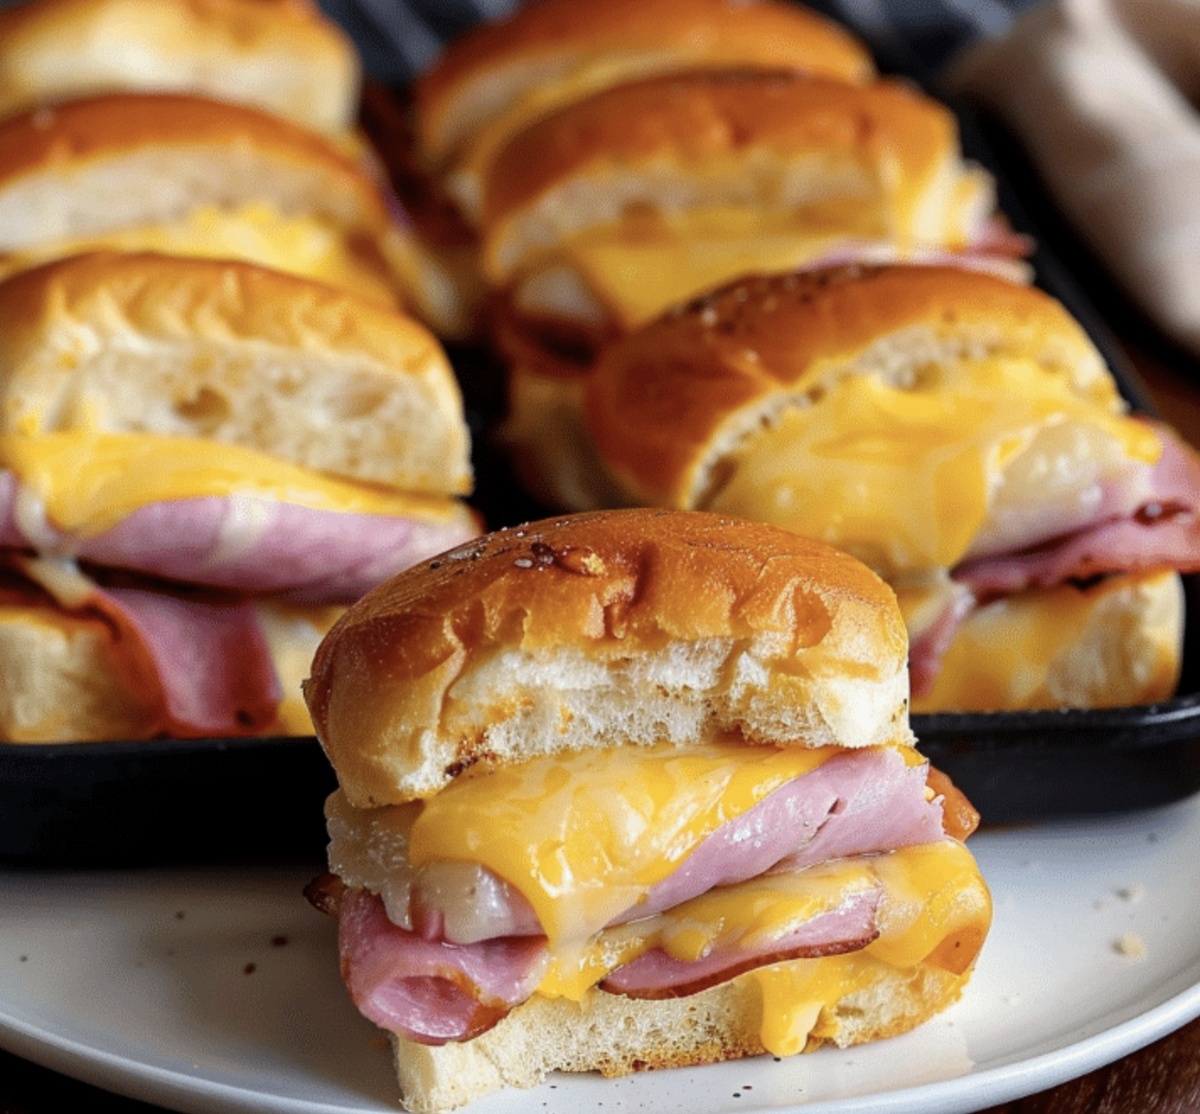
Easy Ham and Cheese Sliders Recipe for Crowd-Pleasing Snacks
Yourself savoring delectable ham and cheese sliders that melt perfectly in moments.
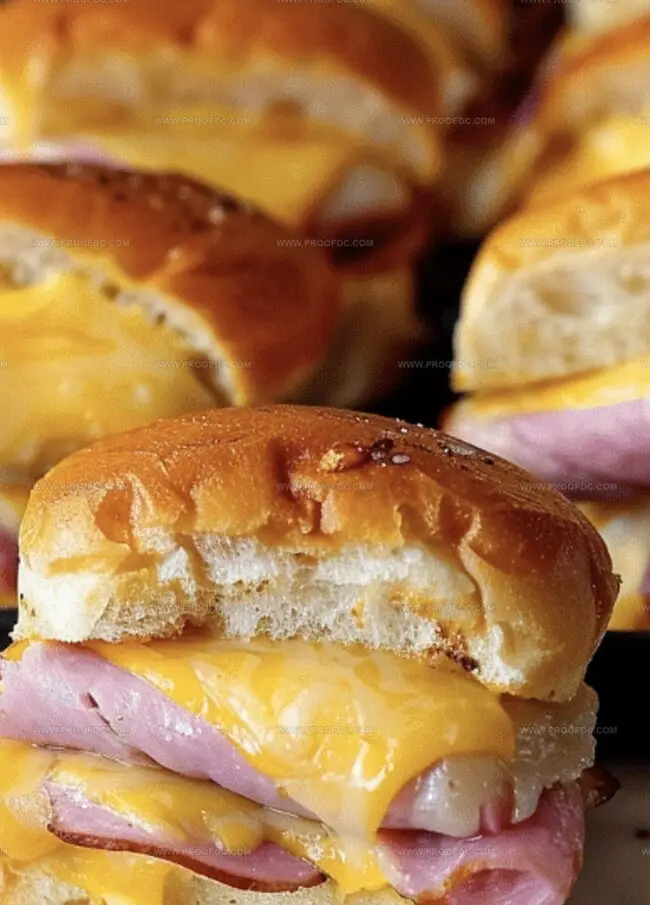
Tiny sandwiches pack massive flavor into each compact bite.
Soft rolls cradle layers of salty meat and creamy cheese with incredible precision.
Weekend gatherings or quick game day snacks become instantly memorable through these miniature delights.
Small yet mighty, these sliders promise to charm everyone around your table.
Friends will beg you to share the secret behind such incredible miniature sandwiches.
The smiles and satisfaction waiting just moments away from your first delicious bite.
Why Ham And Cheese Sliders Are A Party Hit
What You’ll Need For Ham And Cheese Sliders
Bread Base:Protein and Cheese:Flavor Enhancers:How To Make Ham And Cheese Sliders Quickly

Step 1: Prep the Baking Station
Heat the oven to 350°F. Line a 9×13-inch baking dish with aluminum foil or parchment paper, creating a clean workspace for your delicious sliders.
Step 2: Slice and Separate Rolls
Grab a package of dinner rolls and carefully slice them in half horizontally. Keep the top and bottom halves together, creating a sandwich-like base that will hold your mouthwatering ingredients.
Step 3: Layer the Bottom Half
Spread these ingredients on the bottom half of the rolls:Step 4: Crown with Top Rolls
Gently place the top half of the rolls back onto the layered bottom, creating a perfect slider sandwich.
Step 5: Whip Up the Glaze
In a small bowl, mix together:Step 6: Brush and Bake
Generously brush the glaze over the tops of the rolls, ensuring every inch gets a delicious coating. Slide the baking dish into the preheated oven.
Step 7: Bake to Golden Perfection
Bake for 15-20 minutes until the tops turn golden brown and the cheese melts into gooey deliciousness.
Step 8: Serve and Enjoy
Remove from the oven, let cool for a few minutes, then slice and serve these irresistible sliders that will have everyone asking for seconds!
Tips To Make Ham And Cheese Sliders Even Better
Store And Reheat Ham And Cheese Sliders With Ease
What Pairs Well With Ham And Cheese Sliders
Different Ways To Enjoy Ham And Cheese Sliders
FAQs About Ham And Cheese Sliders
These sliders are a crowd-pleasing favorite that combines savory ham, melty cheese, and a buttery, herbed topping that creates an irresistible flavor combination perfect for parties, game days, or quick family meals.
Absolutely! You can assemble the sliders up to a day in advance and keep them covered in the refrigerator. Just add the butter mixture right before baking to ensure the bread stays crisp and fresh.
Brush the butter mixture evenly over the tops of the rolls and make sure to cover every surface. This helps create a beautiful golden crust and adds extra flavor to the sliders. Using a pastry brush works best for even distribution.
Deli-style ham is ideal – look for a good quality, slightly thicker cut that will hold up well during baking. Black forest or honey ham add a nice subtle flavor that complements the cheese perfectly.
Print
Ham And Cheese Sliders Recipe
- Total Time: 35 minutes
- Yield: 12 1x
Description
Small Hawaiian rolls become irresistible when layered with savory ham and melted Swiss cheese in these crowd-pleasing ham and cheese sliders. Perfect for game day or casual gatherings, these mini sandwiches deliver big flavor in one delightful bite you’ll crave again and again.
Ingredients
Main Protein and Bread:
- 12 Hawaiian rolls (or any soft dinner rolls)
- 12 slices deli ham (or more to taste)
- 12 slices Swiss cheese (or your favorite cheese)
Spread and Optional Ingredients:
- ¼ cup (60 grams) mayonnaise (optional)
Butter Glaze:
- ¼ cup (60 grams) unsalted butter, melted
- 1 tablespoon Dijon mustard
- 1 teaspoon Worcestershire sauce
- 1 teaspoon garlic powder
- 1 tablespoon poppy seeds (optional)
Instructions
- Prepare the baking surface by lining a 9×13-inch dish with aluminum foil or parchment paper to facilitate effortless cleaning after baking.
- Warm the oven to a moderate temperature of 350°F (175°C), ensuring an even heat distribution for optimal cooking.
- Gently separate the dinner rolls, creating a base layer within the prepared baking dish without dismantling the entire package.
- Carefully layer sliced ham across the rolls, covering each piece with precision to ensure consistent meat distribution.
- Strategically place swiss cheese slices atop the ham, allowing the cheese to slightly overlap the meat for maximum flavor coverage.
- Craft a savory butter mixture by blending melted butter with dijon mustard, worcestershire sauce, and dried onion flakes, whisking until thoroughly combined.
- Drizzle the aromatic butter mixture evenly over the assembled rolls, ensuring each slider receives an equal coating of the flavorful blend.
- Sprinkle poppy seeds across the top of the rolls, adding a subtle crunch and visual appeal to the dish.
- Cover the baking dish with aluminum foil, creating a protective seal that will help steam and melt the ingredients.
- Slide the covered dish into the preheated oven and bake for approximately 20 minutes, allowing the cheese to melt and the flavors to meld together.
- Remove the foil during the final 5 minutes of baking to achieve a golden, slightly crispy top on the sliders.
- Extract the baking dish from the oven and let the sliders rest for a few minutes before serving, allowing the flavors to settle and the cheese to set.
Notes
- Choose slider rolls with a soft, pillowy texture for the best melt-in-your-mouth experience.
- Mix different cheese varieties like Swiss and cheddar to create a more complex, rich flavor profile.
- Brush the tops with a garlic butter mixture to elevate the sliders from simple to gourmet, adding a delicious golden-brown crispness when baked.
- For a lighter version, swap out regular ham for lean turkey or chicken to reduce calories without sacrificing taste.
- Prep Time: 10 minutes
- Cook Time: 25 minutes
- Category: Lunch, Snacks, Appetizer
- Method: Baking
- Cuisine: American
Nutrition
- Serving Size: 12
- Calories: 250
- Sugar: 2 g
- Sodium: 650 mg
- Fat: 15 g
- Saturated Fat: 7 g
- Unsaturated Fat: 6 g
- Trans Fat: 0 g
- Carbohydrates: 20 g
- Fiber: 1 g
- Protein: 9 g
- Cholesterol: 30 mg
Jenna Stewart
Head Chef & Recipe Innovator
Expertise
Farm-to-Table Cooking; Seasonal Menu Development; Visual Plating Techniques; Flavor Layering and Simple Prep Hacks.
Education
The Culinary Institute of America, Hyde Park, NY
Jenna Stewart is the inventive spirit behind many of our standout dishes at Pro of Delicious Creations. A proud graduate of The Culinary Institute of America, she built her skills mastering both classic recipes and fresh, modern twists.
Now, Jenna celebrates the beauty of seasonal, local ingredients, often sourced from her garden and nearby markets, to create recipes that are bursting with flavor yet easy to follow. When she’s not experimenting in the kitchen, Jenna loves exploring nature on hikes and discovering new treasures at local co-ops.