
Grandma’s Timeless Rum Balls Recipe: Sweet Holiday Magic
Tucked away in grandma’s cherished rum balls recipe lies a nostalgic treat that whispers sweet memories of holiday gatherings.
These delectable morsels carry the warmth of tradition with each decadent bite.
Crumbly cookies mingled with rich rum create a delightful symphony of flavor that dances across your palate.
The kitchen filled with the enticing aroma of chocolate and spirits blending together.
Simple ingredients transform into magical spheres of pure indulgence that spark conversation and delight.
Nobody can resist the allure of these bite-sized wonders that connect generations through a single, irresistible recipe.
You’ll want to bookmark this classic confection and start mixing right away.
Why Grandmas Rum Balls Taste Like The Holidays
What Goes Into Grandmas Rum Balls
Cookie Base:Sweetening and Flavor Agents:Liquid Binding Ingredient:How To Make Grandmas Rum Balls In A Few Steps
Step 1: Crumble Vanilla Wafers
Grab a package of vanilla wafers and place them in a resealable plastic bag. Use a rolling pin or the bottom of a heavy skillet to crush the wafers into fine crumbs. You want a nice, even texture that will help your rum balls hold together perfectly.
Step 2: Create Flavor Base
In a spacious mixing bowl, combine the crushed wafer crumbs with:Step 3: Bind the Mixture
Pour in rum and corn syrup. Use a wooden spoon or spatula to mix everything thoroughly. The mixture should start to come together and feel slightly sticky. If it seems too dry, add a tiny bit more rum to help everything bind.
Step 4: Shape the Treats
Use clean hands to roll the mixture into small, bite-sized balls. Work quickly and gently, as the warmth of your hands will help the ingredients stick together.
Step 5: Add Festive Coating
Roll each rum ball in additional powdered sugar, cocoa powder, or finely ground nuts. This gives them a beautiful finished look and adds an extra layer of flavor.
Step 6: Chill and Develop Flavor
Place the rum balls on a parchment-lined tray and refrigerate for several hours or overnight. This resting time allows the flavors to meld and intensify, making them even more delicious.
Step 7: Serve and Enjoy
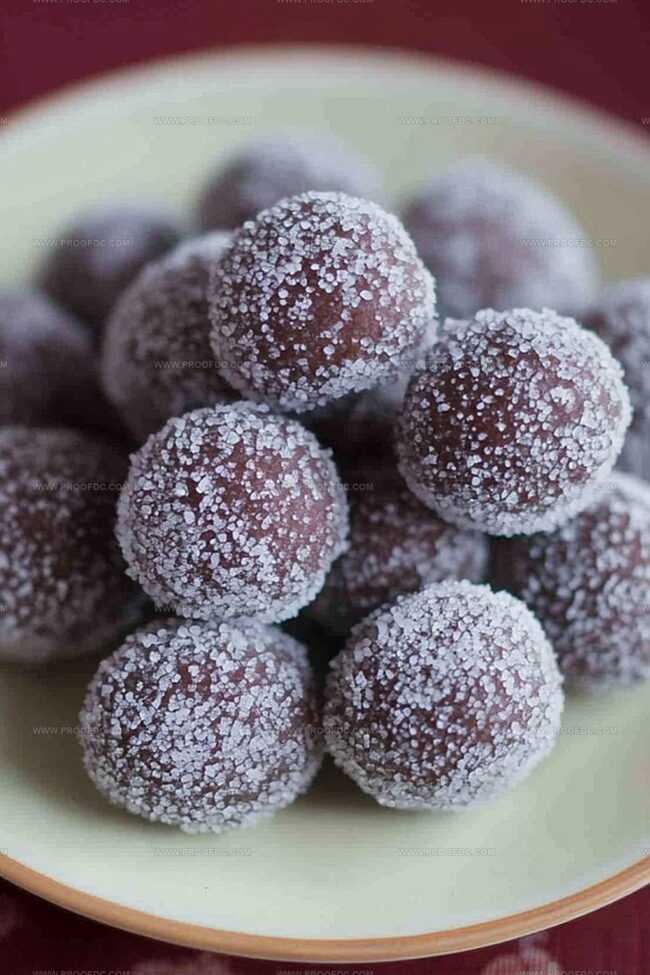
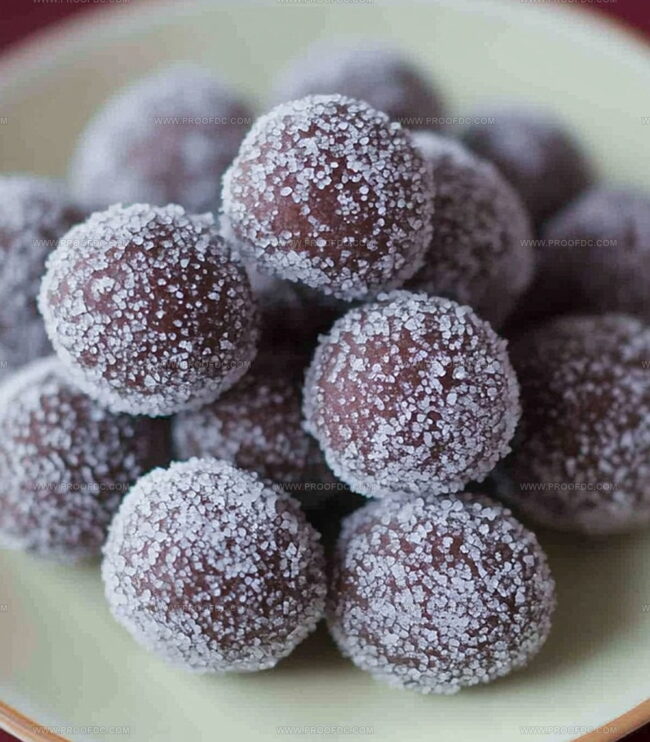
Arrange the rum balls on a festive plate. They’re perfect for holiday gatherings, after-dinner treats, or sharing with friends who appreciate a grown-up sweet bite.
Storage Tip: Keep rum balls in an airtight container in the refrigerator. They’ll stay fresh and delicious for up to two weeks.
Pro Tips For Rolling Grandmas Rum Balls Just Right
How To Store And Reheat Grandmas Rum Balls Properly
Great Pairings For Grandmas Rum Balls
Variations To Try With Grandmas Rum Balls
Questions About Grandmas Rum Balls Answered
These rum balls are a nostalgic family recipe that brings together rich chocolate flavor, crunchy nuts, and a warm rum kick – perfect for holiday gatherings or adult dessert treats.
Absolutely! You can substitute the rum with grape juice, orange juice, or coffee for a similar moisture and flavor profile without the alcohol content.
When stored in an airtight container in the refrigerator, these rum balls can maintain their delicious texture and flavor for up to 2 weeks, allowing you to enjoy them over several days.
No, these traditional rum balls contain alcohol and are meant for adult consumption. If you want a kid-friendly version, use the non-alcoholic substitution mentioned in the previous FAQ.
Print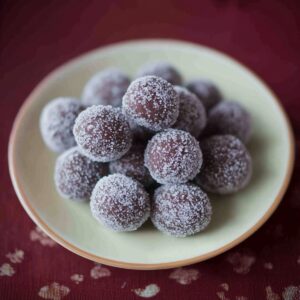
Grandmas Rum Balls Recipe
- Total Time: 1 hour 20 minutes
- Yield: 20 1x
Description
Nostalgic holiday charm meets sweet indulgence in Grandma’s Rum Balls, a classic treat passed down through generations. Packed with rich rum-soaked flavor and rolled in cocoa, these delightful bites connect you to cherished family memories and festive traditions.
Ingredients
Main Ingredients:
- 2 cups (250 g) vanilla wafer cookies, finely crushed
- 1 cup (120 g) pecans or walnuts, finely chopped
Sweeteners and Binding Agents:
- 1 cup (120 g) powdered sugar
- 3 tablespoons (45 ml) light corn syrup or honey
Flavor Enhancers:
- ¼ cup (20 g) unsweetened cocoa powder
- ¼ cup (60 ml) dark or spiced rum
Garnish:
- Powdered sugar (for rolling)
Instructions
- Pulverize vanilla wafers into fine crumbs using a food processor or rolling pin, ensuring a uniform texture that will help bind the mixture effectively.
- Create a flavor foundation by whisking powdered sugar and cocoa powder together, distributing the dry ingredients evenly to enhance the rum ball’s rich taste profile.
- Incorporate finely chopped nuts into the crumb mixture, providing a delightful crunch and nutty undertone to the confectionery treat.
- Gently pour rum into the dry ingredient blend, stirring methodically to create a cohesive, slightly sticky dough that holds its shape when rolled.
- Using clean hands or a small cookie scoop, form the mixture into compact, uniform spheres approximately one inch in diameter.
- Generously roll each rum ball in additional powdered sugar, creating a delicate, snow-white exterior that contrasts beautifully with the dark, rich interior.
- Arrange the coated rum balls on a parchment-lined tray, allowing them to set and develop deeper flavors by resting in a cool environment for several hours.
- Store the rum balls in an airtight container, preferably in the refrigerator, where they can mature and maintain their robust rum-infused essence for up to two weeks.
Notes
- Swap vanilla wafers with gluten-free cookies for a celiac-friendly version that maintains the same delightful crunch and texture.
- Reduce powdered sugar by 25% if you prefer less sweetness, allowing the rich cocoa and rum flavors to shine through more prominently.
- Toast nuts beforehand to enhance their deep, nutty flavor and create a more complex taste profile for the rum balls.
- When mixing ingredients, use a spatula or wooden spoon to prevent crushing the nuts and ensure even distribution of flavors throughout the mixture.
- Prep Time: 20 minutes
- Cook Time: 1-2 hours
- Category: Desserts, Snacks, Cocktails
- Method: Mixing
- Cuisine: American
Nutrition
- Serving Size: 20
- Calories: 122
- Sugar: 8 g
- Sodium: 2 mg
- Fat: 6 g
- Saturated Fat: 1 g
- Unsaturated Fat: 5 g
- Trans Fat: 0 g
- Carbohydrates: 15 g
- Fiber: 1 g
- Protein: 2 g
- Cholesterol: 0 mg
Jenna Stewart
Head Chef & Recipe Innovator
Expertise
Farm-to-Table Cooking; Seasonal Menu Development; Visual Plating Techniques; Flavor Layering and Simple Prep Hacks.
Education
The Culinary Institute of America, Hyde Park, NY
Jenna Stewart is the inventive spirit behind many of our standout dishes at Pro of Delicious Creations. A proud graduate of The Culinary Institute of America, she built her skills mastering both classic recipes and fresh, modern twists.
Now, Jenna celebrates the beauty of seasonal, local ingredients, often sourced from her garden and nearby markets, to create recipes that are bursting with flavor yet easy to follow. When she’s not experimenting in the kitchen, Jenna loves exploring nature on hikes and discovering new treasures at local co-ops.