Sweet Honeycomb Bee Doughnuts Recipe: Buzzing with Flavor!
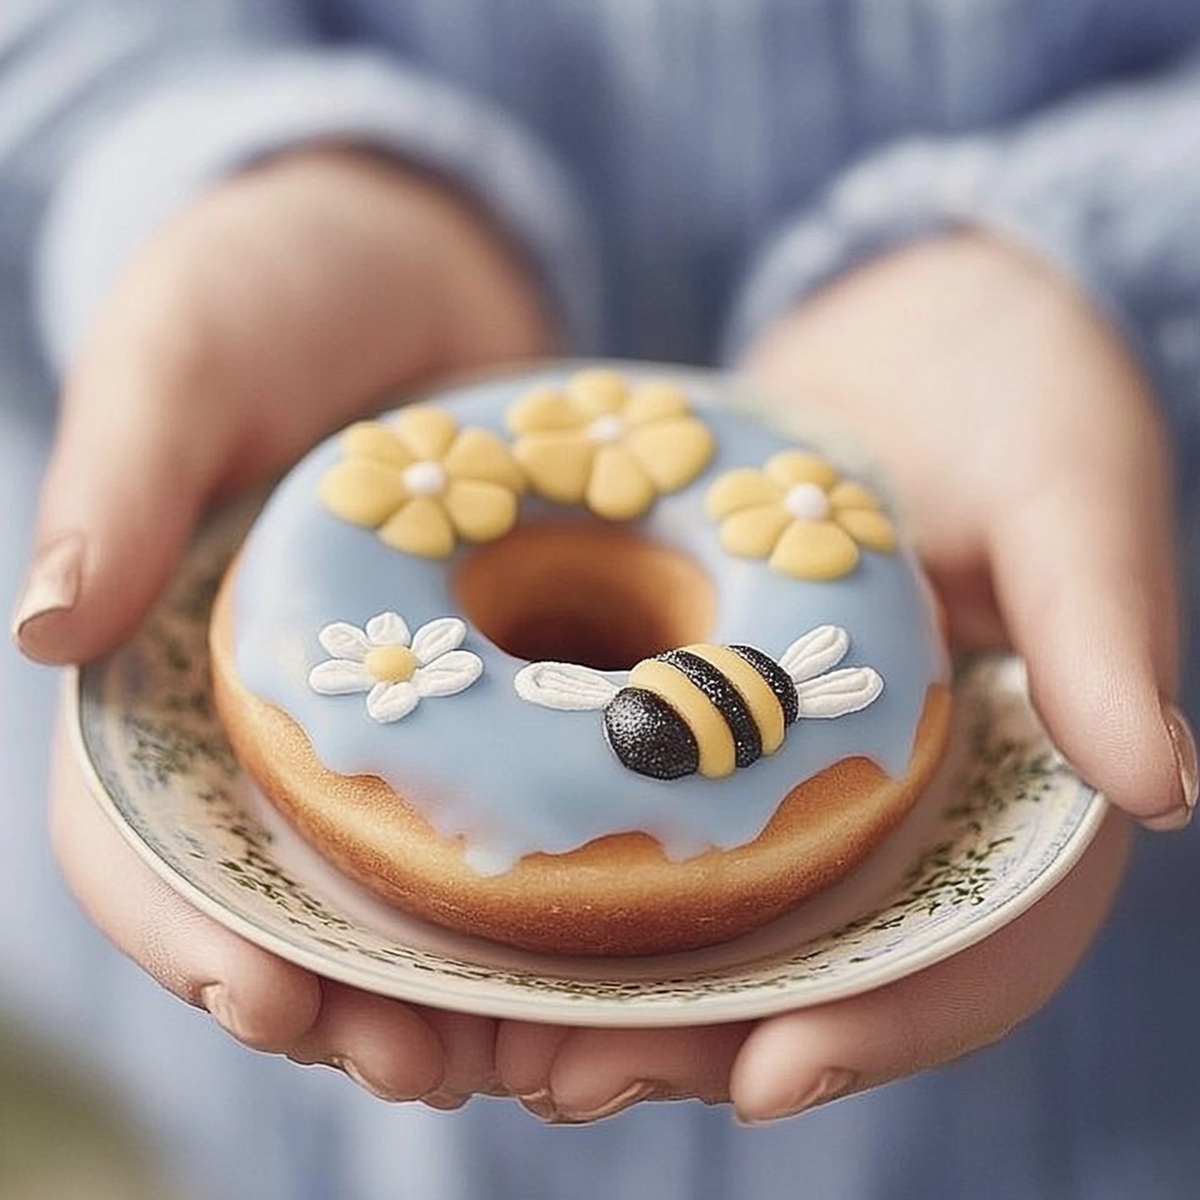
Sweet and golden bee doughnuts burst with bakery magic that’ll make your taste buds dance.
These delightful treats combine soft, pillowy dough with a honey-infused glaze that sings of summer afternoons.
Crafted with simple ingredients, this recipe brings warmth to any kitchen.
Delicate and light, each doughnut carries the essence of honeycomb sweetness.
The crisp exterior gives way to a tender center that melts in your mouth.
Rich golden hues and delicate drizzles make these doughnuts a stunning centerpiece for breakfast or dessert.
Dive into this buzzing recipe and transform your baking game with these irresistible honey-kissed delights.
Quick Recipe Overview
Things You’ll Need For Bee Doughnuts
For Dry Base:For Wet Ingredients:For Decoration:Kitchen Tools For Bee Doughnuts
Directions For Making Bee Doughnuts
Craft delightful doughnuts using your preferred method – baking or frying. For baked version, mix dry ingredients separately from wet ingredients, then gently combine. Pour batter into doughnut molds, ensuring even distribution. Bake until golden and springy to touch. Let cool completely before decorating.
Create a vibrant yellow coating by blending powdered sugar with milk. Incorporate yellow food coloring until you achieve a cheerful, sunshine-like hue. Adjust liquid or sugar to reach your desired smoothness and shine.
Dunk cooled doughnuts into yellow icing, allowing excess to drip gracefully. Place on cooling rack. Use chocolate to sketch delicate stripes across doughnut surface. Carefully position tiny candy eyes. Attach almond or white chocolate pieces as delicate wings, creating a whimsical bee-like appearance.
Give decorations a few moments to set. Arrange these adorable bee-inspired treats on a playful platter. Share with loved ones, spreading joy through your creative culinary adventure.
Ways To Tweak Bee Doughnuts
Tasty Ways To Plate Bee Doughnuts
Store Leftovers From Bee Doughnuts
Keep freshly baked doughnuts in an airtight container at room temperature for 1-2 days, ensuring maximum flavor and texture. Refrigeration Tip: When stored in the refrigerator, doughnuts remain tasty for up to 4 days, covered with plastic wrap to prevent moisture loss. Freezing Strategy: Wrap individual doughnuts separately in plastic film, then place in a freezer-safe container; they’ll stay delicious for 2-3 weeks. Make-Ahead Magic: Prepare doughnut batter or icing a day before, storing separately in sealed containers in the refrigerator to save time during preparation.
Print
Golden Bee Doughnuts Recipe
- Total Time: 32-35 minutes
- Yield: 11 1x
Description
Crispy bee doughnuts bring French bakery magic into home kitchens with golden, honey-glazed perfection. Sweet pastry craftsmanship delivers delightful treats you will savor with pure culinary pleasure.
Ingredients
- 2 large eggs
- 2 cups (480 mL/16 fl oz) all-purpose flour
- ½ cup (120 mL/4 fl oz) whole milk
- ½ cup (100 g/3.5 oz) granulated sugar
- 2 tsp baking powder
- ¼ tsp salt
- ¼ cup (60 mL/2 fl oz) unsalted butter, melted
- 1 tsp vanilla extract
- 2 cups (240 g/8.5 oz) powdered sugar
- 3–4 tbsps milk (adjust for consistency)
- Yellow food coloring
- ½ cup (120 mL/4 fl oz) melted chocolate or chocolate frosting
- Mini candy eyes
- Sliced almonds or white chocolate discs
Instructions
- Prepare Dough: Whisk dry ingredients in a mixing bowl. In a separate container, blend liquid components. Gently combine wet and dry mixtures, maintaining a light texture. For baked version, transfer batter into a greased doughnut mold, filling each cavity three-quarters full. Bake in a preheated oven at 350°F until a testing skewer comes out clean. For fried option, use a traditional yeast doughnut recipe or pre-made pastries.
- Create Honey Glaze: Whisk powdered sugar with milk in a bowl until silky. Add yellow food coloring, blending thoroughly for an even, sunny hue. Adjust glaze consistency by adding milk or sugar incrementally to ensure optimal coating.
- Decorate as Bee-Inspired Treats: After complete cooling, dip doughnut tops into golden glaze, allowing excess to drip off. Place on a wire rack to set. Use chocolate to create horizontal stripes mimicking bee anatomy. Attach tiny candy eyes near the doughnut’s top with a small icing dot. Position sliced almonds or white chocolate discs as delicate wing accents.
- Serve and Enjoy: Allow decorative elements to set briefly. Present these whimsical bee-themed confections, ready to delight friends and family with their playful design and sweet flavor.
Notes
- Flour Finesse: Use cake flour for lighter, more delicate doughnuts that melt in your mouth. Sift dry ingredients to prevent lumps and ensure smooth batter consistency.
- Glaze Glow: Maintain precise temperature when working with glaze to achieve perfect coating. Too warm causes runny finish, while too cool creates thick, uneven layer.
- Decoration Precision: Use toothpicks or fine paintbrush for detailed bee markings to create crisp, clean chocolate lines. Refrigerate briefly after decorating to set chocolate quickly.
- Dietary Adaptations: Swap regular milk with almond or oat milk for dairy-free version. Replace wheat flour with gluten-free blend for celiac-friendly option. Consider using natural food coloring from turmeric or bee pollen for more organic yellow tone.
- Prep Time: 20 minutes
- Cook Time: 12 minutes (baked) or 15 minutes (fried)
- Category: Breakfast, Snacks, Desserts
- Method: Baking
- Cuisine: American
Nutrition
- Serving Size: 11
- Calories: 246
- Sugar: 20 g
- Sodium: 120 mg
- Fat: 10 g
- Saturated Fat: 6 g
- Unsaturated Fat: 4 g
- Trans Fat: 0 g
- Carbohydrates: 35 g
- Fiber: 1 g
- Protein: 3 g
- Cholesterol: 40 mg
Marcus Foley
Food Critic & Kitchen Coach
Expertise
Recipe Testing and Troubleshooting; Time-Saving Kitchen Hacks; Global Flavor Exploration; Engaging Food Writing and Honest Reviews.
Education
Institute of Culinary Education (ICE), New York, NY
Marcus Foley, based in Atlanta, GA, is a friendly food expert who makes cooking fun and simple.
With hands-on training from the Institute of Culinary Education and years of tasting everything from street food to fine dining, he shares easy kitchen hacks, global flavor ideas, and step-by-step recipes that turn kitchen mishaps into delicious surprises.