Spooky Ghost Meringues Recipe: Hauntingly Sweet Treat
Spooky season calls for these delightful ghost meringues that will bewitch your taste buds with their ethereal charm.
Crisp, light, and hauntingly delicious, these sweet treats promise a playful twist on classic desserts.
Floating clouds of sugary magic dancing across your plate, ready to enchant everyone at the party.
Each ghostly creation whispers secrets of delicate sweetness and playful Halloween spirit.
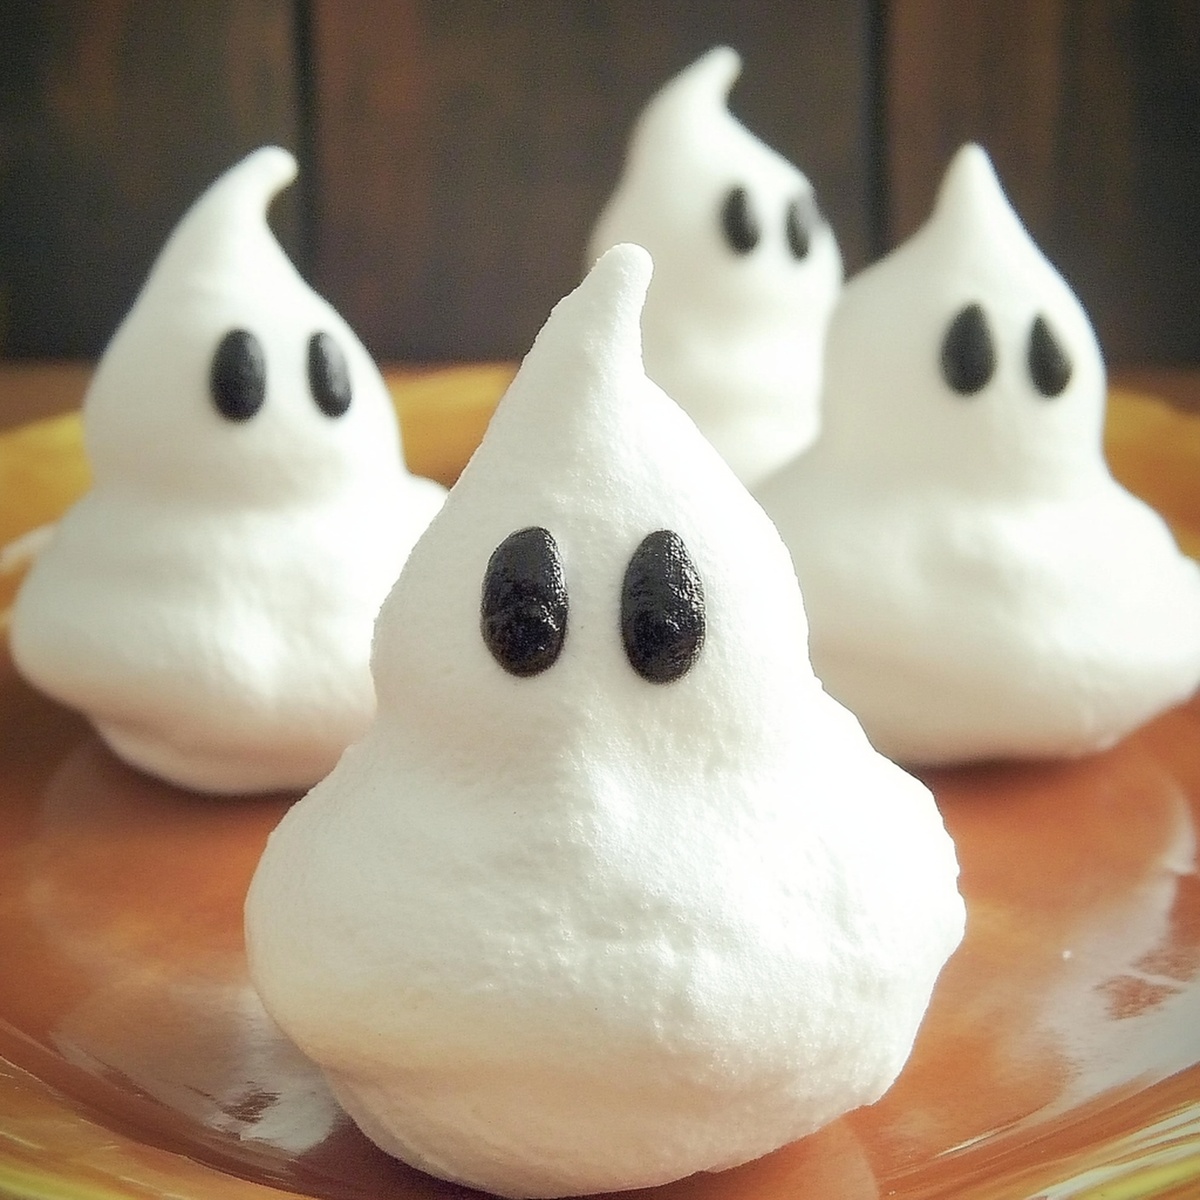
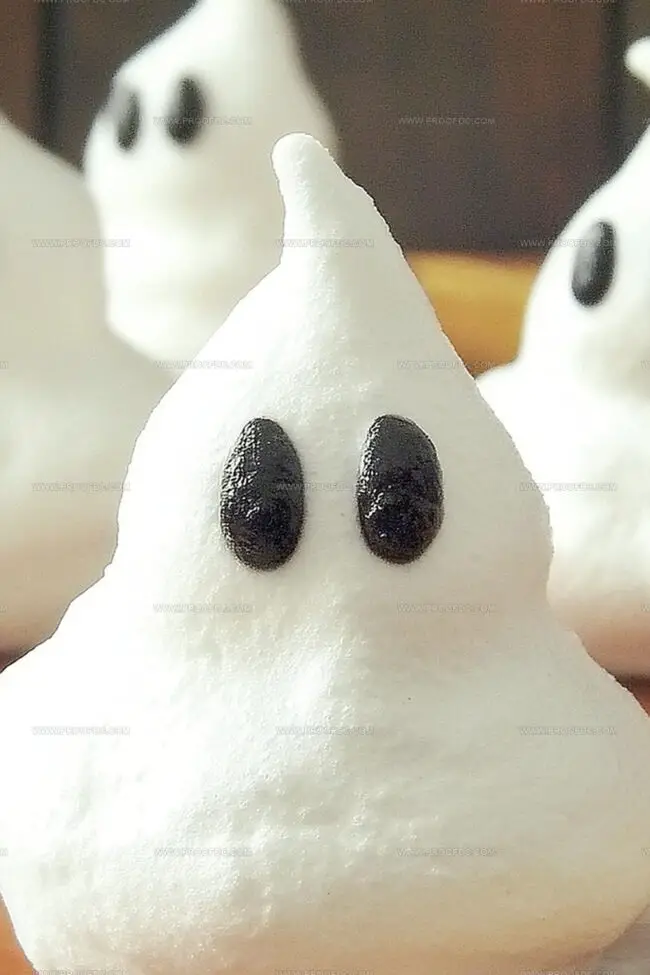
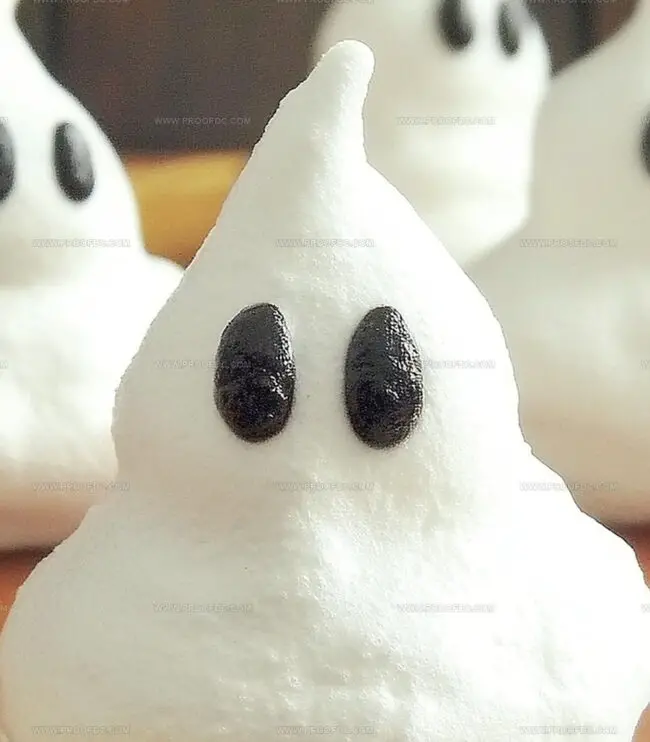
Delicate peaks of white meringue transform into adorable spectral figures that seem to float just above the surface.
Crafting these ethereal confections requires minimal ingredients but delivers maximum Halloween excitement.
You’ll be surprised how simple it is to conjure up these magical little spirits that are sure to cast a spell of delight.
Why Ghost Meringues Are Spooky And Sweet
What Goes Into Ghost Meringues
Main Ingredients:
Egg Whites and Sugar:Supporting Ingredients:
Flavor and Stabilizers:Decorative Ingredients:
Finishing Touches:How To Make Ghost Meringues
Step 1: Warm Up the Oven
Preheat the oven to 225F (110C). Cover two baking sheets with parchment paper or silicone mats. Ensure the surface is smooth and flat for perfect ghost shapes.
Step 2: Whip the Magical Clouds
In a spotless mixing bowl, start whipping egg whites and cream of tartar using an electric mixer. Begin at medium speed until soft, fluffy peaks emerge. Slowly sprinkle sugar, one spoonful at a time, while continuing to mix. Boost the mixer to high speed and whip until stiff, shiny peaks form. This should take about 5-7 minutes. Gently fold in vanilla extract for a delightful flavor.
Step 3: Shape Spooky Spirits
Carefully transfer the fluffy mixture into a piping bag with a large round tip. If you don’t have a professional piping bag, use a clean plastic bag and snip off one corner. Create ghost shapes by:Step 4: Slow Bake the Spirits
Place the baking sheets in the preheated oven. Bake for 1 hour, allowing the meringues to dry out slowly and maintain their delicate structure. Once the hour is complete, turn off the oven and leave the meringues inside. Let them cool completely for another hour. This technique prevents cracking and ensures a perfect texture.
Step 5: Give Faces to Phantoms
Once meringues are completely cool, transform them into adorable ghosts:Step 6: Serve Supernatural Treats
Arrange the ghostly meringues on a festive platter. These treats can be enjoyed immediately or stored in an airtight container at room temperature. They’ll stay fresh and crispy for up to 5 days – perfect for Halloween parties or sweet snack time!
Tips For Making Ghost Meringues Right
How To Store And Reheat Ghost Meringues
Fun Pairings For Ghost Meringues
Variations Of Ghost Meringues You’ll Like
Ghost Meringues FAQs
Cream of tartar helps stabilize the egg whites, creating a smoother and more voluminous meringue that holds its shape better during beating and baking.
While technically possible, hand whisking requires significant arm strength and time. An electric mixer ensures consistent, fluffy peaks much more easily and quickly.
Your meringue is perfect when it forms stiff, glossy peaks that stand straight up when you lift the beater. When you turn the bowl upside down, the meringue should not slide or droop.
Cracking usually happens from sudden temperature changes. By leaving meringues in the oven after turning it off, you’re allowing them to cool slowly, which helps prevent cracking and ensures a smooth texture.
Print
Ghost Meringues Recipe
- Total Time: 2 hours 15 minutes
- Yield: 12 1x
Description
Spooky Halloween “ghost meringues” dance with ethereal elegance, floating between sweet simplicity and haunting charm. Delicate white peaks swirl with ghostly grace, inviting Halloween enthusiasts to create spirited treats that delight and enchant.
Ingredients
Meringue Base:
- 4 large egg whites, at room temperature
- 1 cup (200 grams) granulated sugar
- ¼ teaspoon cream of tartar
Flavoring:
- 1 teaspoon vanilla extract
Decoration:
- Melted chocolate or black decorating gel for the faces
Instructions
- Sanitize all equipment by ensuring mixing bowl and beaters are completely grease-free and moisture-free to guarantee perfect meringue volume.
- Separate egg whites meticulously, ensuring no yolk contamination, which could prevent proper whipping of the whites.
- Whip egg whites with cream of tartar on medium speed until soft, cloud-like peaks develop, resembling gentle white waves.
- Gradually introduce sugar, one tablespoon at a time, allowing each addition to dissolve completely while continuously beating the mixture.
- Elevate mixer speed to high, transforming the mixture into a glossy, sturdy texture with peaks standing firmly upright when beaters are lifted.
- Fold vanilla extract gently into the meringue, maintaining the delicate air bubbles that provide volume and structure.
- Select a large round piping tip or prepare a plastic bag with a cleanly snipped corner for precise ghost shape formation.
- Create ghostly silhouettes on parchment-lined baking sheets by piping substantial circular bases with elongated, tapered peaks suggesting spectral movement.
- Position baking sheets in a preheated oven at 225F, allowing gentle, consistent heat to dry and solidify the delicate meringue structures.
- After one hour of baking, switch off oven, leaving meringues inside to cool gradually and prevent unexpected cracking.
- Once completely cooled, personalize each ghost using melted chocolate or black decorating gel to craft expressive, whimsical facial features.
- Store finished ghost meringues in an airtight container, maintaining their crisp texture for up to five days at room temperature.
Notes
- Whip egg whites in a spotlessly clean, grease-free bowl to ensure perfect meringue volume and stability.
- Use room temperature egg whites for faster and more stable peak formation during beating.
- Add sugar gradually to prevent grainy texture and ensure smooth, glossy meringue consistency.
- Prevent moisture absorption by storing Ghost Meringues in an airtight container with silica gel packets to maintain crispness.
- Experiment with different piping tips to create unique ghost shapes and personalities.
- Make these meringues gluten-free and naturally fat-free, perfect for health-conscious sweet lovers.
- Create dairy-free treats by avoiding chocolate decorations and using alternative face decorating methods like black royal icing.
- Troubleshoot potential meringue failures by checking humidity levels and avoiding making on rainy or very humid days.
- Prep Time: 15 minutes
- Cook Time: 1 hour
- Category: Desserts, Snacks
- Method: Baking
- Cuisine: French
Nutrition
- Serving Size: 12
- Calories: 50
- Sugar: 17 g
- Sodium: 0 mg
- Fat: 0 g
- Saturated Fat: 0 g
- Unsaturated Fat: 0 g
- Trans Fat: 0 g
- Carbohydrates: 13 g
- Fiber: 0 g
- Protein: 1 g
- Cholesterol: 0 mg
Jenna Stewart
Head Chef & Recipe Innovator
Expertise
Farm-to-Table Cooking; Seasonal Menu Development; Visual Plating Techniques; Flavor Layering and Simple Prep Hacks.
Education
The Culinary Institute of America, Hyde Park, NY
Jenna Stewart is the inventive spirit behind many of our standout dishes at Pro of Delicious Creations. A proud graduate of The Culinary Institute of America, she built her skills mastering both classic recipes and fresh, modern twists.
Now, Jenna celebrates the beauty of seasonal, local ingredients, often sourced from her garden and nearby markets, to create recipes that are bursting with flavor yet easy to follow. When she’s not experimenting in the kitchen, Jenna loves exploring nature on hikes and discovering new treasures at local co-ops.