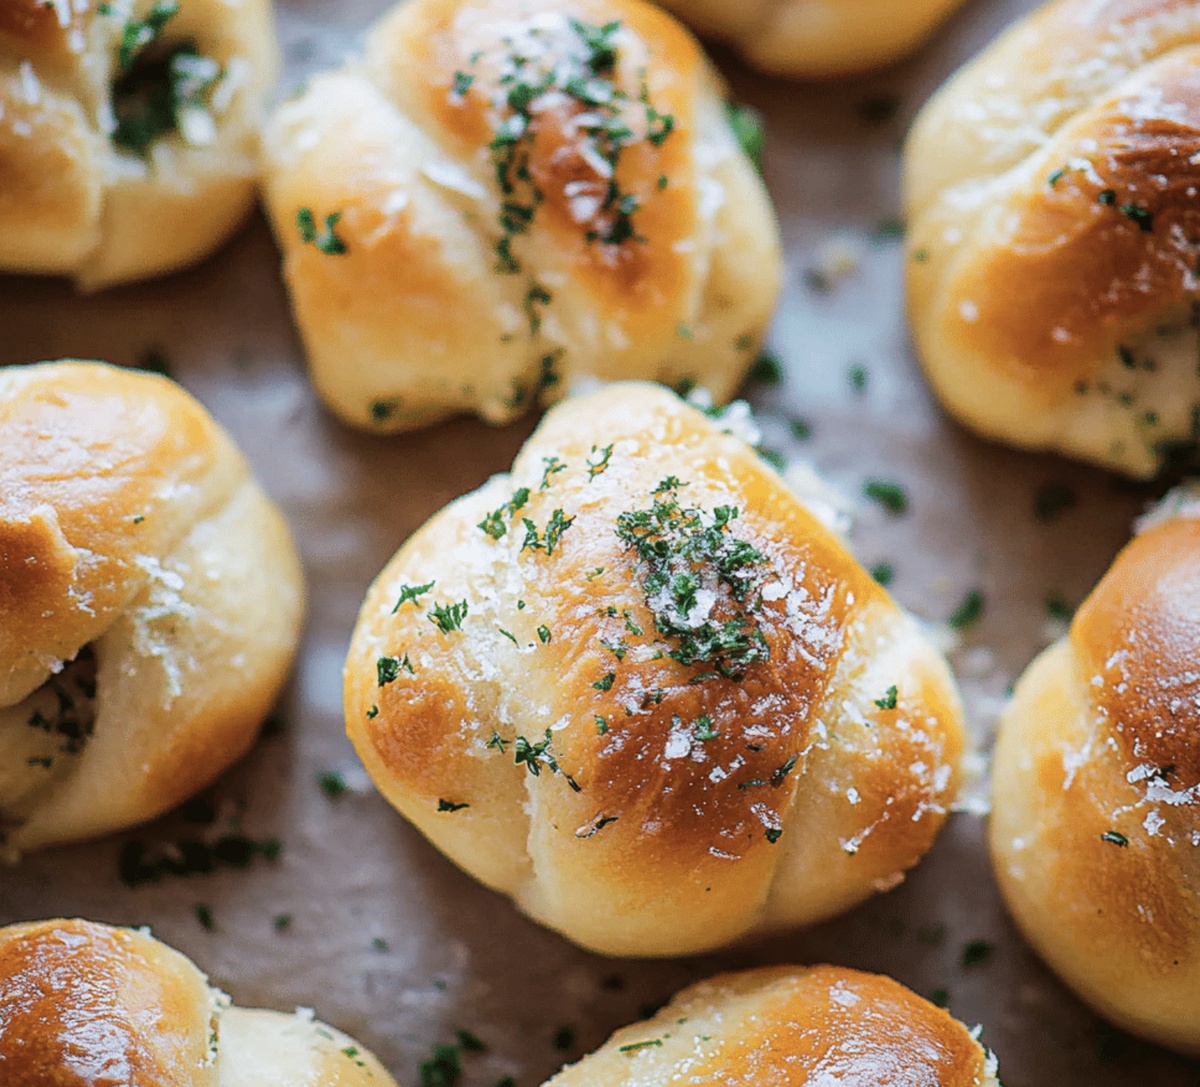
Heavenly Homemade Garlic Knots Recipe: Fluffy Bites of Joy
Twisting and braiding homemade garlic knots into delightful bread shapes brings pure joy to my kitchen adventures.
My Italian grandmother first taught me this magical technique decades ago.
These savory treats smell incredible while baking and promise crispy, golden edges everyone will love.
Warm, buttery aromas drift through the house, beckoning hungry people from every room.
Simple ingredients like fresh dough, fragrant garlic, and herbs create something extraordinary with minimal effort.
Perfectly seasoned and wonderfully soft, these knots complement pasta dishes or stand alone as a delicious snack.
You’ll want to bookmark this recipe for future comfort food cravings.
Why Garlic Knots Are A Classic Favorite

Everything Needed For Garlic Knots
Dough Ingredients:Topping Ingredients:Preparation Ingredients:How To Bake Garlic Knots Without Fuss
Step 1: Awaken the Yeast
Grab a small bowl and combine:Let the mixture sit and get bubbly for about 5 minutes.
Step 2: Create Magical Dough
In a large mixing bowl, blend:Pour in the yeast mixture and olive oil. Mix until a soft, pillowy dough forms. Knead the dough on a lightly floured surface, working it with your hands for 5-7 minutes until smooth and stretchy. If you have a stand mixer, let the dough hook do the work for 4-5 minutes.
Step 3: Let the Dough Dance
Transfer the dough to a greased bowl. Cover with a clean kitchen towel and find a cozy, warm spot for it to rise. Wait 1-1.5 hours until the dough has doubled in size.
Step 4: Shape Delightful Twists
Gently punch down the puffy dough. Divide it into 12 equal pieces. Roll each piece into a rope about 6-8 inches long. Tie each rope into a loose knot and place on a parchment-lined baking sheet. Give the knots some breathing room between each other.
Step 5: Second Rise
Cover the knots with a kitchen towel. Let them puff up for 30 minutes.
Step 6: Bake to Golden Perfection
Crank up the oven to 400F (200C). Slide the baking sheet inside and bake for 12-15 minutes until the twists turn a beautiful golden brown.
Step 7: Drench in Garlic Goodness
While the twists are still warm, create a mouthwatering topping by mixing:Generously brush the warm twists with this magical garlic butter.
Serve immediately and watch everyone’s eyes light up with joy!
Tips That Help With Garlic Knots Every Time
How To Store Garlic Knots And Keep Them Soft
Good Dips To Enjoy With Garlic Knots
Twists You Can Try On Garlic Knots
Garlic Knots FAQs Answered Fast
These homemade garlic knots are fresher, lighter, and you control the ingredients. Unlike store-bought versions, they’re made with simple, high-quality ingredients and have a more authentic, just-baked taste.
Not at all! This recipe is beginner-friendly. Even if you’ve never worked with yeast before, the steps are straightforward. The key is patience during rising and gentle kneading.
Yes! You can prepare the dough and let it rise in the refrigerator overnight. This slow rise actually develops more flavor and makes the dough easier to handle. Just bring it to room temperature before shaping.
If the yeast doesn’t become foamy after 5 minutes in warm water with sugar, it’s likely expired. Fresh, active yeast will look bubbly and smell slightly sweet. When in doubt, buy a new packet to ensure your garlic knots rise perfectly.
Print
Garlic Knots Recipe
- Total Time: 2 hours 5 minutes
- Yield: 12 1x
Description
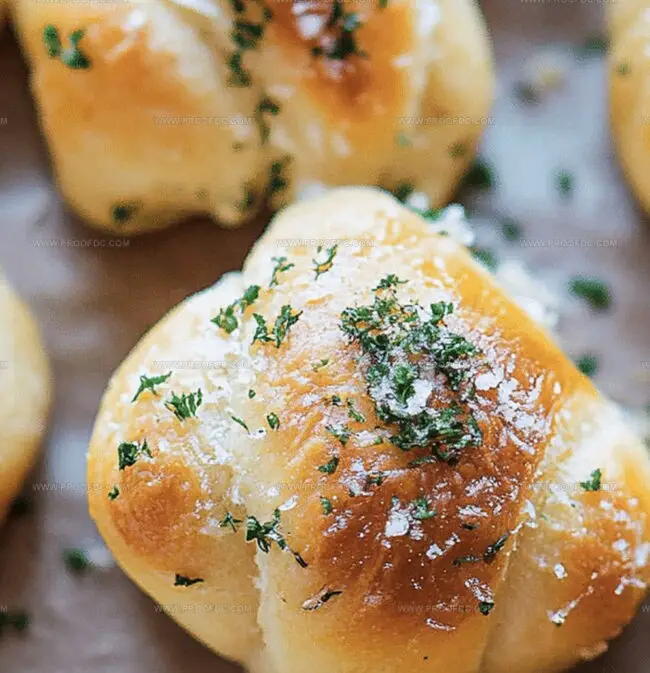
Mouthwatering garlic knots bring Italian street food charm to home kitchens, offering a perfect blend of crusty exterior and tender inner dough. Buttery garlic essence and herb-infused olive oil create an irresistible snack that will make appetizer dreams come true.
Ingredients
Main Flour Ingredients:
- 3 cups (375 g) all-purpose flour
- 2 ¼ teaspoons (1 packet) instant yeast
Seasoning and Flavor Ingredients:
- 2 teaspoons granulated sugar
- 1 teaspoon salt
- ¼ teaspoon salt
- 2 cloves garlic, minced
- 1 tablespoon fresh parsley, finely chopped (or 1 teaspoon dried parsley)
Liquid and Fat Ingredients:
- 1 cup (240 ml) warm water (110°F/45°C)
- 2 tablespoons olive oil
- ¼ cup (60 g) unsalted butter, melted
Instructions
- Craft the foundational dough by dissolving yeast in warm liquid, creating a frothy mixture that will serve as the catalyst for a light, airy texture.
- Combine flour and salt in a spacious mixing vessel, then integrate the activated yeast liquid and olive oil. Manipulate the ingredients until a cohesive, slightly tacky dough emerges.
- Transfer the dough to a lightly dusted surface and vigorously knead, developing gluten strands and creating a smooth, resilient consistency. This process should take approximately 6-7 minutes of dedicated kneading.
- Nestle the dough in a lubricated container, drape with a soft cloth, and allow it to expand and rise in a draft-free environment until its volume doubles, roughly 60-90 minutes.
- Deflate the risen dough gently, then segment it into uniform portions. Roll each segment into elongated ropes, approximately 6-8 inches in length.
- Transform each rope into a casual knot, ensuring loose, relaxed twists. Arrange these delicate formations on a parchment-lined baking sheet, providing ample spacing between each piece.
- Permit a secondary proofing phase, covering the knots to encourage further volume and softness for about 25-35 minutes.
- Heat the oven to 400F, creating an optimal environment for transforming the delicate dough into golden, aromatic treasures.
- Slide the baking sheet into the preheated oven, allowing the knots to bake until they achieve a rich, amber-toned exterior, approximately 13-16 minutes.
- Immediately upon removal, lavish the warm knots with a luxurious garlic-infused butter mixture, ensuring each crevice is generously coated with the fragrant, herbaceous blend.
Notes
- Boost yeast performance by using water between 100-110°F to ensure proper activation without killing the microorganisms.
- Create consistent knots by using a kitchen scale to weigh each dough piece for uniform sizing and even baking.
- Enhance texture by allowing dough to rest and rise in a draft-free, warm environment like a turned-off oven with the light on.
- Prevent sticking during shaping by lightly flouring your work surface and hands, ensuring smooth and easy knotting process.
- Customize flavor profiles by experimenting with different herbs like rosemary, thyme, or adding grated parmesan to the garlic butter topping.
- Achieve golden-brown perfection by brushing knots with an egg wash before baking to create a beautiful, glossy exterior.
- Store leftover garlic knots in an airtight container at room temperature for 2-3 days, reheating briefly in the oven to restore crispness.
- Make the recipe gluten-free by substituting all-purpose flour with a 1:1 gluten-free baking blend for those with dietary restrictions.
- Prep Time: 20 minutes
- Cook Time: 15 minutes
- Category: Appetizer, Snacks
- Method: Baking
- Cuisine: Italian
Nutrition
- Serving Size: 12
- Calories: 150
- Sugar: 1 g
- Sodium: 200 mg
- Fat: 7 g
- Saturated Fat: 3.5 g
- Unsaturated Fat: 2.5 g
- Trans Fat: 0 g
- Carbohydrates: 19 g
- Fiber: 0.5 g
- Protein: 3 g
- Cholesterol: 15 mg
Jenna Stewart
Head Chef & Recipe Innovator
Expertise
Farm-to-Table Cooking; Seasonal Menu Development; Visual Plating Techniques; Flavor Layering and Simple Prep Hacks.
Education
The Culinary Institute of America, Hyde Park, NY
Jenna Stewart is the inventive spirit behind many of our standout dishes at Pro of Delicious Creations. A proud graduate of The Culinary Institute of America, she built her skills mastering both classic recipes and fresh, modern twists.
Now, Jenna celebrates the beauty of seasonal, local ingredients, often sourced from her garden and nearby markets, to create recipes that are bursting with flavor yet easy to follow. When she’s not experimenting in the kitchen, Jenna loves exploring nature on hikes and discovering new treasures at local co-ops.