
Heavenly Garlic Bread Rolls Recipe: Golden Buttery Bliss
Warm, pillowy garlic bread rolls emerge as the ultimate comfort food that’ll make your kitchen smell incredible.
These soft, fragrant delights promise to capture everyone’s attention at the dinner table.
Each bite brings a delectable blend of buttery richness and aromatic garlic.
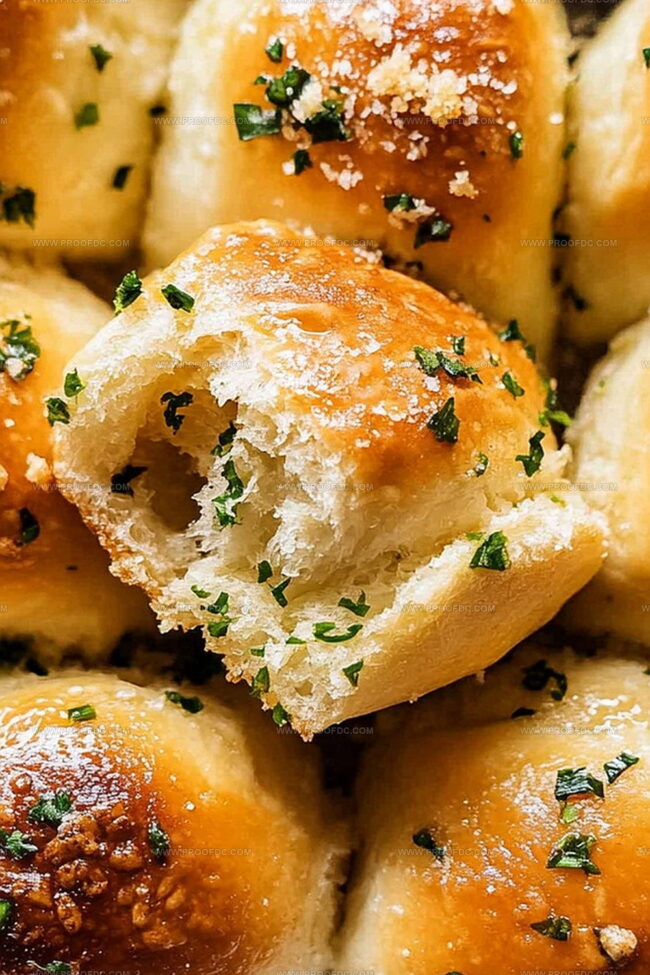
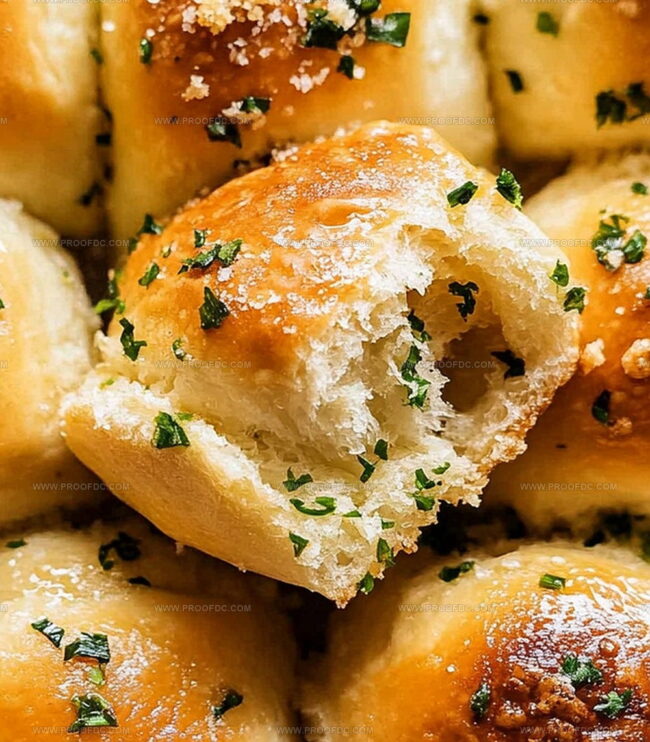
Pulling apart these golden-brown beauties, watching steam rise and revealing a tantalizing interior.
Crispy edges give way to a tender center that melts in your mouth.
The simple ingredients transform into something magical with minimal effort.
You’ll want to serve these immediately while they’re hot and irresistibly fresh.
Prepare to become the hero of any meal with these mouthwatering rolls that everyone will devour.
Why Garlic Bread Rolls Hit The Spot
What’s In Garlic Bread Rolls
Dry Ingredients:Wet Ingredients:Leavening and Flavor Enhancers:How To Make Garlic Bread Rolls Fresh
Step 1: Activate Yeast Magic
Mix warm water, sugar, and yeast in a small bowl. Let the mixture sit and become frothy, watching tiny bubbles dance and develop for about 5-10 minutes.
Step 2: Create Soft Dough Goodness
In a large mixing bowl, combine:Gradually add:Stir until a tender dough emerges. Knead the dough on a lightly floured surface for 8-10 minutes, transforming it into a smooth, elastic wonder. For easier kneading, use a stand mixer with a dough hook for about 5 minutes.
Step 3: Allow Dough to Rise
Transfer the dough to a greased bowl. Cover with a kitchen towel and let it rest in a cozy, warm spot. Watch it double in size over 1-1.5 hours – patience is key!
Step 4: Shape Delightful Rolls
Gently punch down the risen dough. Divide into 12 equal pieces. Roll each piece into a perfect little ball. Arrange on a greased or parchment-lined baking tray, leaving a tiny space between each roll.
Step 5: Second Rise
Cover the rolls with a soft towel. Let them puff up and become puffy for 30-40 minutes.
Step 6: Prepare Oven
Crank up the oven to 190 Celsius (375 Fahrenheit).
Step 7: Craft Garlic Butter Magic
Melt butter in a small saucepan or microwave-safe bowl. Stir in:Blend until aromatic and smooth.
Step 8: Bake to Golden Perfection
Generously brush rolls with half the garlic butter. Slide into the preheated oven. Bake for 15-20 minutes until they turn a gorgeous golden brown.
Step 9: Final Butter Touch
Pull rolls from the oven. Immediately brush with remaining garlic butter. Sprinkle with Parmesan cheese if desired.
Step 10: Serve and Enjoy
Serve these heavenly rolls piping hot. Pair with pasta, soup, or enjoy them as a standalone treat that’ll make taste buds dance!
Tips For Fluffy Garlic Bread Rolls
How To Keep Garlic Bread Rolls Tasty
What To Serve With Garlic Bread Rolls
Fun Ways To Customize Garlic Bread Rolls
All You Need To Know About Garlic Bread Rolls
These rolls are infused with a rich garlic butter mixture that gets brushed on before and after baking, creating an extra flavor-packed and aromatic bread that’s more indulgent than standard dinner rolls.
You don’t need anything fancy – just a mixing bowl, a baking tray, and either a stand mixer or your hands for kneading. A kitchen towel for covering the dough and a small brush for the garlic butter are helpful.
When you mix warm water, sugar, and yeast, it should become frothy and bubbly within 5-10 minutes. If nothing happens, your yeast might be expired, and you’ll need to get a fresh batch to ensure your rolls rise properly.
Yes! You can prepare the dough and let it rise, then cover and refrigerate overnight. Just let it come to room temperature and complete the rising process before shaping and baking the next day.
Print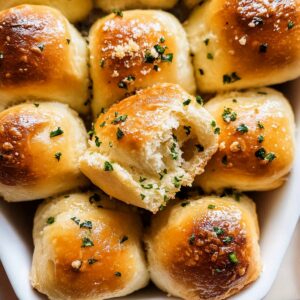
Garlic Bread Rolls Recipe
- Total Time: 2.5 hours
- Yield: 12 1x
Description
Golden-brown garlic bread rolls dance with aromatic herbs and buttery richness. Crisp exterior and tender interior promise a delightful companion to pasta, soups, or enjoyed solo with pure comfort and flavor.
Ingredients
Main Ingredients (Flour and Liquids):
- 500 g (4 cups) all-purpose flour
- 250 ml (1 cup) warm milk
- 60 ml (¼ cup) warm water
- 1 egg, lightly beaten
Leavening and Seasoning Ingredients:
- 1 packet (7 g or 2 ¼ teaspoons) active dry yeast
- 1 tablespoon sugar
- 1 teaspoon salt
Butter and Topping Ingredients:
- 60 g (4 tablespoons) unsalted butter, softened
- 60 g (4 tablespoons) unsalted butter, melted
- 3 cloves garlic, minced
- 1 tablespoon fresh parsley, chopped
- ¼ cup parmesan cheese (optional, for sprinkling)
Instructions
- Activate the yeast by combining warm water, sugar, and yeast in a small bowl. Allow the mixture to rest and become frothy, indicating the yeast is alive and ready.
- Create the dough foundation by mixing flour and salt in a large mixing bowl. Pour in the activated yeast, warm milk, softened butter, and beaten egg. Blend ingredients until a cohesive dough forms.
- Transform the dough through thorough kneading on a lightly floured surface. Work the dough for 8-10 minutes, developing its elasticity and smooth texture. Alternatively, use a stand mixer with a dough hook for consistent results.
- Nurture dough growth by placing it in a greased bowl. Cover with a kitchen towel and position in a warm, draft-free area. Allow the dough to rise and double in volume, which typically takes 1-1.5 hours.
- Reshape the risen dough by gently deflating it. Divide the dough into 12 equal portions, rolling each into a smooth ball with gentle hand motions.
- Arrange the dough balls on a greased or parchment-lined baking tray, ensuring slight separation between rolls. Drape a towel over the rolls and permit a second rising phase for 30-40 minutes.
- Prepare the oven by preheating to 190C (375F), creating an ideal baking environment.
- Craft the garlic butter by melting butter and incorporating minced garlic and fresh parsley. Stir until ingredients are thoroughly combined.
- Enhance the rolls by generously brushing them with half of the prepared garlic butter before baking.
- Bake the rolls in the preheated oven for 15-20 minutes, watching for a golden-brown transformation.
- Complete the rolls by removing them from the oven and immediately applying the remaining garlic butter. Optional: Sprinkle Parmesan cheese for additional flavor.
- Present the warm, aromatic garlic bread rolls alongside pasta, soup, or as a delightful standalone treat.
Notes
- Ensure water temperature is lukewarm (around 110°F) to activate yeast without killing it, promoting perfect dough rising.
- Knead dough thoroughly to develop gluten, creating soft and fluffy bread texture with consistent crumb structure.
- Allow sufficient rising time in a draft-free, warm environment for maximum volume and light, airy rolls.
- Use freshly minced garlic for robust flavor intensity, avoiding pre-minced versions that can taste stale or flat.
- Prep Time: 20 minutes
- Cook Time: 20 minutes
- Category: Appetizer, Snacks
- Method: Baking
- Cuisine: Italian
Nutrition
- Serving Size: 12
- Calories: 200
- Sugar: 1 g
- Sodium: 230 mg
- Fat: 9 g
- Saturated Fat: 5 g
- Unsaturated Fat: 3 g
- Trans Fat: 0 g
- Carbohydrates: 25 g
- Fiber: 1 g
- Protein: 5 g
- Cholesterol: 30 mg
Jenna Stewart
Head Chef & Recipe Innovator
Expertise
Farm-to-Table Cooking; Seasonal Menu Development; Visual Plating Techniques; Flavor Layering and Simple Prep Hacks.
Education
The Culinary Institute of America, Hyde Park, NY
Jenna Stewart is the inventive spirit behind many of our standout dishes at Pro of Delicious Creations. A proud graduate of The Culinary Institute of America, she built her skills mastering both classic recipes and fresh, modern twists.
Now, Jenna celebrates the beauty of seasonal, local ingredients, often sourced from her garden and nearby markets, to create recipes that are bursting with flavor yet easy to follow. When she’s not experimenting in the kitchen, Jenna loves exploring nature on hikes and discovering new treasures at local co-ops.