
Fudgy No-Bake Brownie Bars Recipe: Rich Treats for Chocoholics
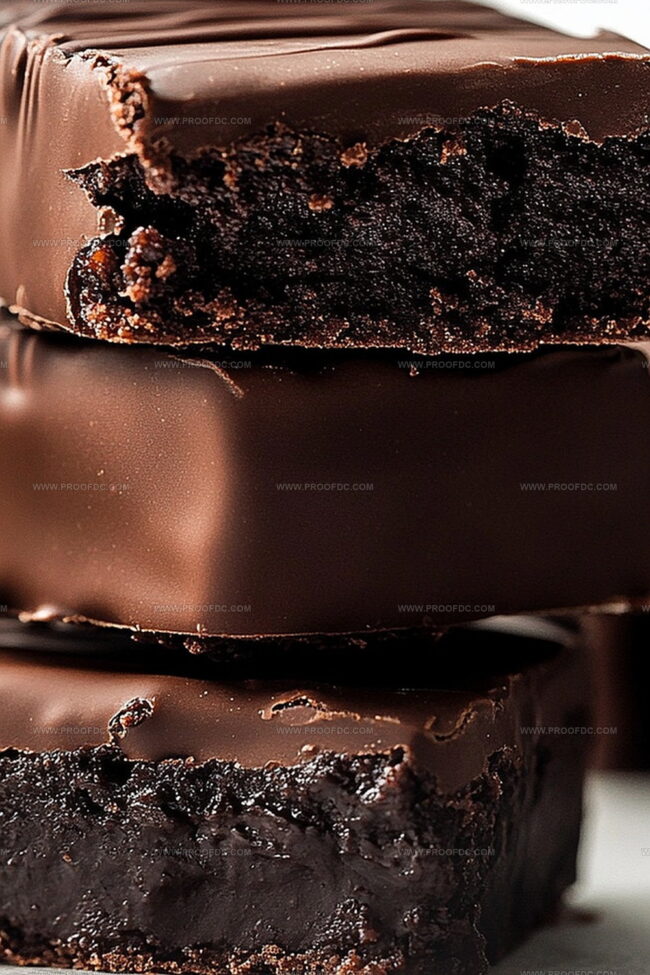
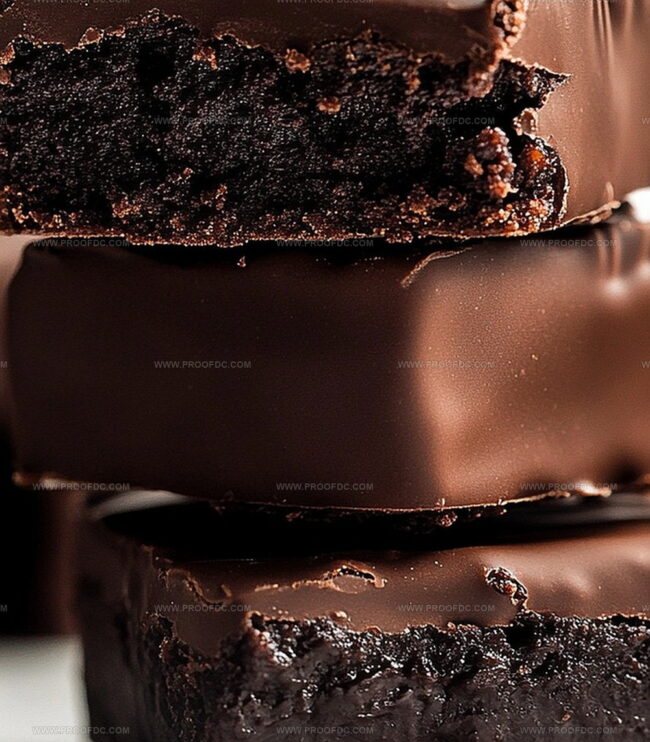
Chocolate lovers rejoice as these decadent no-bake brownie bars bring pure bliss to your dessert table.
Rich, fudgy, and impossibly easy to make, these bars blend indulgence with simplicity.
Packed with deep chocolate flavor, they require zero oven time and minimal effort.
Ingredients like nuts, cocoa, and dates come together in a delightful dance of textures and tastes.
Each bite promises a luxurious experience that satisfies even the most intense sweet cravings.
These bars are perfect for summer gatherings or quiet moments of personal indulgence.
Dive into this effortless treat that proves deliciousness doesn’t always demand complicated techniques.
Quick Recipe Overview
What Goes In No-Bake Brownie Bars
For Base Ingredients:For Flavor Enhancers:For Creamy Binders:For Optional Additions:Tools To Help With No-Bake Brownie Bars
Steps For Putting Together No-Bake Brownie Bars
Grab your food processor and start grinding walnuts into a fine, crumbly texture that’ll form the base of these delectable treats.
Toss in soft dates, rich cocoa powder, creamy almond butter, aromatic vanilla, and a pinch of salt. Blend everything until a luscious, sticky mixture emerges.
If you’re feeling indulgent, gently fold in mini chocolate chips for an extra burst of sweetness and texture.
Line a rectangular dish with parchment paper and press the dough evenly, creating a smooth surface that promises deliciousness.
For a gourmet touch, drizzle melted chocolate and sprinkle chopped nuts or coconut flakes across the top.
Slide the pan into the refrigerator and let these bars chill for about an hour, allowing them to set and intensify their rich flavors.
Slice into perfect bars, marvel at your creation, and savor each bite. Store any remaining bars in the refrigerator or freezer for future snacking pleasure.
Tasty Tweaks For No-Bake Brownie Bars
Serving Suggestions For No-Bake Brownie Bars
Storage Tricks For No-Bake Brownie Bars That Work
Print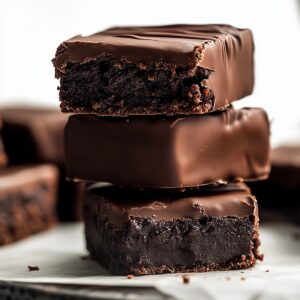
Fudgy Brownie Bars Recipe
- Total Time: 1 hour 10 minutes
- Yield: 11 1x
Description
Irresistible no-bake brownie bars emerge as a quick chocolate delight for dessert enthusiasts. Rich cocoa and nutty textures blend seamlessly, promising sweet satisfaction without oven time. Chocolate lovers will devour these simple, indulgent treats.
Ingredients
- 1 ½ cups (360 ml) Medjool dates (softened if needed)
- 1 cup (240 ml) walnuts or almonds (raw)
- ⅓ cup (80 ml) cocoa powder (unsweetened)
- ¼ cup (60 ml) almond butter (or peanut butter)
- 1 tsp (5 ml) vanilla extract
- ¼ tsp (1.25 ml) salt
- ¼ cup (60 ml) chocolate chips (mini, optional)
- 2 tbsps (30 ml) dark chocolate (melted)
- Chopped nuts or shredded coconut (for garnish)
Instructions
- Prep Ingredients: Hydrate dates in warm water if needed, drain thoroughly, and pat dry with a kitchen towel.
- Process Nuts: Pulse walnuts or almonds in a food processor until finely ground, avoiding over-processing into a paste.
- Create Dough: Blend softened dates, cocoa powder, almond butter, vanilla extract, and salt in the food processor until a cohesive mixture forms. Add minimal water if the dough seems dry.
- Enhance Texture: Fold mini chocolate chips into the dough manually for even distribution and added richness.
- Prepare Pan: Line an 8-inch baking dish with parchment paper, allowing slight overhang. Spread and compress the mixture evenly using hands or a silicone spatula.
- Finishing Touches: Optionally drizzle melted chocolate over the surface and sprinkle with chopped nuts or coconut shavings for an elegant presentation.
- Chill and Set: Refrigerate the pan for approximately one hour to firm up the bars and achieve the perfect consistency.
- Serve and Store: Remove bars from the pan using parchment paper edges, slice into uniform rectangles, and enjoy. Store any leftovers in an airtight container in the refrigerator or freezer.
Notes
- Hydrate Dates Carefully: Ensure dates are soft but not waterlogged by briefly soaking and thoroughly drying to maintain the perfect texture and prevent excess moisture.
- Process Nuts Gently: Pulse nuts slowly to achieve a fine, sandy consistency without creating a dense, oily paste that could compromise the bar’s structural integrity.
- Control Moisture Levels: Add water sparingly during mixing, just enough to bind ingredients without making the dough too wet or losing its rich, compact structure.
- Customize Dietary Needs: Swap nuts for seeds like sunflower or pumpkin to create nut-free versions, or use vegan chocolate chips for plant-based alternatives without sacrificing flavor intensity.
- Prep Time: 10 minutes
- Cook Time: 1 hour
- Category: Desserts, Snacks
- Method: Blending
- Cuisine: American
Nutrition
- Serving Size: 11
- Calories: 180
- Sugar: 8 g
- Sodium: 40 mg
- Fat: 12 g
- Saturated Fat: 2 g
- Unsaturated Fat: 10 g
- Trans Fat: 0 g
- Carbohydrates: 18 g
- Fiber: 3 g
- Protein: 4 g
- Cholesterol: 0 mg
Marcus Foley
Food Critic & Kitchen Coach
Expertise
Recipe Testing and Troubleshooting; Time-Saving Kitchen Hacks; Global Flavor Exploration; Engaging Food Writing and Honest Reviews.
Education
Institute of Culinary Education (ICE), New York, NY
Marcus Foley, based in Atlanta, GA, is a friendly food expert who makes cooking fun and simple.
With hands-on training from the Institute of Culinary Education and years of tasting everything from street food to fine dining, he shares easy kitchen hacks, global flavor ideas, and step-by-step recipes that turn kitchen mishaps into delicious surprises.