Savory French Dip Biscuits Recipe: A Homestyle Comfort Classic
These savory French dip biscuits capture comfort food magic in every single bite.
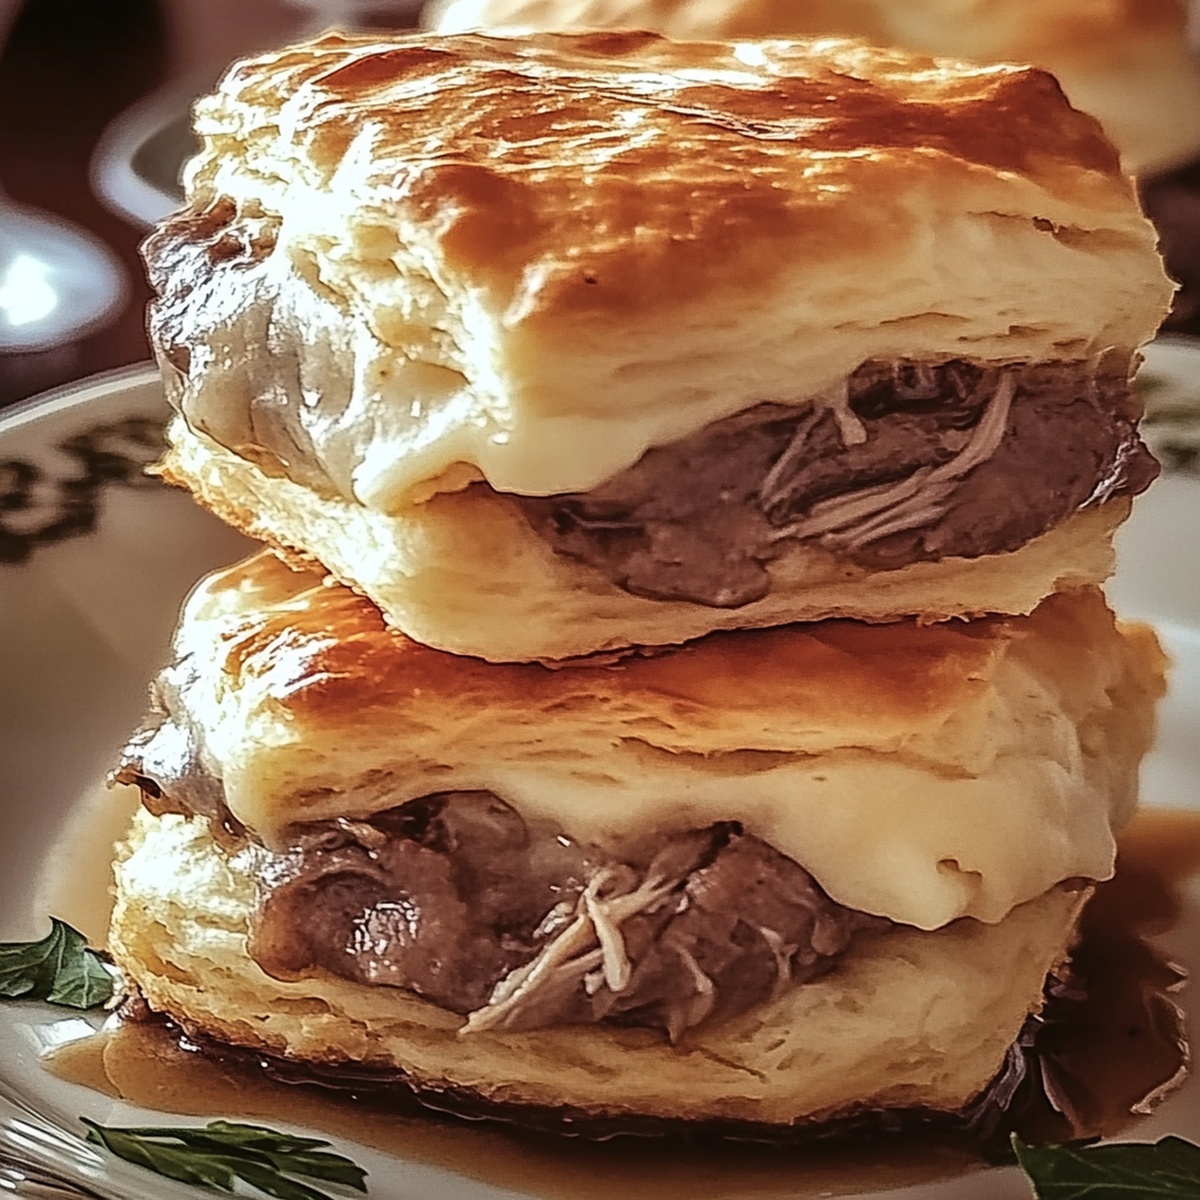
Pulling apart a warm, flaky pastry stuffed with tender, juicy beef.
Melted provolone cheese oozes between golden-brown layers, creating an irresistible sandwich-style experience.
Classic deli roast beef gets a cozy home inside buttery, soft biscuit pockets.
Rich beef broth stands ready for dunking, promising intense flavor with each delectable mouthful.
Imagine serving these crowd-pleasing treats at game day gatherings or casual weekend meals.
You’ll want to bookmark this recipe for moments when serious hunger strikes and basic sandwiches simply won’t do.
What Makes French Dip Biscuits So Savory

French Dip Biscuits Ingredient Guide
Biscuit Base:Protein and Cheese:Flavor Enhancers:Dipping Sauce:How To Bake French Dip Biscuits With Ease

Step 1: Warm Up The Oven
Crank the oven to 375°F (190°C). Grab a baking sheet and line it with parchment paper or give it a quick spray of cooking oil.
Step 2: Create Delicious Pockets
Gently separate each biscuit dough and softly press them flat. Place your filling in the center of each biscuit:Carefully fold the biscuit edges over the filling, pinching them closed to create sealed pockets. Position them seam-side down on the prepared baking sheet.
Step 3: Add Flavor Boost
Generously brush the biscuit tops with melted butter. Sprinkle these tasty pockets with:Step 4: Bake To Golden Perfection
Slide the baking sheet into the preheated oven. Bake for 12-15 minutes until the biscuits turn a beautiful golden brown and look perfectly cooked.
Step 5: Whip Up Savory Dipping Sauce
While biscuits bake, prepare the au jus:Step 6: Serve And Enjoy
Transfer the hot biscuit pockets to a serving plate. Accompany with small bowls of rich au jus for dipping. Get ready for a flavor explosion!
Tips To Help With French Dip Biscuits
Store And Warm Up French Dip Biscuits
Great Combos For French Dip Biscuits
New Twists On French Dip Biscuits
FAQs About French Dip Biscuits
These biscuits combine the classic French dip sandwich flavors inside a handheld, portable pastry. The buttery biscuit dough is stuffed with roast beef and cheese, then baked until golden, offering a delicious twist on the traditional sandwich.
Yes! You can prepare the filled biscuits and refrigerate them before baking. Just add an extra 2-3 minutes to the baking time when cooking from cold. They’re perfect for meal prep or quick weeknight dinners.
While fresh deli roast beef works best, you can also use leftover roast beef from a previous meal. The key is to use thinly sliced beef that will be tender inside the biscuit. Rotisserie chicken or turkey can be nice alternatives if you prefer.
No worries! You can substitute with beef broth, adding a splash of Worcestershire sauce for depth. Some home cooks even use onion soup mix or beef bouillon as a quick replacement for traditional au jus.
Print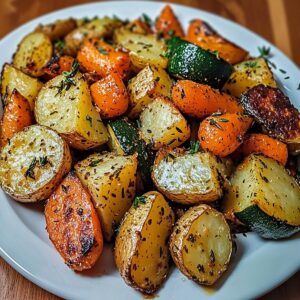
Garlic Herb Roasted Potatoes, Carrots, And Zucchini Recipe
- Total Time: 40 minutes
- Yield: 4 1x
Description
Rustic Mediterranean “Garlic Herb Roasted Potatoes, Carrots, and Zucchini” blend colorful vegetables with aromatic herbs for a simple yet elegant side dish. Fresh ingredients and minimal prep time promise a delightful accompaniment where you savor each herb-infused, perfectly roasted bite.
Ingredients
Primary Vegetables:
- 2 cups (300 g / 10.5 ounces) baby potatoes, halved or quartered
- 2 cups (250 g / 8.8 ounces) carrots, peeled and cut into 1-inch pieces
- 2 cups (250 g / 8.8 ounces) zucchini, cut into half-moons
Herbs and Seasonings:
- 1 teaspoon dried thyme
- 1 teaspoon dried rosemary
- ½ teaspoon paprika
- ½ teaspoon salt
- ¼ teaspoon black pepper
- 3 garlic cloves, minced
- 2 tablespoons fresh parsley, chopped (optional, for garnish)
Liquid and Oil:
- 3 tablespoons olive oil
Instructions
- Prepare the baking environment by heating the oven to 400F (200C) and lining a large baking sheet with parchment paper or aluminum foil for easy cleanup and optimal roasting.
- Wash and chop potatoes, carrots, and zucchini into uniform bite-sized pieces to ensure even cooking and consistent texture throughout the dish.
- Transfer the chopped vegetables into a spacious mixing bowl, creating a colorful medley of fresh produce ready for seasoning.
- Drizzle extra virgin olive oil generously over the vegetables, ensuring each piece gets a light, even coating that will help create a crispy exterior during roasting.
- Sprinkle minced garlic, dried thyme, crushed rosemary, smoky paprika, kosher salt, and freshly ground black pepper across the vegetables, using your hands or a large spoon to toss and distribute the seasonings thoroughly.
- Carefully arrange the seasoned vegetables on the prepared baking sheet in a single, uncrowded layer, allowing sufficient space between pieces to promote proper caramelization and prevent steaming.
- Place the baking sheet in the preheated oven and roast for 25-30 minutes, gently stirring the vegetables midway through cooking to promote even browning and prevent sticking.
- Check the vegetables for doneness by testing the potatoes and carrots with a fork – they should be tender and golden, with the zucchini showing slight caramelized edges.
- Remove the roasted vegetables from the oven and optionally garnish with freshly chopped parsley for a burst of color and added freshness before serving immediately.
Notes
- Customize vegetable sizes by cutting into uniform, bite-sized pieces to ensure even roasting and consistent cooking throughout the dish.
- Consider using different herbs like oregano or basil for varied flavor profiles, making the recipe versatile and adaptable to personal taste preferences.
- Swap olive oil with avocado oil for higher heat tolerance and a slightly nutty undertone, perfect for those seeking alternative cooking oils.
- Maintain spacing between vegetables on the baking sheet to promote crispy edges and prevent steaming, which helps achieve that delightful golden-brown caramelization.
- Prep Time: 10 minutes
- Cook Time: 30 minutes
- Category: Dinner, Lunch, Snacks
- Method: Roasting
- Cuisine: American
Nutrition
- Serving Size: 4
- Calories: 195
- Sugar: 4 g
- Sodium: 240 mg
- Fat: 9 g
- Saturated Fat: 1 g
- Unsaturated Fat: 8 g
- Trans Fat: 0 g
- Carbohydrates: 27 g
- Fiber: 5 g
- Protein: 3 g
- Cholesterol: 0 mg
Jenna Stewart
Head Chef & Recipe Innovator
Expertise
Farm-to-Table Cooking; Seasonal Menu Development; Visual Plating Techniques; Flavor Layering and Simple Prep Hacks.
Education
The Culinary Institute of America, Hyde Park, NY
Jenna Stewart is the inventive spirit behind many of our standout dishes at Pro of Delicious Creations. A proud graduate of The Culinary Institute of America, she built her skills mastering both classic recipes and fresh, modern twists.
Now, Jenna celebrates the beauty of seasonal, local ingredients, often sourced from her garden and nearby markets, to create recipes that are bursting with flavor yet easy to follow. When she’s not experimenting in the kitchen, Jenna loves exploring nature on hikes and discovering new treasures at local co-ops.