Fluffy Morning Breakfast Rolls Recipe: Rise & Shine Delight
Warm, pillowy breakfast rolls straight from your oven can turn any morning into a delightful celebration.
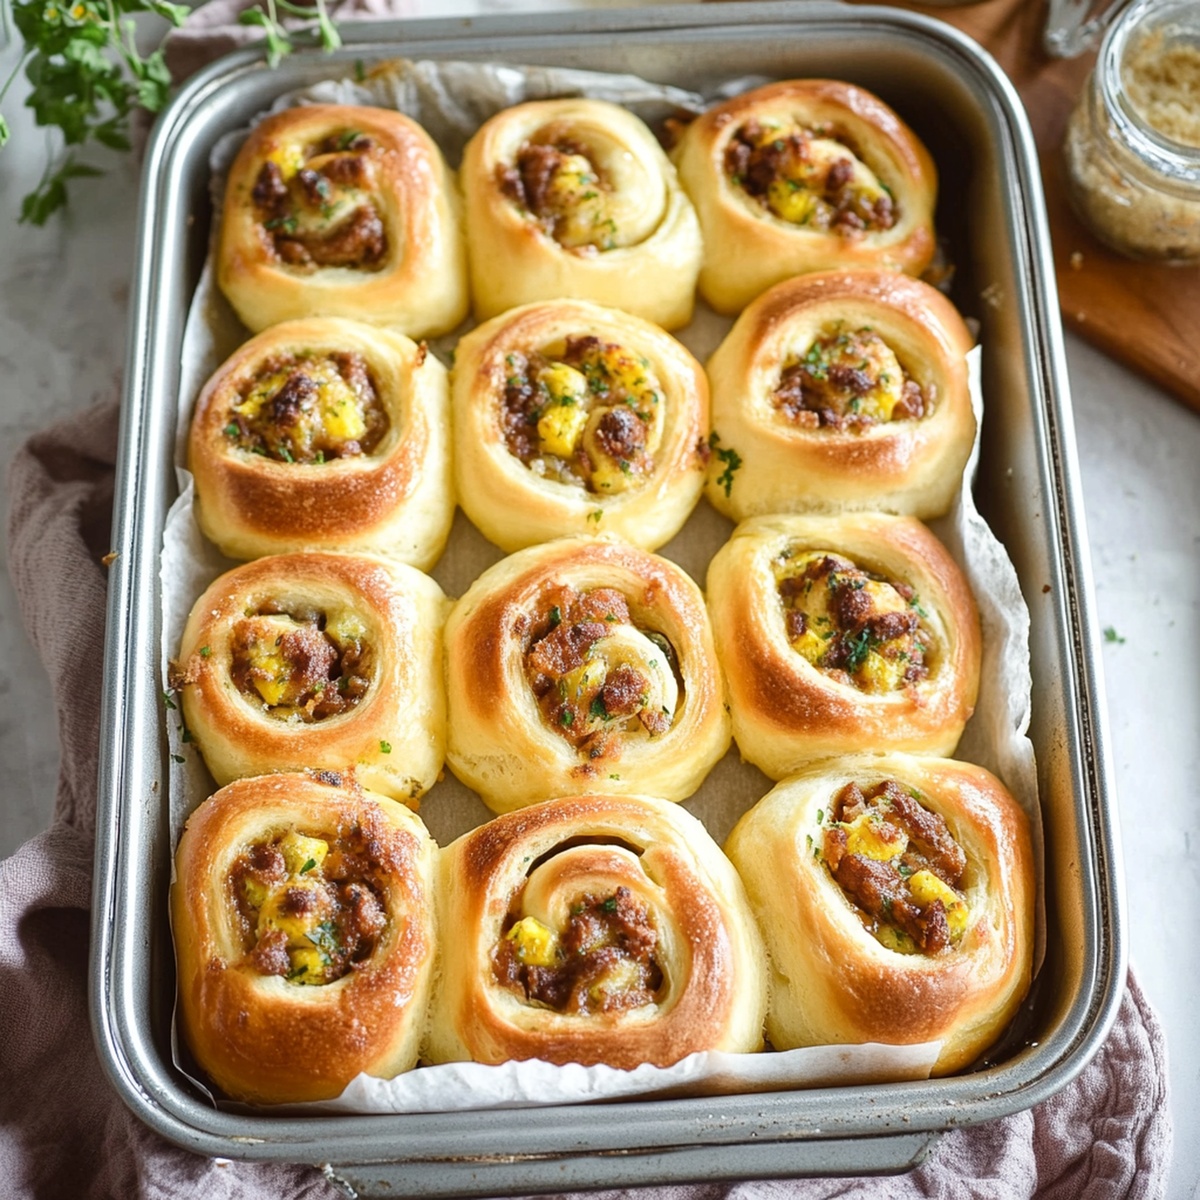
Soft dough with perfect breakfast rolls recipe tucked inside promises a mouthwatering start to your day.
Homemade bread creates magic in the kitchen with minimal effort and maximum flavor.
Each bite promises comfort and satisfaction that store-bought pastries can never match.
The aroma of freshly baked rolls will drift through your home, tempting everyone to the table.
Simple ingredients and straightforward steps mean you can master these rolls without stress.
Dive into this recipe and transform your breakfast routine with these irresistible, golden-brown delights.
Quick Recipe Overview

What You’ll Need For Breakfast Rolls
For Dough Base:For Liquid Ingredients:For Finishing:Tools For Rolling Out Breakfast Rolls
Steps To Bake Breakfast Rolls Golden And Soft

Mix dry ingredients in a spacious bowl, blending flour, yeast, salt, and sugar. Pour in warm milk, melted butter, and a fresh egg. Work the mixture thoroughly, either by hand or using a mixer with a dough hook. Knead consistently until the dough transforms into a smooth, stretchy texture. Shield the dough and let it rest in a cozy spot, allowing it to expand and rise for approximately one hour.
Gently deflate the puffy dough and transfer it to a lightly floured surface. Roll out the dough into a delightful rectangular shape. Sprinkle your favorite fillings across the surface, creating a tempting landscape of flavors. Carefully roll the dough into a tight, elegant cylinder.
Slice the dough cylinder into even, inviting sections. Place these delicate rolls onto a prepared baking sheet, ensuring they have space to grow. Cover the rolls and allow them a final resting period of about 30 minutes.
Preheat the oven to a warm 375°F. Brush the rolls with a golden egg wash to create a beautiful, glossy finish. Slide the baking sheet into the oven and bake for 15-20 minutes until the rolls turn a gorgeous golden brown.
Remove the rolls from the oven and let them cool slightly. Transfer to a serving plate and enjoy the warm, aromatic breakfast treat straight from your kitchen.
Tips To Make Breakfast Rolls Extra Fluffy
Serve Breakfast Rolls With Butter Or Jam
Store Breakfast Rolls Without Losing Freshness
Print
Fluffy Breakfast Rolls Recipe
- Total Time: 40 minutes
- Yield: 7 1x
Description
Homemade breakfast rolls capture the warmth of morning comfort in this classic recipe. Hearty ingredients combine for a delightful start that you will savor with each delicious bite.
Ingredients
- 3.5 cups (840 ml) all-purpose flour
- 6 large eggs
- 6 slices bacon
- 1 cup (240 ml) shredded cheddar cheese
- 1 cup (240 ml) warm milk
- 2 tbsps (30 ml) sugar
- 2.25 tsp instant yeast
- 1 tsp salt
- 1 large egg
- ¼ cup (60 ml) melted unsalted butter
- ¼ cup (60 ml) milk or cream
- 2 tbsps (30 ml) melted unsalted butter
- 1 tsp garlic powder
- Salt and pepper to taste
Instructions
- Dry Blend: Thoroughly mix flour, sugar, salt, and yeast in a spacious mixing bowl, creating a foundational dry ingredient base.
- Liquid Integration: Warmly fold milk, melted butter, and egg into the dry mixture, whisking until a cohesive, smooth batter forms without lumps.
- Dough Development: Knead the mixture using a stand mixer or hand technique, transforming the ingredients into an elastic, silky dough that springs back when gently pressed.
- First Proofing: Place the dough in a lightly oiled container, drape with a damp cloth, and let it rest in a draft-free, warm zone for approximately one hour, or until it dramatically expands to double its original volume.
- Dough Manipulation: Gently punch down the risen dough, releasing trapped air and redistributing the yeast’s active cultures across the entire mass.
- Shaping and Preparation: Roll out the dough on a flour-dusted surface, carefully forming uniform rolls, then arrange them on a prepared baking sheet with slight spacing between each piece.
- Final Proofing and Baking: Allow rolls to rest for an additional 30 minutes, then bake in a preheated oven at 375°F for 15-20 minutes, achieving a golden-brown exterior and soft, pillowy interior.
Notes
- Maintain Precise Temperature: Ensure warm milk is between 110-115°F to activate yeast without killing it, creating optimal dough rising conditions.
- Knead with Patience: Develop gluten structure by kneading 8-10 minutes, stopping when dough becomes smooth and elastic, preventing tough rolls.
- Control Rising Environment: Place dough in a draft-free, warm spot around 80-85°F, like near a preheated oven, to guarantee consistent and steady rising.
- Prevent Dry Surface: Cover dough with slightly damp cloth instead of dry towel to retain moisture and prevent skin formation during proofing process.
- Prep Time: 20 minutes
- Cook Time: 20 minutes
- Category: Breakfast, Snacks
- Method: Mixing
- Cuisine: American
Nutrition
- Serving Size: 7
- Calories: 350
- Sugar: 2 g
- Sodium: 450 mg
- Fat: 20 g
- Saturated Fat: 10 g
- Unsaturated Fat: 8 g
- Trans Fat: 0 g
- Carbohydrates: 30 g
- Fiber: 1 g
- Protein: 14 g
- Cholesterol: 150 mg
Marcus Foley
Food Critic & Kitchen Coach
Expertise
Recipe Testing and Troubleshooting; Time-Saving Kitchen Hacks; Global Flavor Exploration; Engaging Food Writing and Honest Reviews.
Education
Institute of Culinary Education (ICE), New York, NY
Marcus Foley, based in Atlanta, GA, is a friendly food expert who makes cooking fun and simple.
With hands-on training from the Institute of Culinary Education and years of tasting everything from street food to fine dining, he shares easy kitchen hacks, global flavor ideas, and step-by-step recipes that turn kitchen mishaps into delicious surprises.