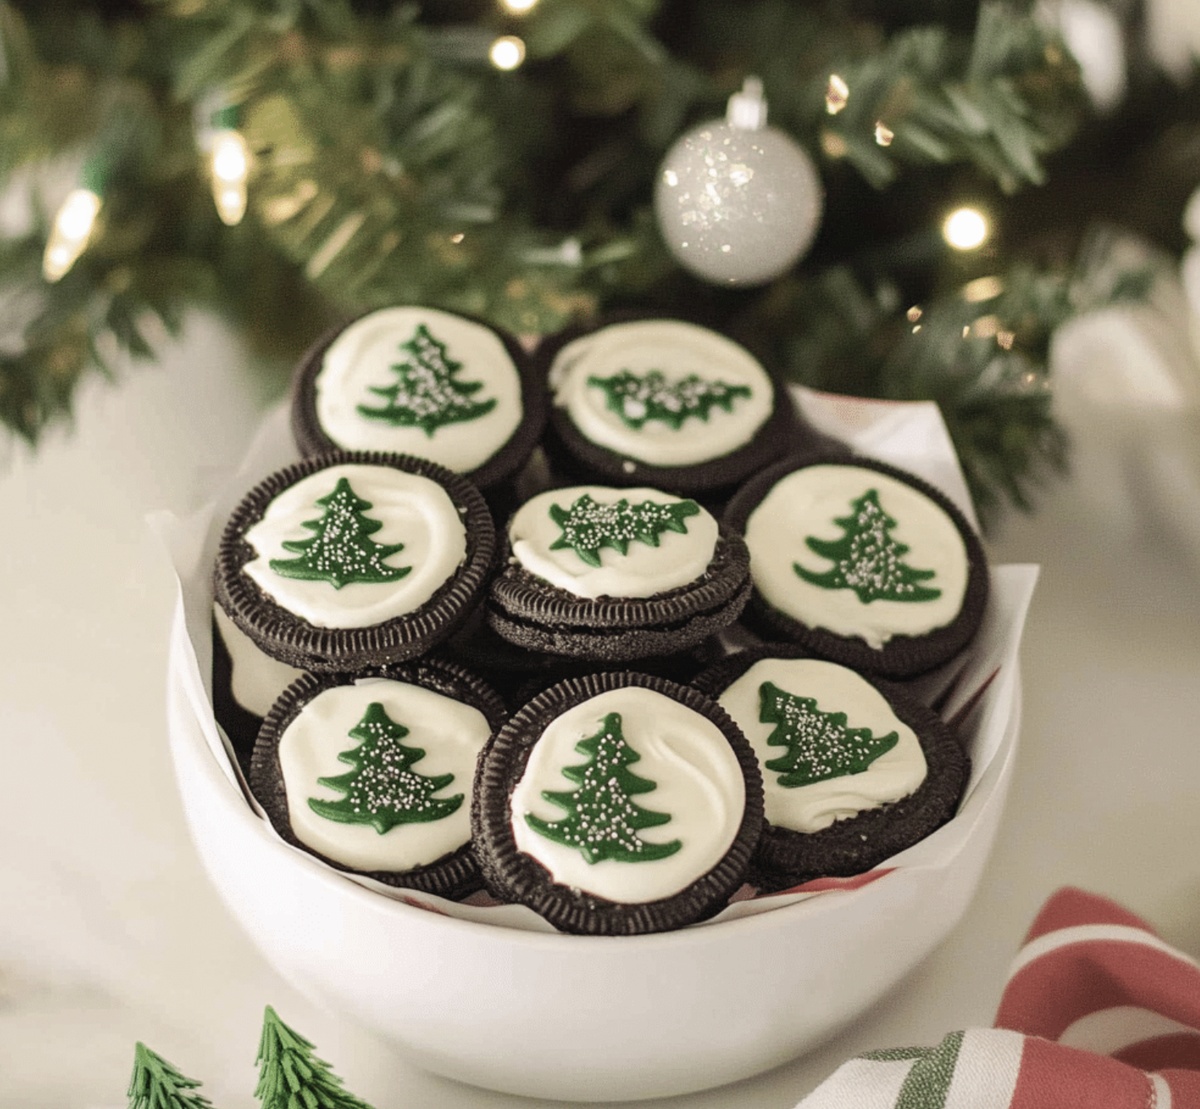
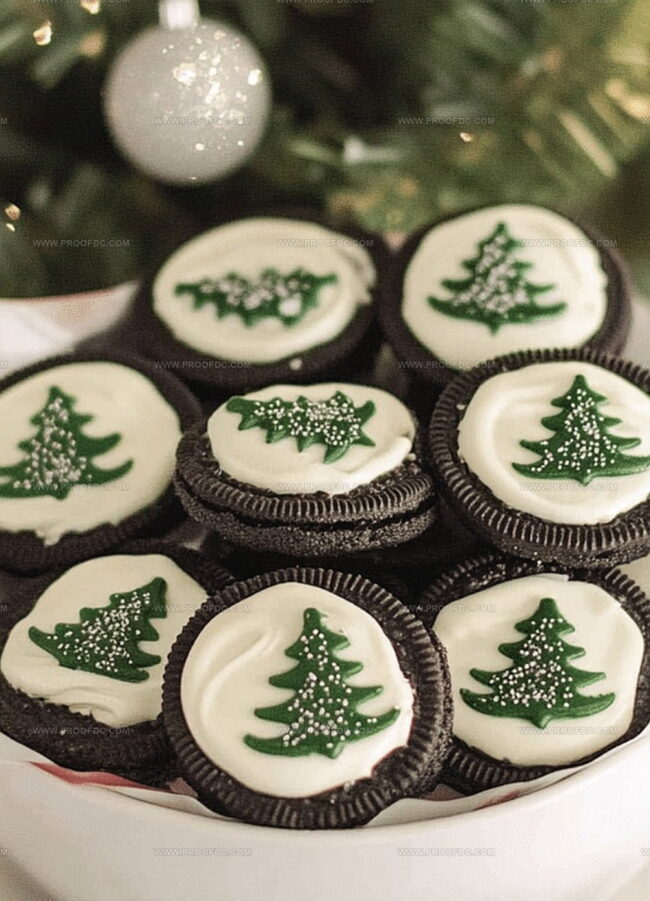
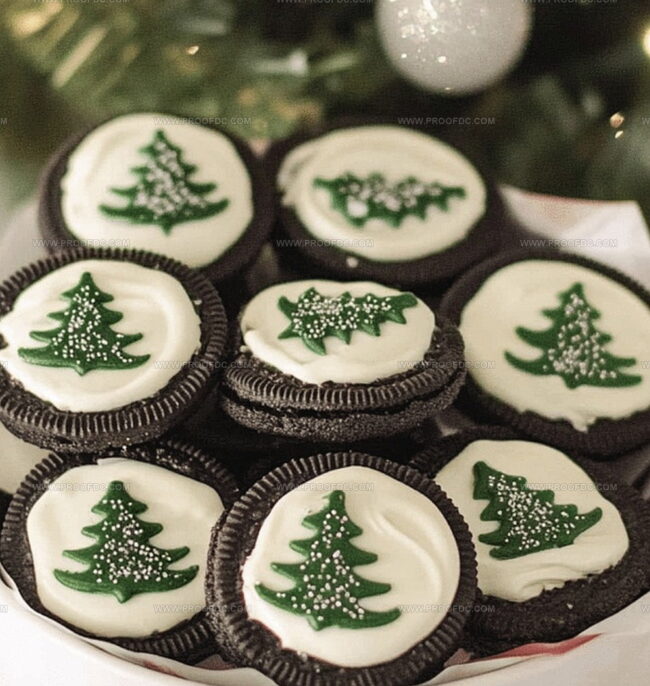
Decorated Christmas Oreos Recipe for Holiday Cheer
Festive holiday baking reaches new heights with this delightful christmas oreos recipe that captures the spirit of the season.
Homemade cookies bring magic to your kitchen with minimal effort.
Soft, chocolatey, and perfectly sweet, these treats promise to become an instant favorite.
Each bite delivers a rich, creamy experience that melts in your mouth.
The simple ingredients combine to create something truly special.
Decorated with cheerful holiday colors, these oreos will spark joy at any gathering.
Quick Recipe Overview
All Ingredients For Christmas Oreos
For Coating and Melting:For Decorative Elements:For Base:Tools You’ll Need For Christmas Oreos
How To Make Christmas Oreos Quickly
Gather white and milk/dark chocolate chips in separate microwave-safe containers. Gently melt the chocolate in short intervals, stirring carefully between each session. Add festive food coloring to white chocolate for a vibrant touch.
Dip each Oreo completely into melted chocolate using a fork. Allow excess chocolate to drip off by tapping the fork’s edge against the bowl. Ensure full and even coverage for a professional look.
Transfer chocolate-covered Oreos onto a parchment-lined baking sheet. While chocolate remains wet, sprinkle holiday-themed decorations like colorful sprinkles or crushed candy canes. Create elegant patterns by drizzling contrasting chocolate colors.
Let Oreos rest at room temperature for several hours until chocolate sets completely. For quicker results, place in refrigerator for 20-30 minutes. Ensure cookies are fully hardened before handling.
Once chocolate has solidified, arrange Oreos on a festive platter or package in decorative gift bags. Perfect for holiday parties, cookie exchanges, or as sweet homemade presents.
Tips For Better Christmas Oreos
Serving Up Christmas Oreos The Fun Way
Keep Christmas Oreos Fresh
Print
Festive Christmas Oreos Recipe
- Total Time: 15 minutes
- Yield: 11 1x
Description
Festive Christmas Oreos elevate classic cookies with seasonal cheer. Holiday baking becomes magical when chocolate and peppermint combine, promising delightful treats you can easily share with friends and family.
Ingredients
- 1 package (14.3 oz / 405 g) Oreo cookies
- 2 cups white chocolate chips or candy melts
- 2 cups milk or dark chocolate chips or candy melts
- Holiday sprinkles
- Crushed candy canes
- Red food coloring
- Green food coloring
Instructions
- Preparation: Arrange a parchment-lined baking sheet to create a clean, organized workspace for chocolate-dipping process.
- Chocolate Melting: Melt white and dark chocolate in microwave-safe containers, using gentle 15-second intervals and stirring consistently to achieve a smooth, glossy texture without scorching.
- Coating Technique: Immerse each Oreo into melted white chocolate, using a fork to lift and drain excess coating, ensuring an even, glistening chocolate shell covers the entire cookie surface.
- Decorative Embellishment: While chocolate remains liquid, quickly adorn with holiday sprinkles, crushed peppermint fragments, or sparkling sugar crystals to create festive visual appeal.
- Artistic Drizzling: Create elegant contrast by streaming alternating chocolate colors in delicate zigzag patterns across the coated cookies, adding sophisticated visual complexity.
- Setting and Storing: Allow decorated Oreos to solidify at room temperature for 20-30 minutes, or accelerate hardening by placing the baking sheet in refrigerator for approximately 15 minutes until chocolate becomes completely firm.
- Presentation: Transfer hardened cookies to an attractive serving platter or package in clear cellophane bags with festive ribbons, perfect for holiday gifting or elegant dessert display.
Notes
- Choose Quality Chocolate: Select high-quality white and dark chocolate with smooth melting properties to ensure a glossy, professional-looking finish.
- Prevent Chocolate Seizing: Avoid introducing moisture when melting chocolate, as even a small drop of water can cause the chocolate to become grainy and unworkable.
- Master Dipping Technique: Use a fork for precise chocolate coating, gently tapping against the bowl’s edge to remove excess chocolate and create a smooth, even layer.
- Quick Decoration Timing: Sprinkle holiday decorations immediately after dipping while chocolate remains wet to ensure toppings adhere perfectly and create a polished appearance.
- Prep Time: 15 minutes
- Cook Time: 0 minutes
- Category: Desserts, Snacks
- Method: None
- Cuisine: American
Nutrition
- Serving Size: 11
- Calories: 200
- Sugar: 20 g
- Sodium: 90 mg
- Fat: 10 g
- Saturated Fat: 5 g
- Unsaturated Fat: 4 g
- Trans Fat: 0 g
- Carbohydrates: 30 g
- Fiber: 1 g
- Protein: 2 g
- Cholesterol: 0 mg
Marcus Foley
Food Critic & Kitchen Coach
Expertise
Recipe Testing and Troubleshooting; Time-Saving Kitchen Hacks; Global Flavor Exploration; Engaging Food Writing and Honest Reviews.
Education
Institute of Culinary Education (ICE), New York, NY
Marcus Foley, based in Atlanta, GA, is a friendly food expert who makes cooking fun and simple.
With hands-on training from the Institute of Culinary Education and years of tasting everything from street food to fine dining, he shares easy kitchen hacks, global flavor ideas, and step-by-step recipes that turn kitchen mishaps into delicious surprises.